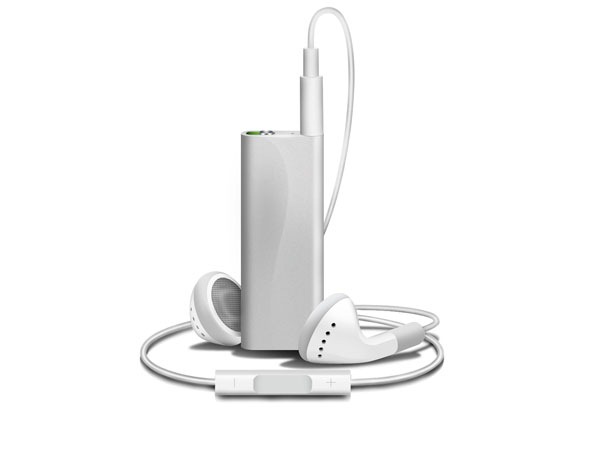
Draw a Realistic iPod Shuffle Photoshop Tutorial
Step 1
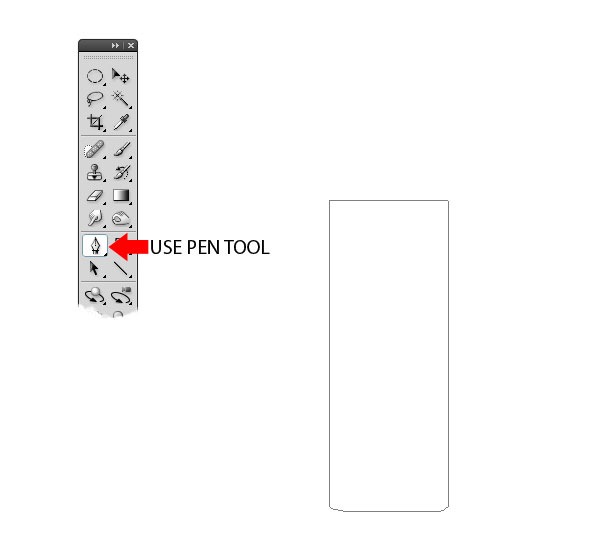
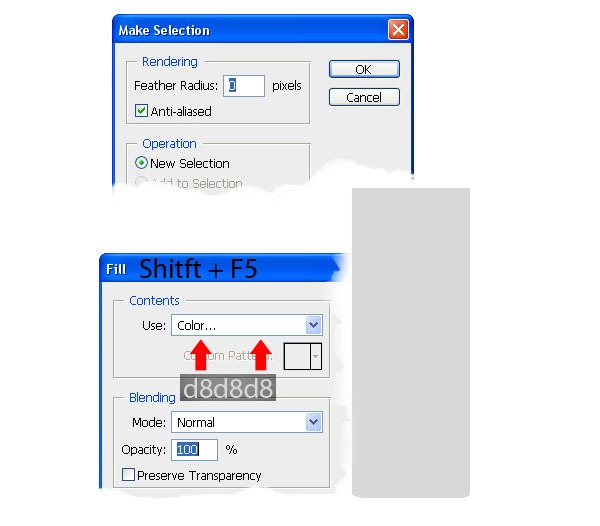
Create New Document ( Ctrl+N ) 1600x1200 pixels at a resolution of 300 pixels/inch. Make new layer and change the name of the layer in "face" and create the same shape as I did using Pen tool ( P ) and fill (Shift +F5) the selection with #d8d8d8 color as in the image below .
Step 2
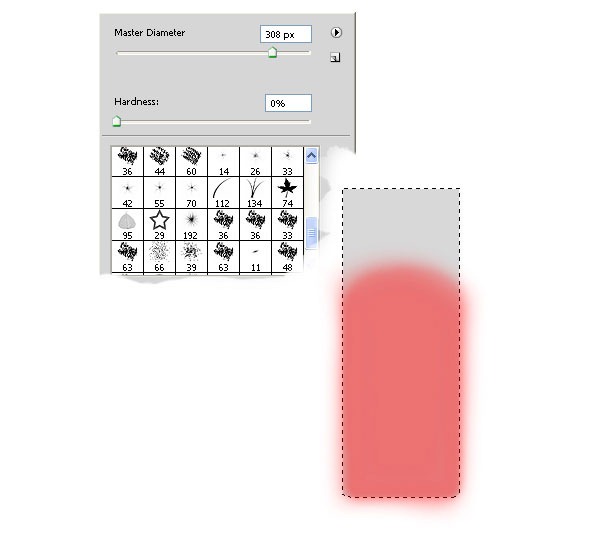
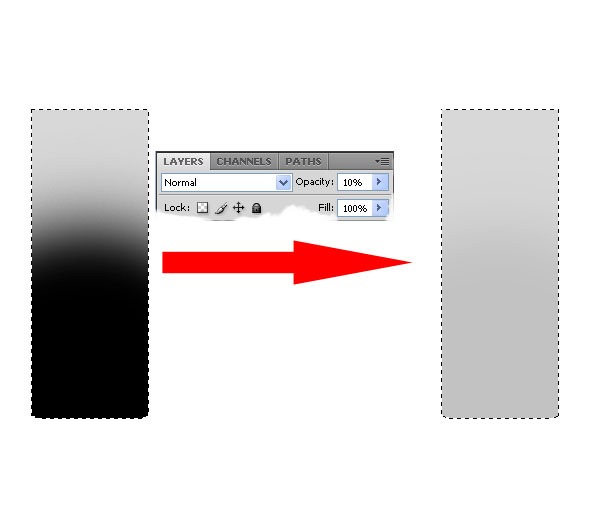
Make new layer and select “ face “ layer ( Ctrl+Click ) and brush ( 308px ) with black color and set the opacity to 10% .
Step 3
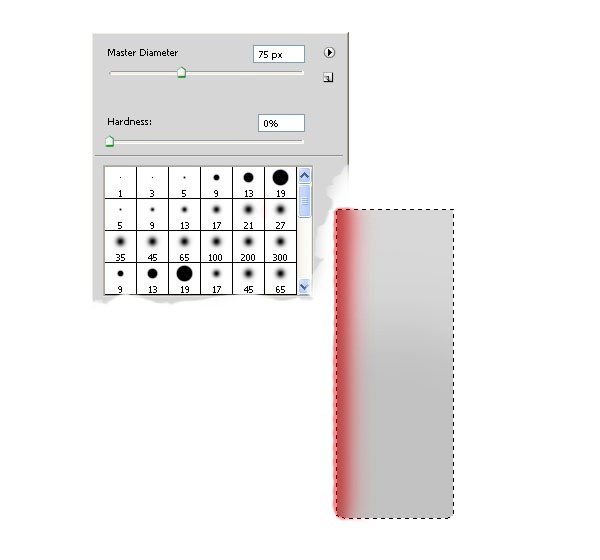
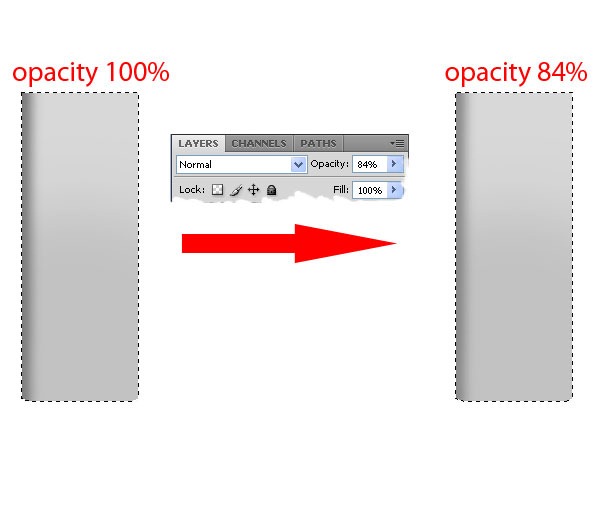
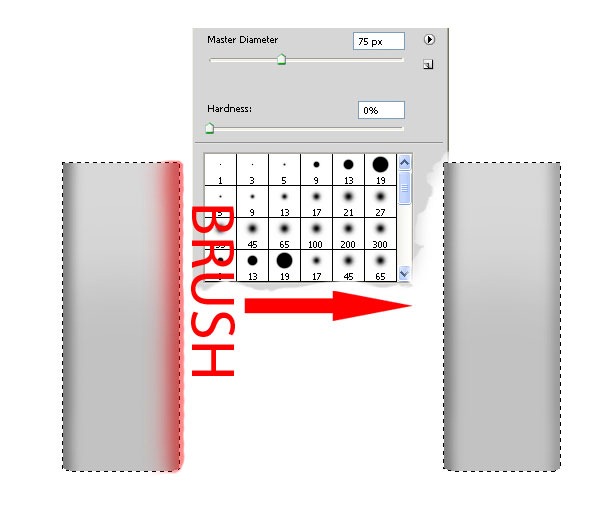
Make new layer and put the brush ( 75px ) on the left edge with black color and set the opacity to 84% .
Step 4
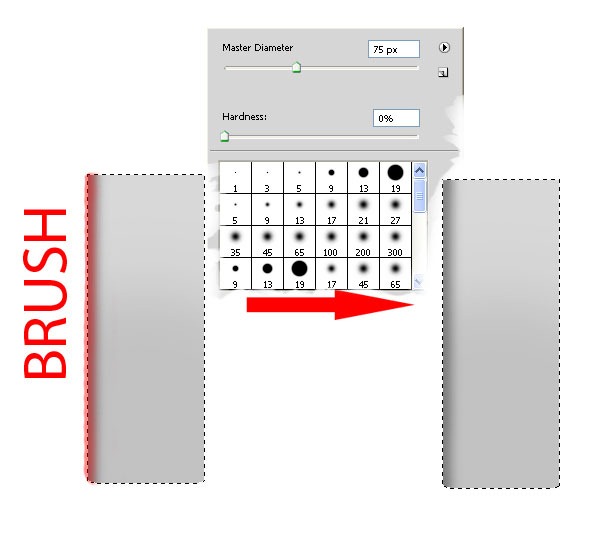
Now again put the brush on the left edge but make it little . Make new layer and put the brush ( 75px ) on the right edge with black color and set the opacity to 57% .
Step 5
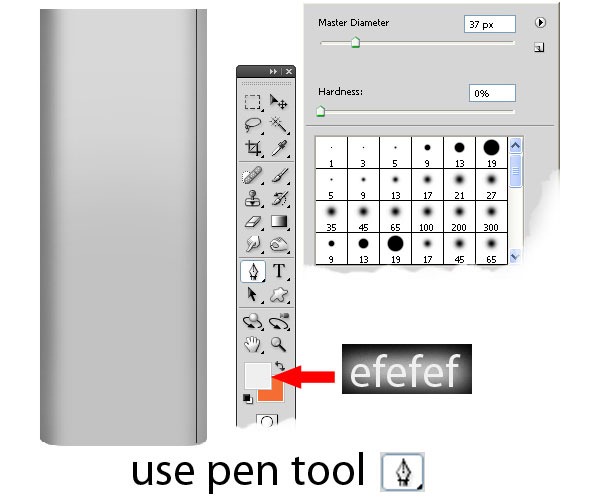
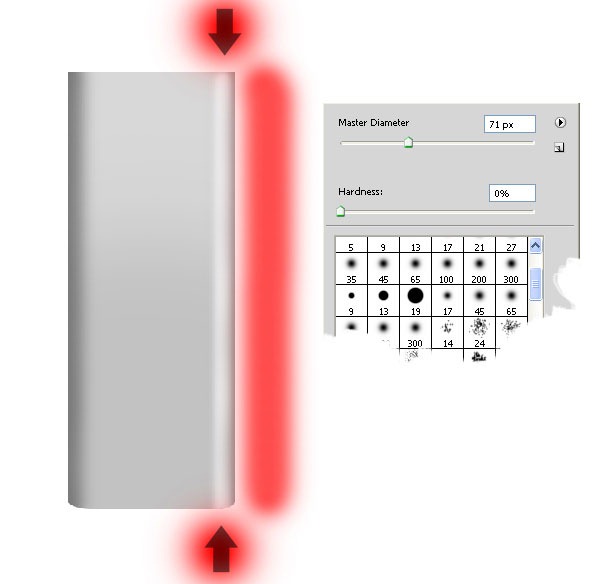
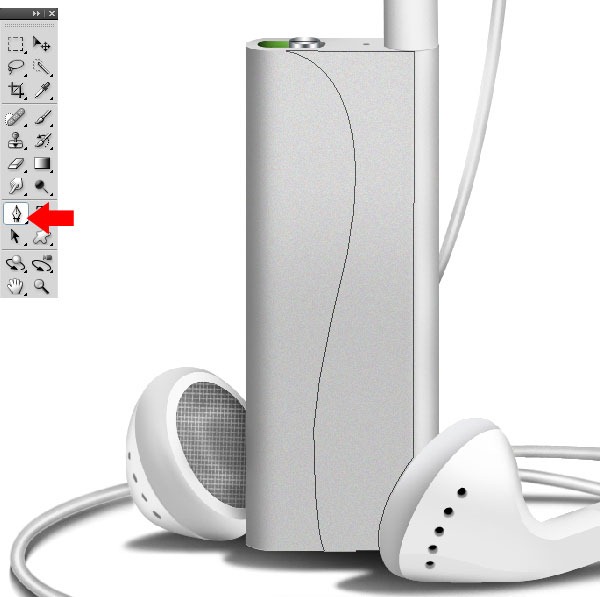
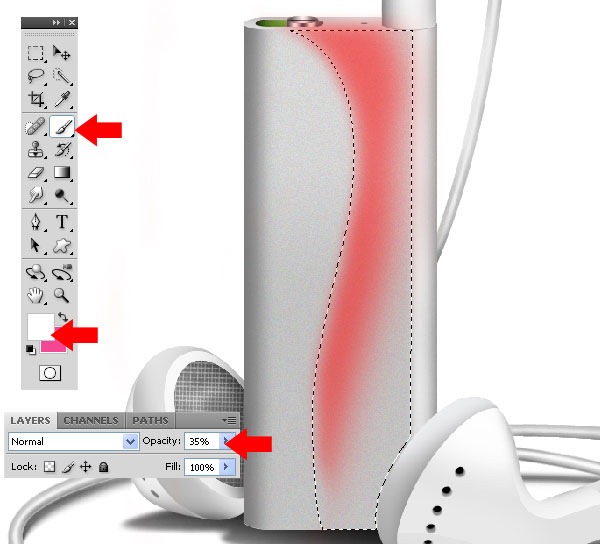
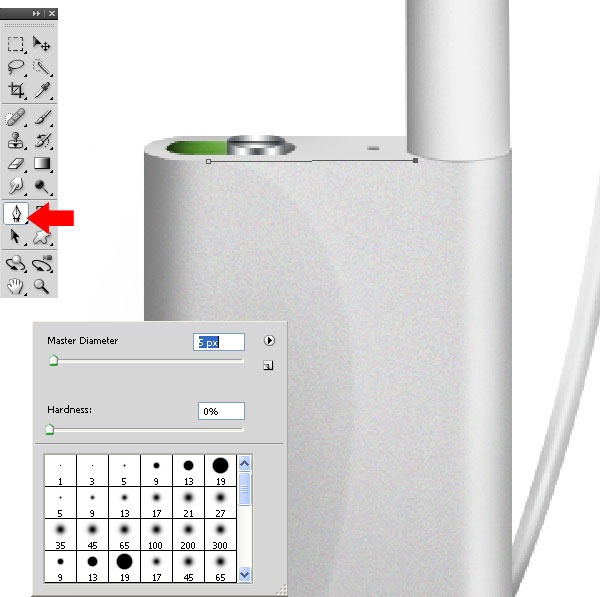
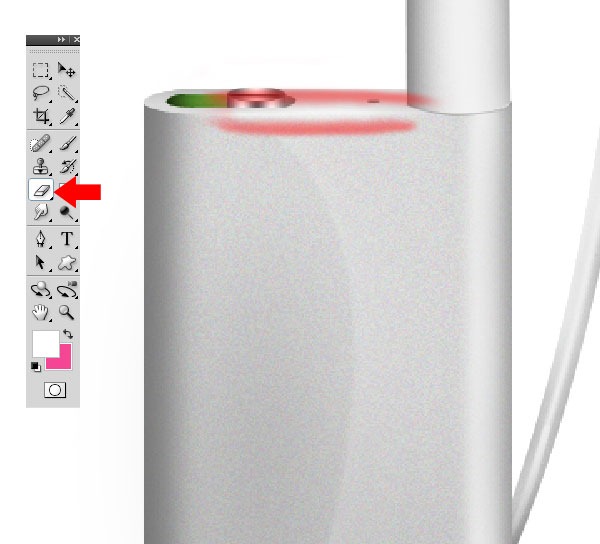
Make new layer and make a path using PenTool ( P ) like in the picture and stroke path with #efefef and brush size ( 37px ) , erase Eraser Tool ( 71px ) a bit on the edge like in the picture.
Step 6
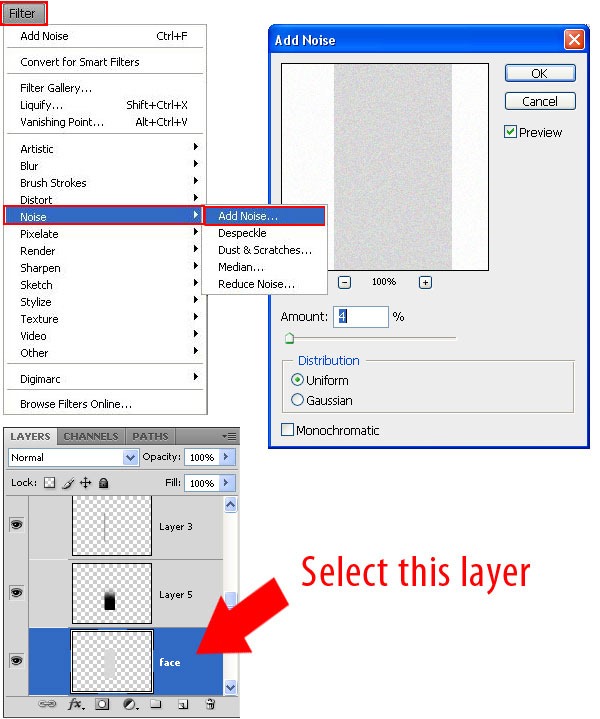
Select “ face “ layer ( Ctrl+Click ) an go to Filter – Noise – Add Noise and set noise in this mode : Amount 4% , Distribution Uniform .
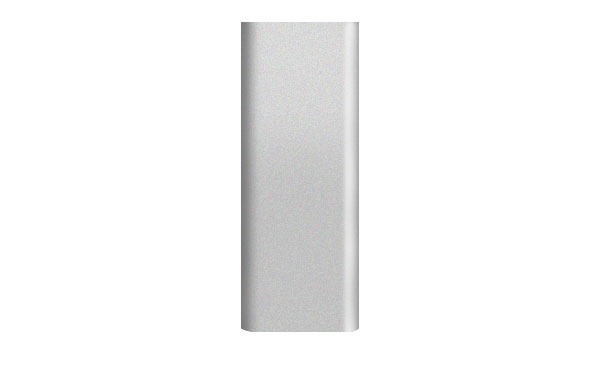
Step 7
Make new layer and create the same shape as I did using Pentool ( P ) and Fill ( Shift + F5 ) selection with #dddddd color , make new layer and brush little with black an size brush 64px .
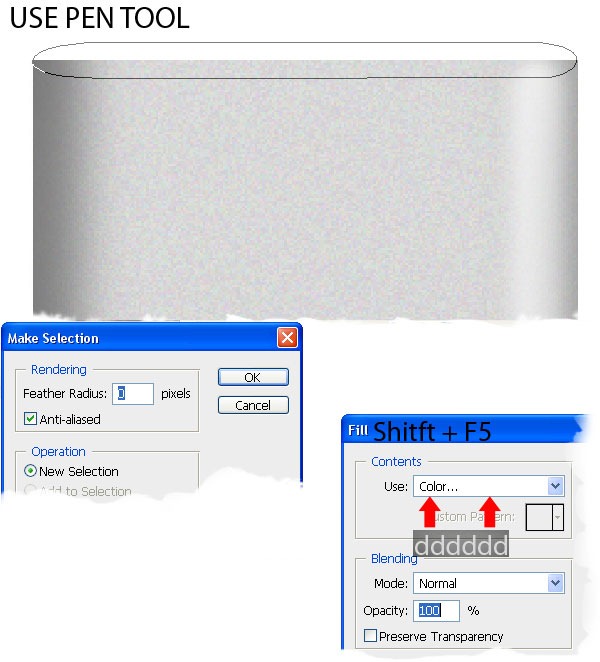
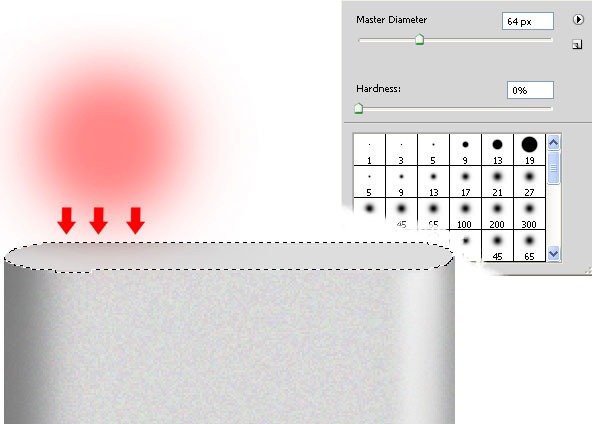
Step 8
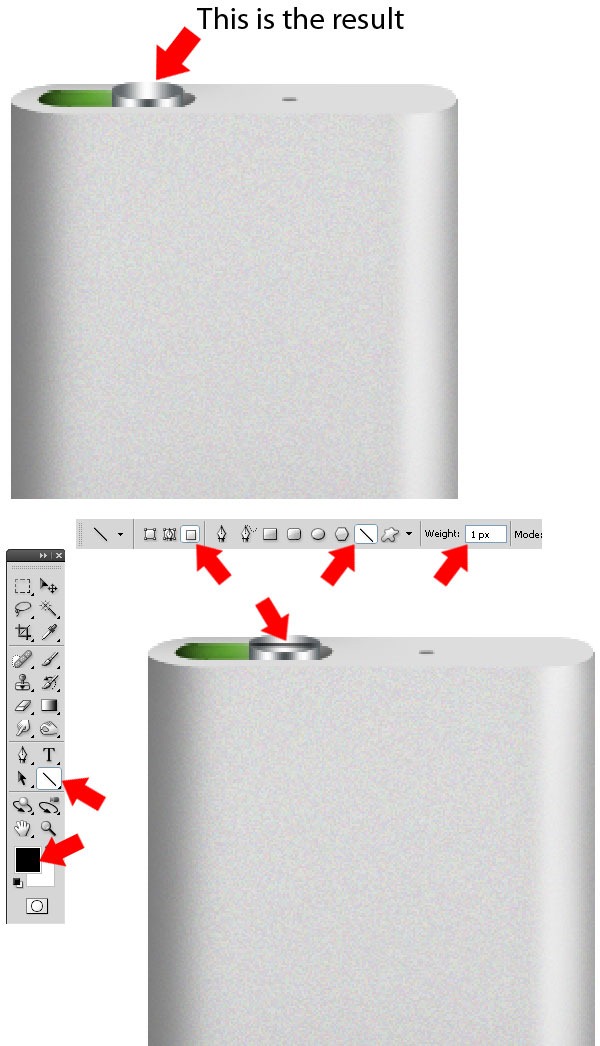
Make new layer and make small hole with Line Tool ( U ) use the settings from the image, brush color black . Make new layer and make new path Pen Tool ( P ) like in the picture and Fill ( Shift + F5 ) selection with #74c93d color .
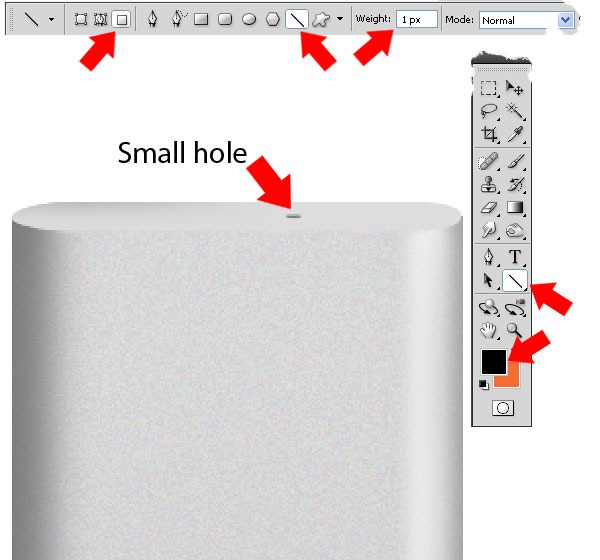
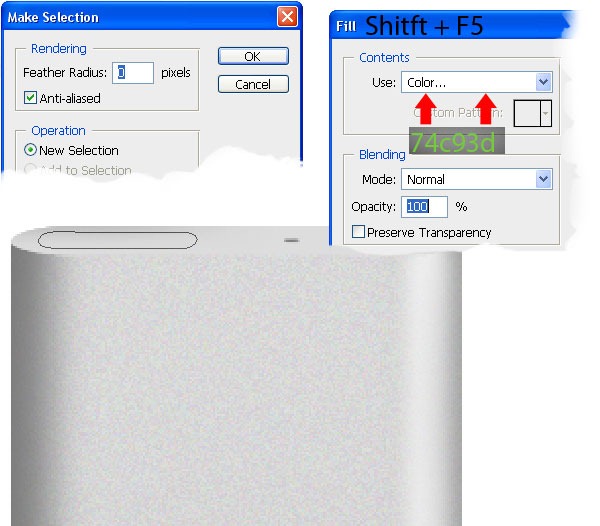
Step 9
Make new layer and brush ( 64px ) the left corner with black . Make new layer and brush ( 64px )the right corner with #989898 color .
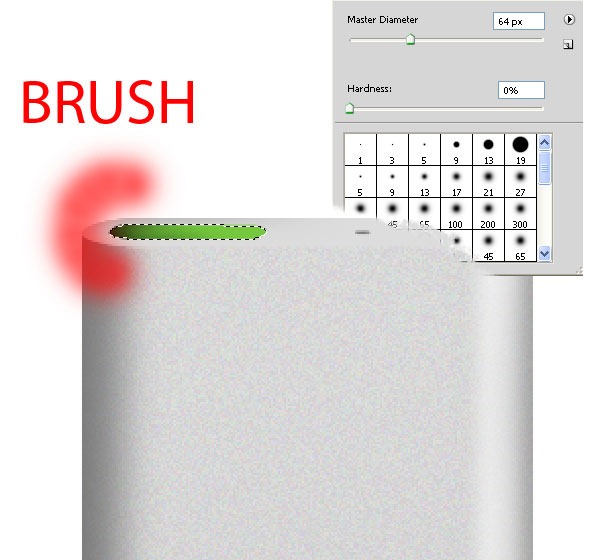
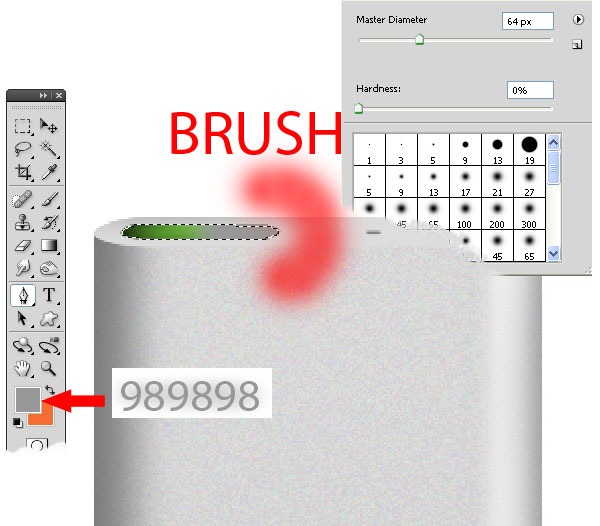
Step 10
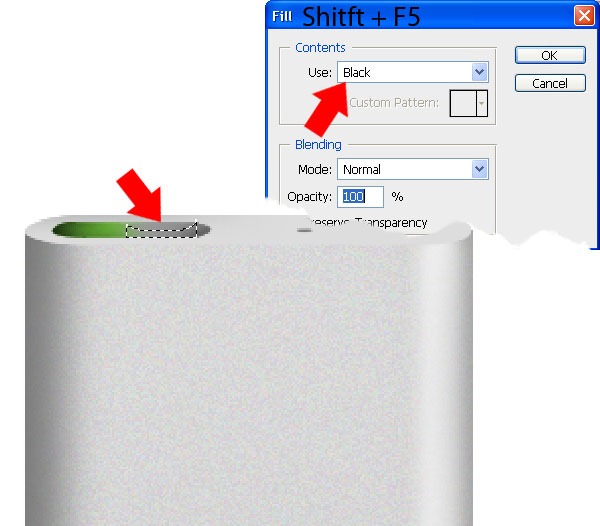
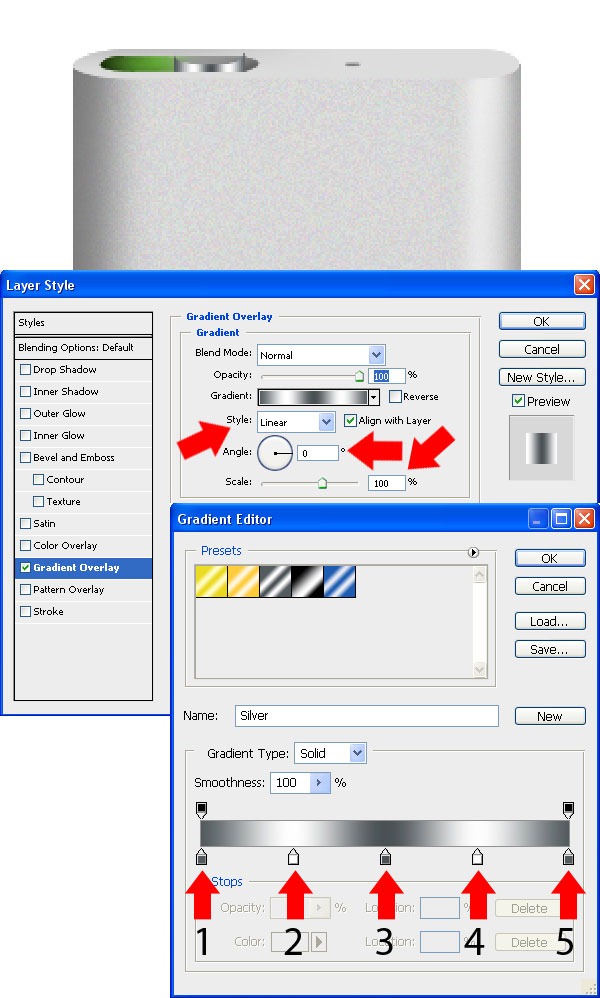
Make new layer an with black brush ( 64px ) little the right corner . Make new layer and make new selection with shape of the photo and Fill ( Shift+F5 ) selection with black . Apply a Gradient Overlay Layer Style (Right click on the layer – Blending Options>Gradient Overlay).
Gradient set at this mode :
- Blend Mode : Normal
- Opacity : 100%
- Style : Linear – Align With Layer
- Angle : 0
- Scale : 100%
- Gradient :
1 – Color # 535b5e Location : 0%
2 – Color # fefefe Location : 25%
3 – Color # 4a5154 Location : 50%
4 – Color # fdfdfd Location 75%
5 – Color # 535b5e Location 100%
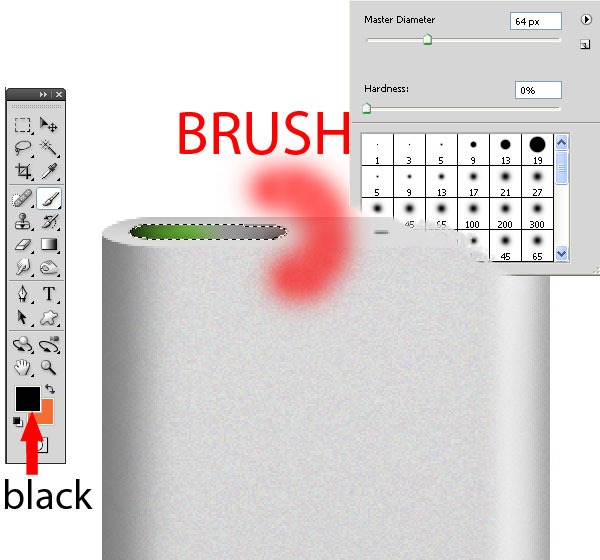
Step 11
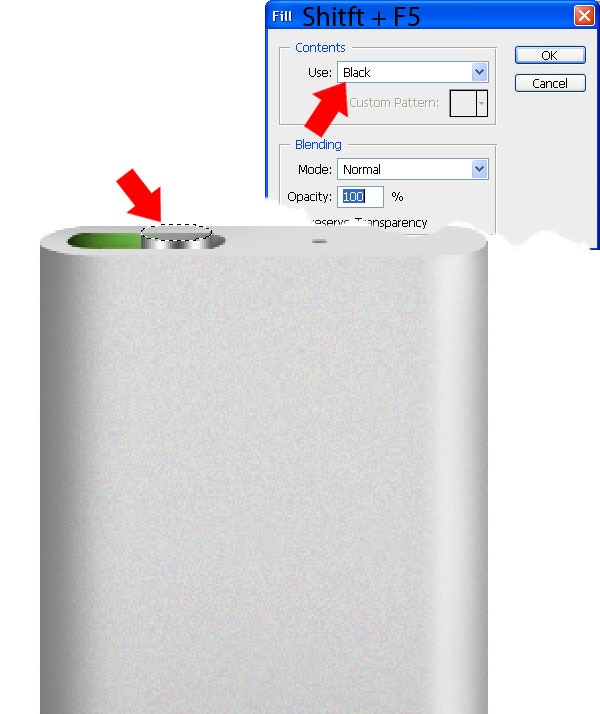
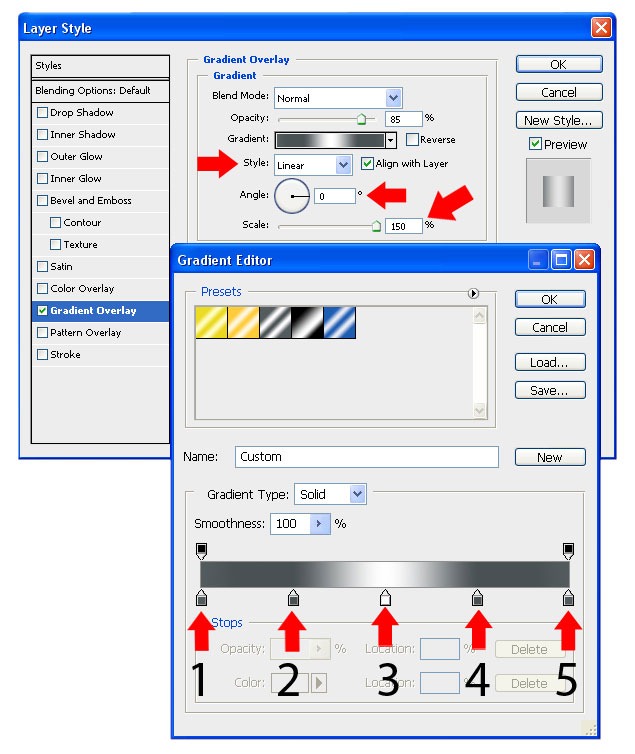
Make new layer and make a circle with Elliptical Marquee Tool ( M ) and Fill selection ( Shift + F5 ) with black . Apply a Gradient Overlay Layer Style (Right click on the layer – Blending Options>Gradient Overlay).
Gradient set at this mode :
- Blend Mode : Normal
- Opacity : 85%%
- Style : Linear – Align With Layer
- Angle : 0
- Scale : 150%
- Gradient :
1 – Color # 535b5e Location : 0%
2 – Color # 4a5154 Location : 25%
3 – Color # fefefe Location : 50%
4 – Color # 4a5154 Location 75%
5 – Color # 535b5e Location 100%
Step 12
Make new layer and make a line with Line Tool ( 1px ) and use settings like in the picture .
Step 13
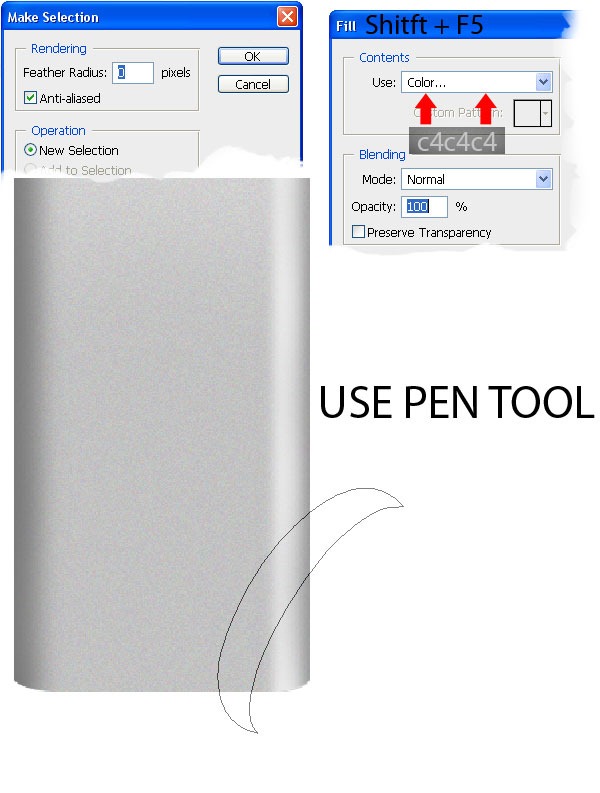
Make new layer and create the same shape as I did using Pentool ( P ) and Fill ( Shift + F5 ) selection with #c4c4c4 color .
Step 14
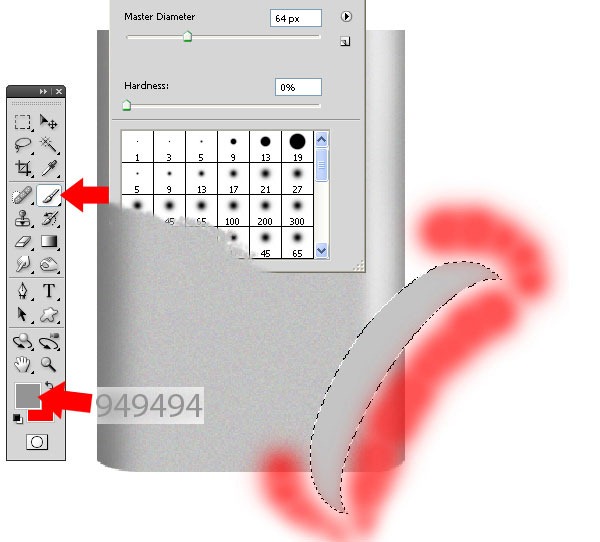
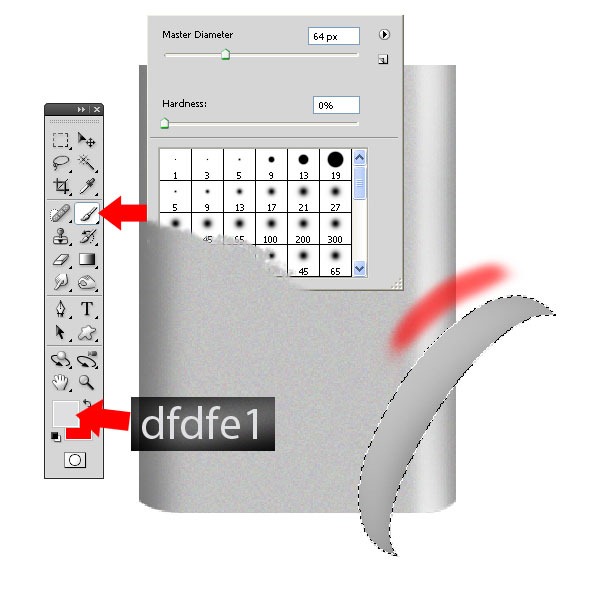
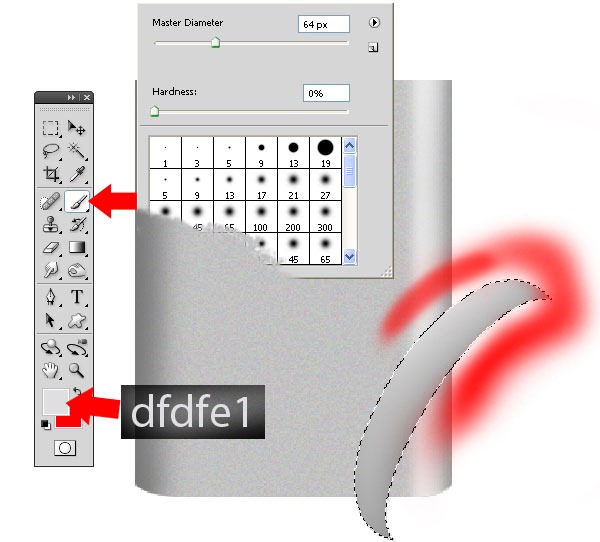
Make new layer and brush and put the brush ( 64px ) on the edge with #949494 color . Make a new layer and brush the side showed in the picture with #dfdfe1 .
Step 15
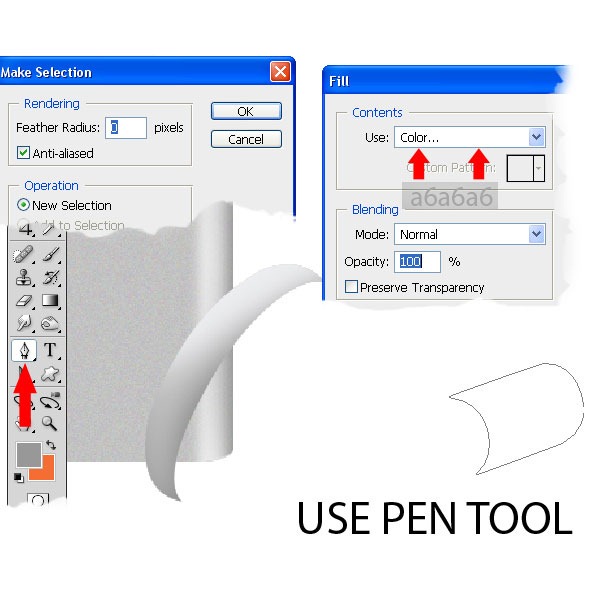
Brush side showed in the picture with #dfdfe1 . Make new layer and make the same shape as I did using PenTool ( P ) and Fill( Shift + F5 ) selection with #a6a6a6 .
Step 16
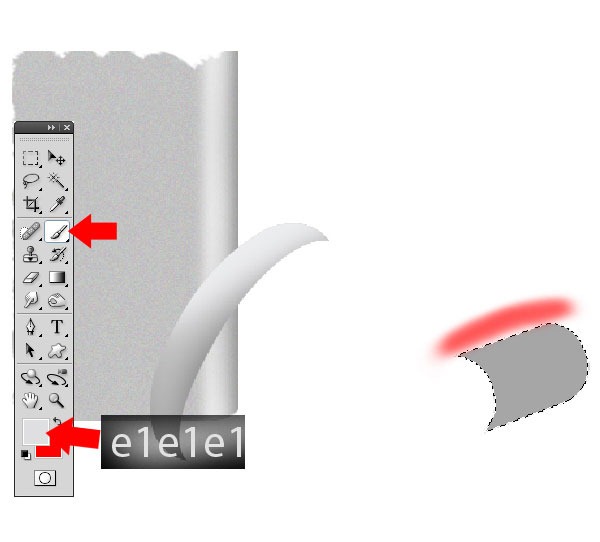
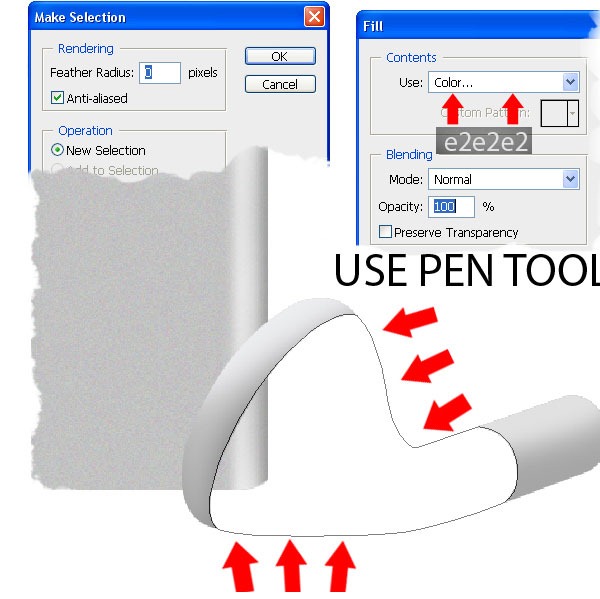
Brush this side ( on photo ) set brush at 64px and use color #e1e1e1 . Make new layer and make new shape ( on photo ) with PenTool ( P ) and Fill ( Shift + F5 ) selection with #e2e2e2 .
Step 17
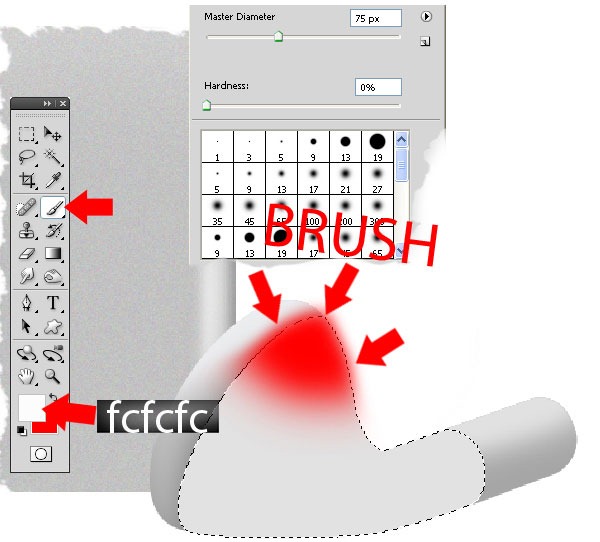
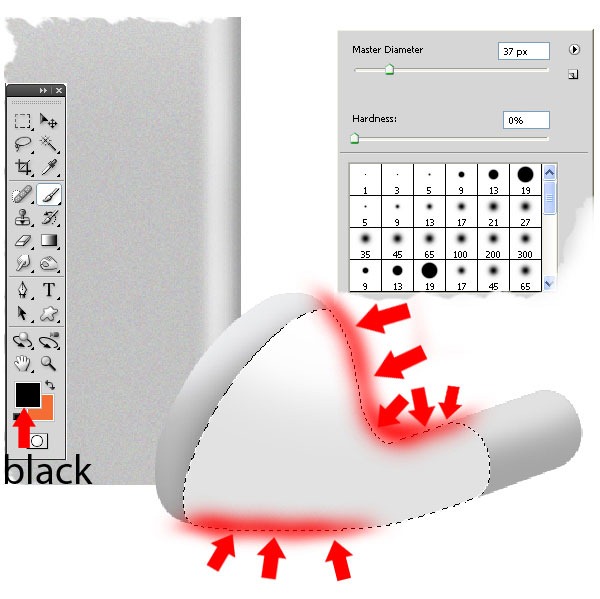
Brush this part with brush set at 75px and color #fcfcfc . Make new layer and brush easy this side on photo set brush at 37px and color black .
Step 18
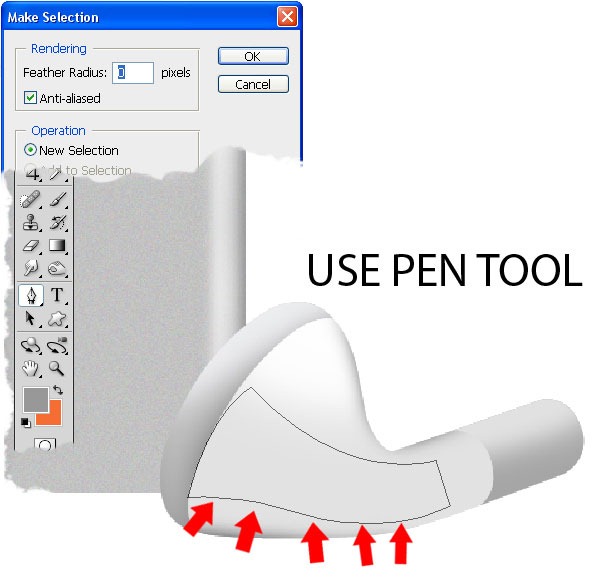
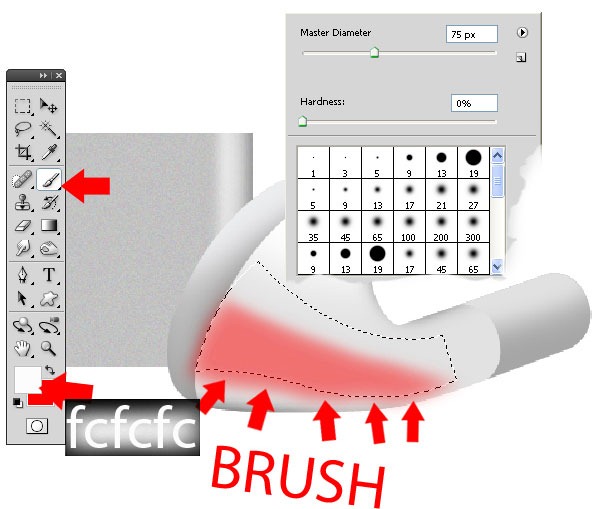
Make new path Pent Tool ( P ) and make selection father 0 . Brush lower side 75px and use color #fcfcfc . Set the opacity 84%
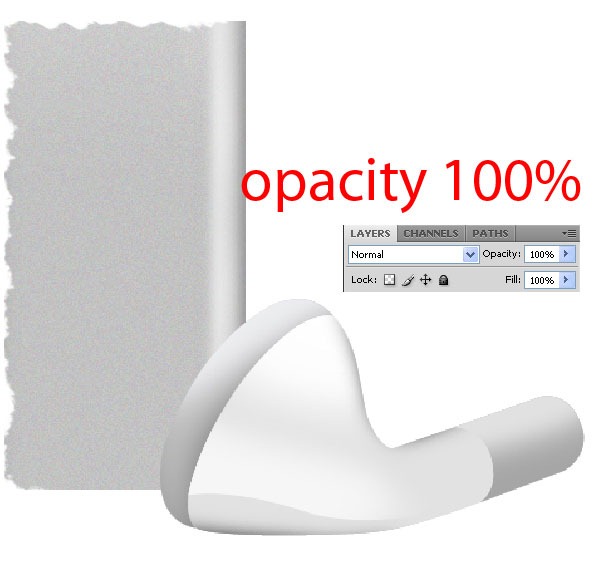
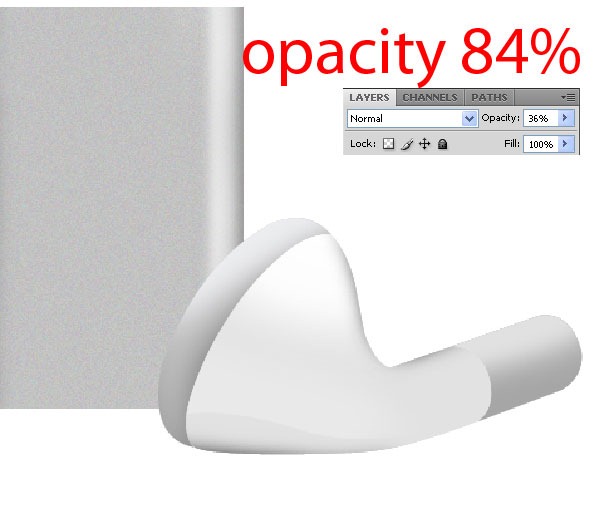
Step 19
Make new path Pen Tool ( P ) and make selection father 0 and brush this area with Brush 75px and use color #fcfcfc . Set opacity 69%
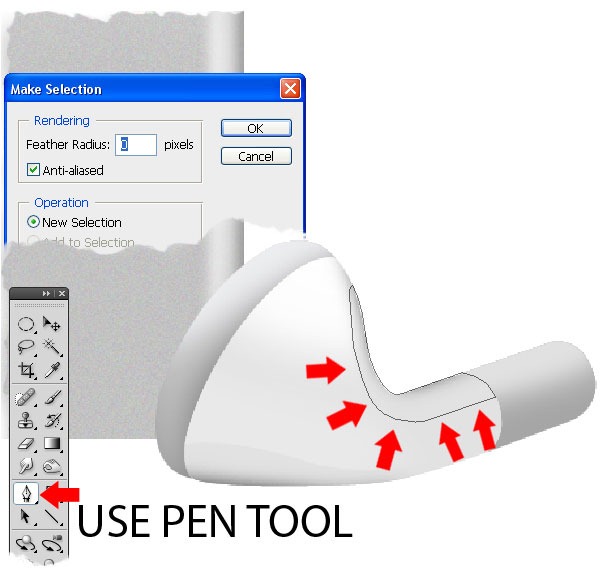
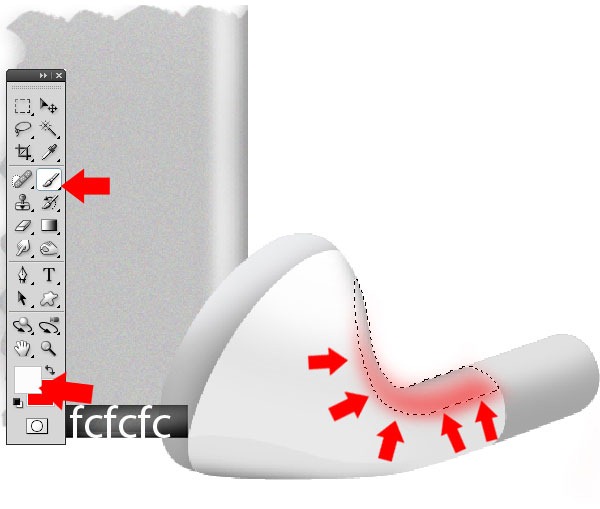
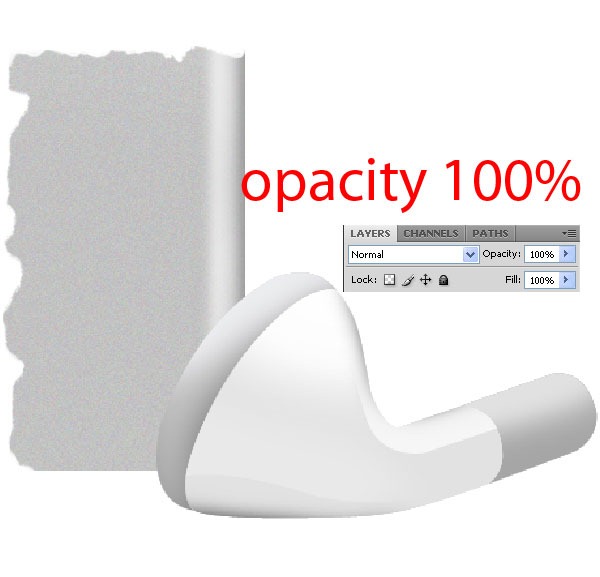
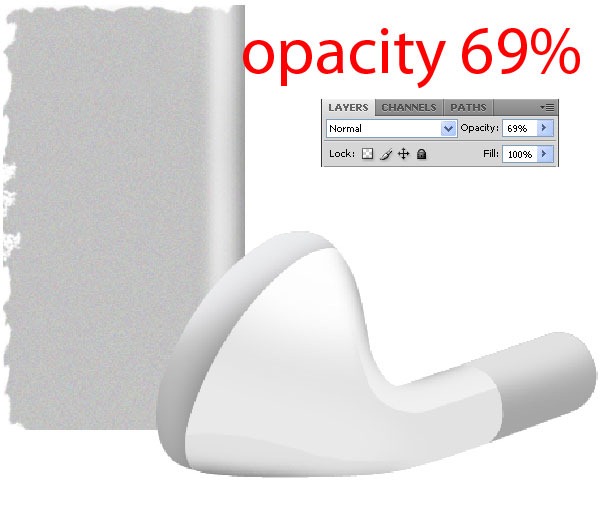
Step 20
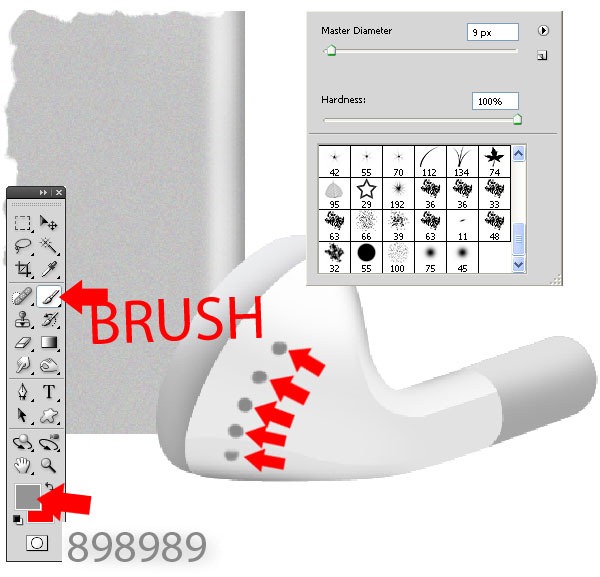
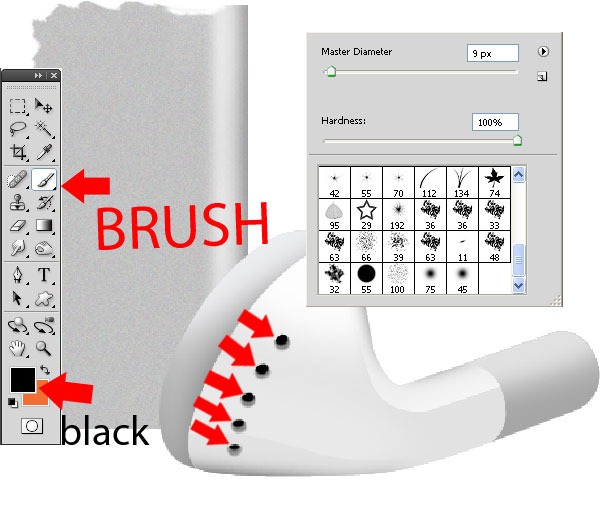
Make new layer and make 5 small holes with Brush 9px and color #898989 . Make another 5 small holes but this time with black color .
Step 21
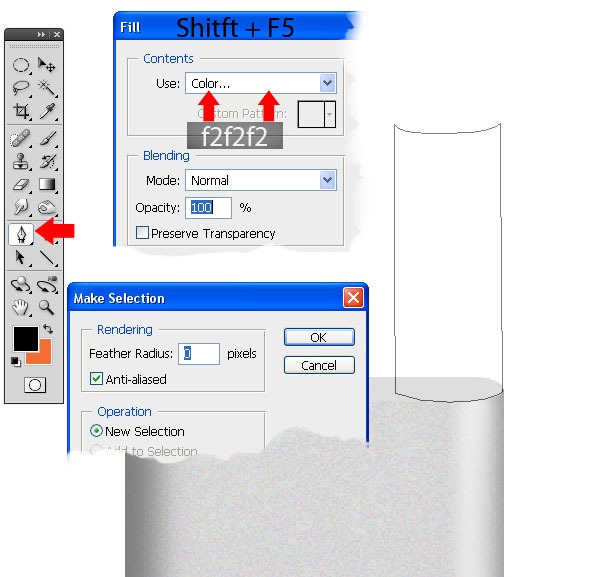
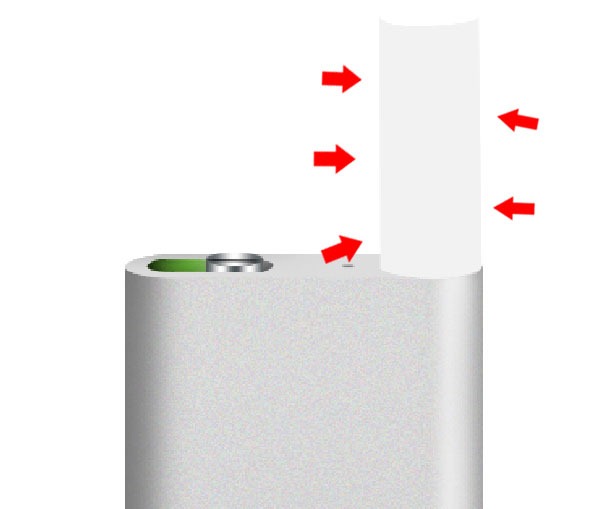
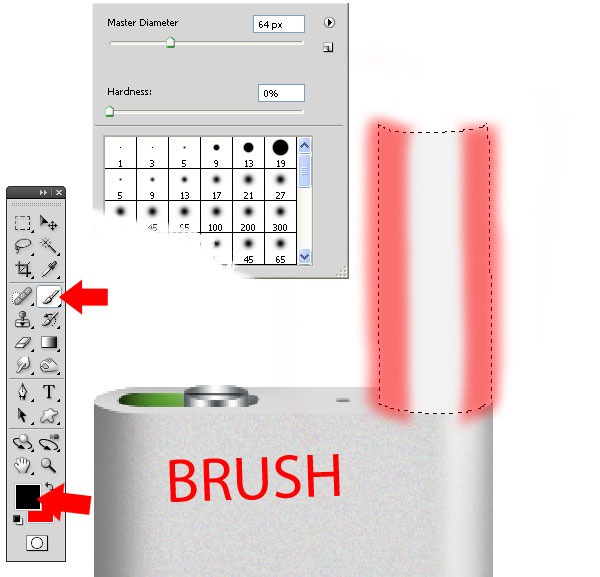
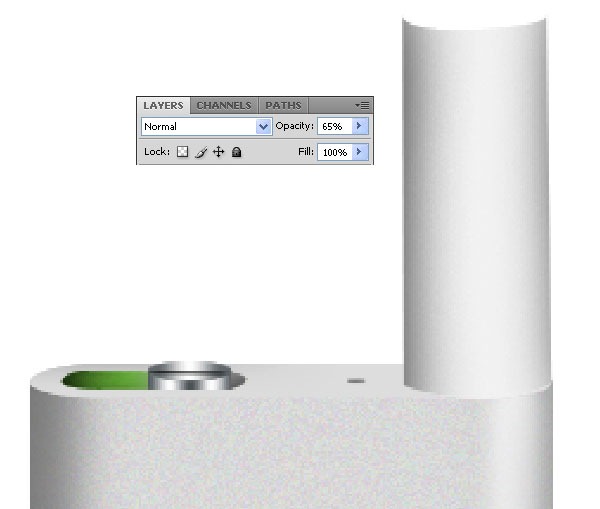
Make new layer and make new path (like in the picture down ) Pen Tool ( P ) and make selection father 0 and Fill ( Shift + F5 ) with color #f2f2f2 . Brush 64px this side ( from the picture ) with black and set the opacity at 65% .
Step 22
Make new circle with Elliptical Marquee Tool ( M ) and Fill ( Shift + F5 ) selection with white . Brush 30px side with black set the opacity at 63% .
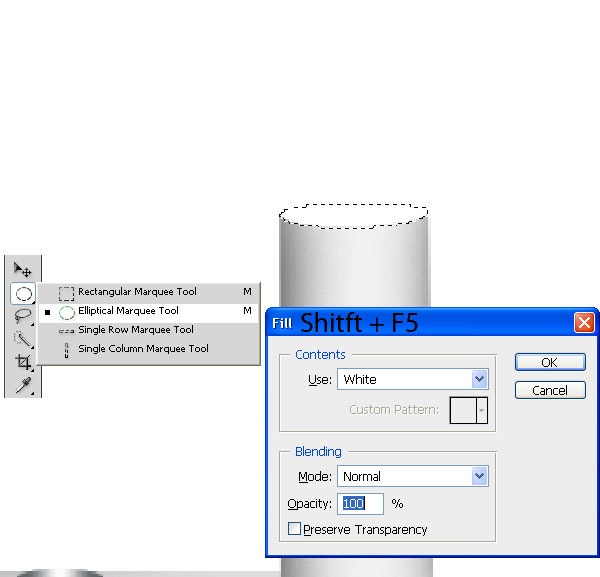
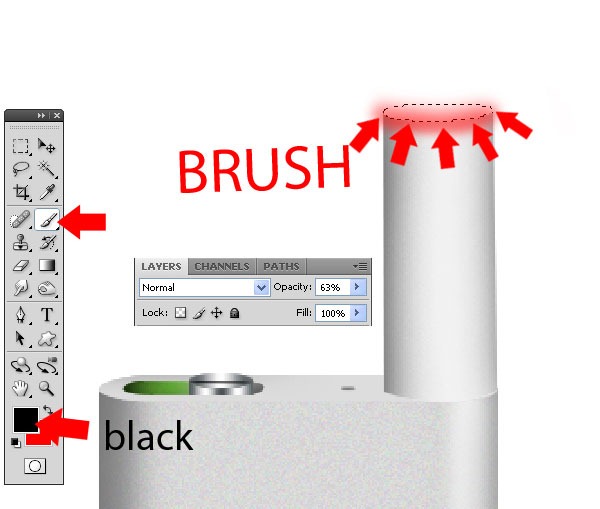
Step 23
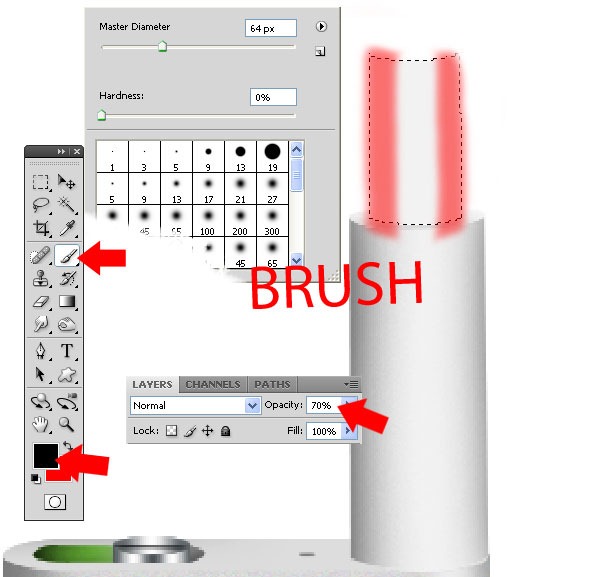
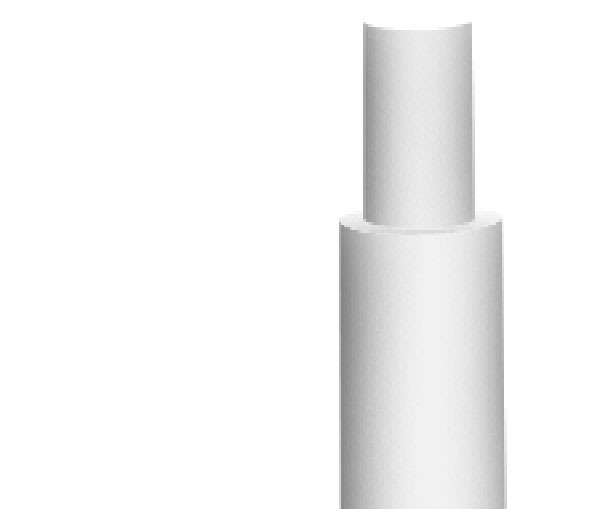
Make new layer and make new path (like in the picture down ) Pen Tool ( P ) and make selection father 0 and Fill ( Shift + F5 ) with color #f2f2f2 . Brush 64px this side ( from the picture ) with black and set the opacity at 70% .
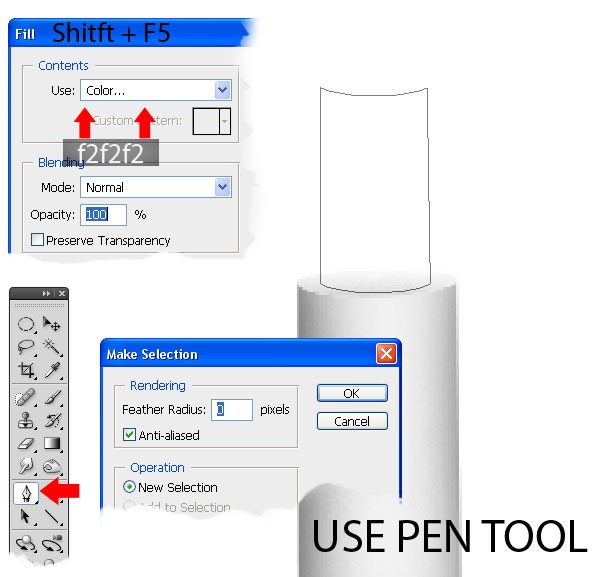
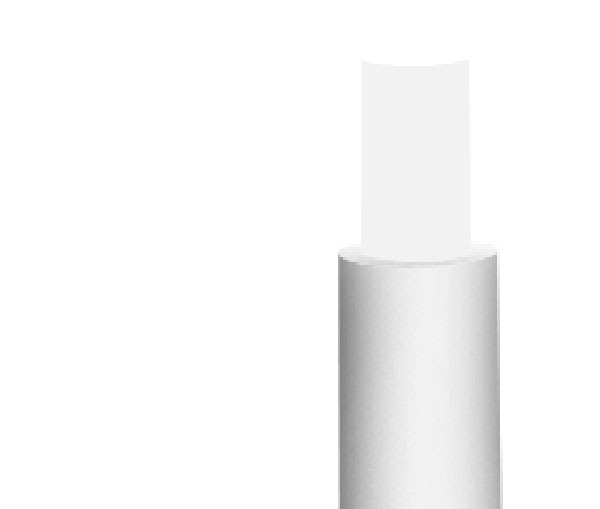
Step 24
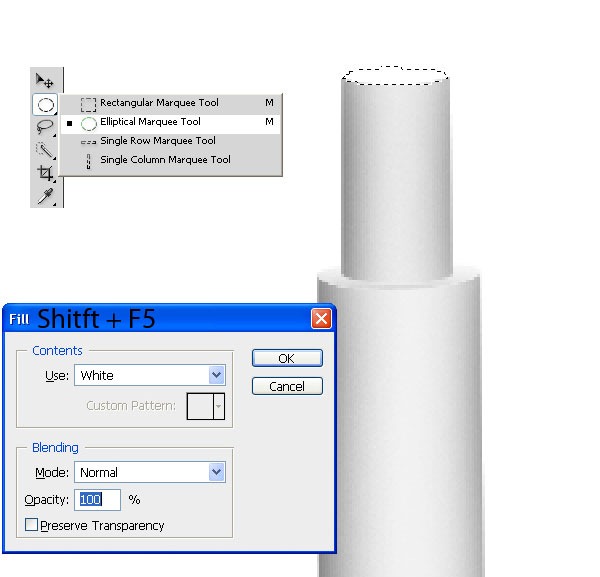
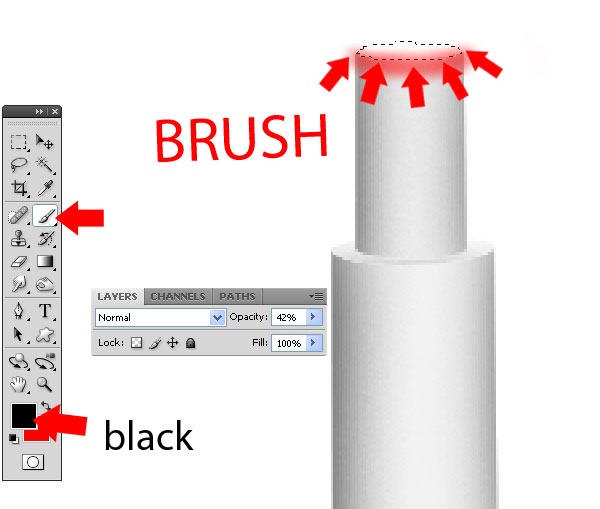
Make new circle with Elliptical Marquee Tool ( M ) and Fill ( Shift + F5 ) selection with white . Brush 30px side with black set the opacity at 42% .
Step 25
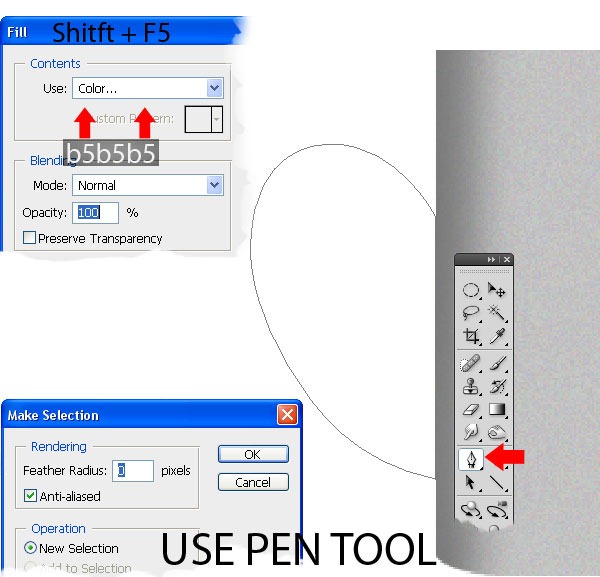
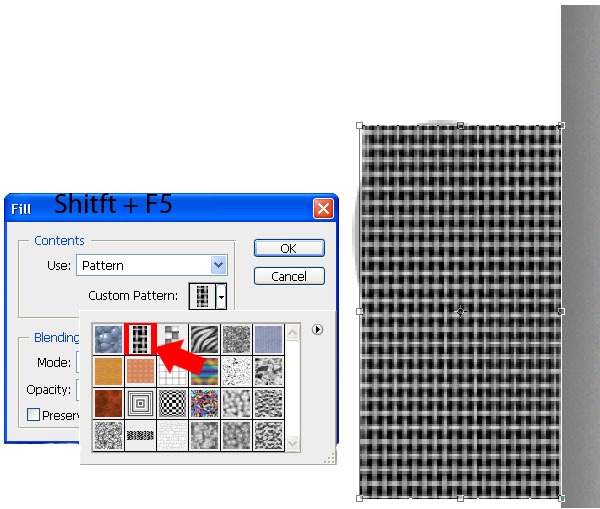
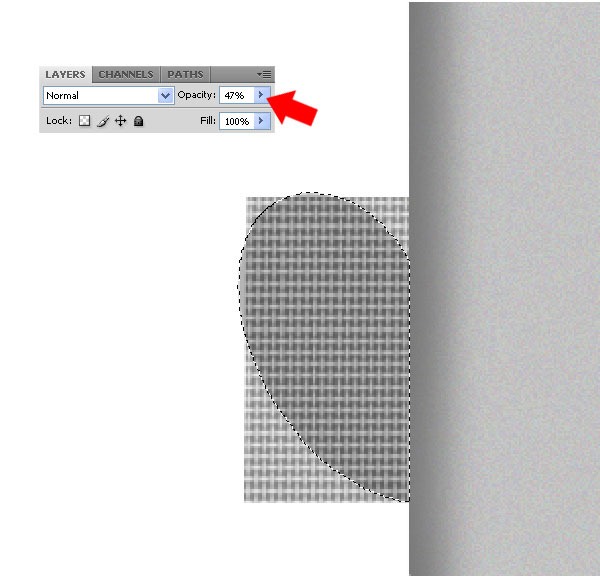
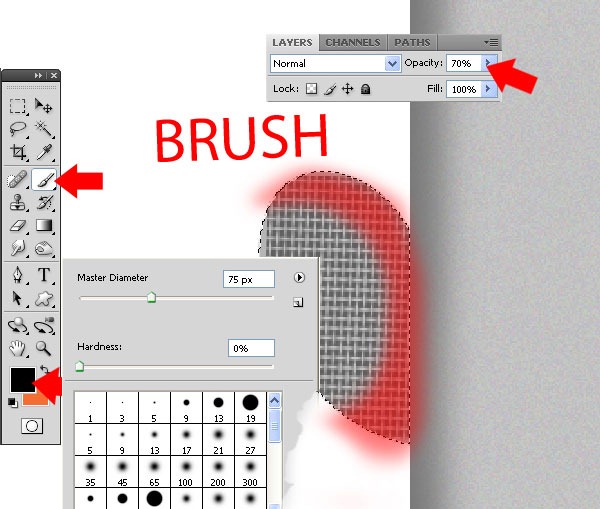
Make new path with Pen Tool ( P ) down in the left area and make selection and Fill ( Shift + F5 ) selection with color #b5b5b5 . Make new layer and Fill with pattern selected and Transform ( Ctrl + T ) like in the picture . Set pattern opacity at 47% . Brush this side with black and set opacity at 70% .
Step 26
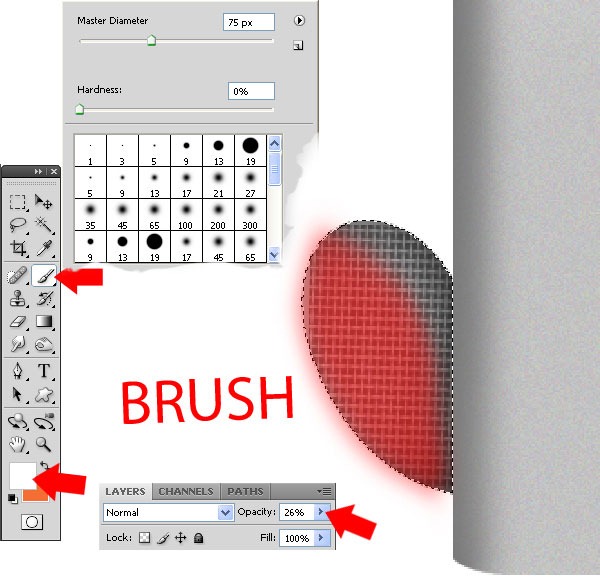
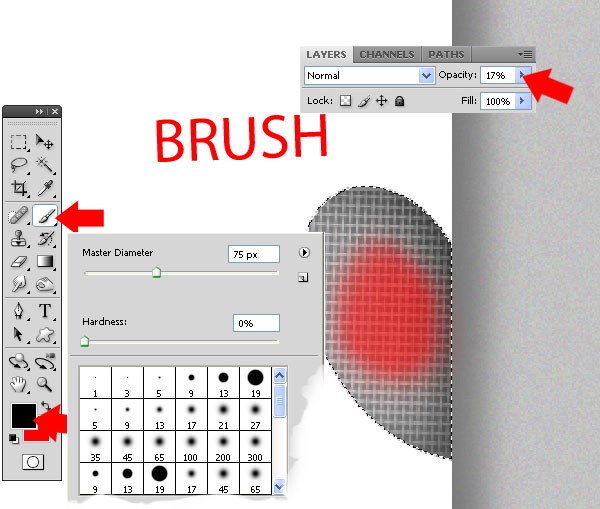
Brush 75px this side with white and set opacity at 26% . Brush with white in center and set opacity 17% .
Step 27
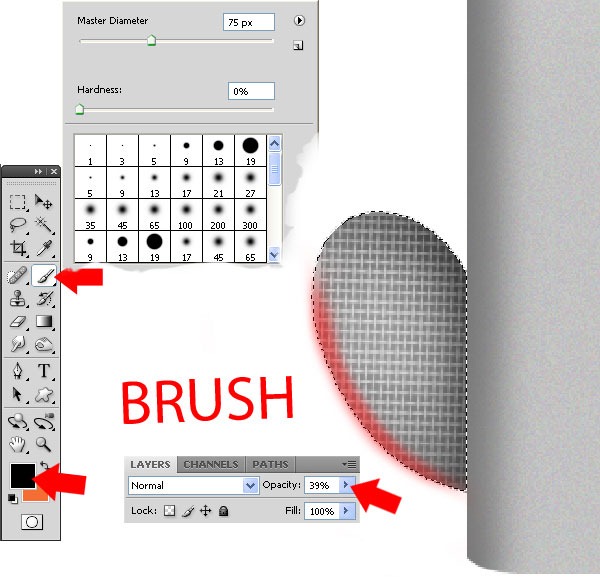
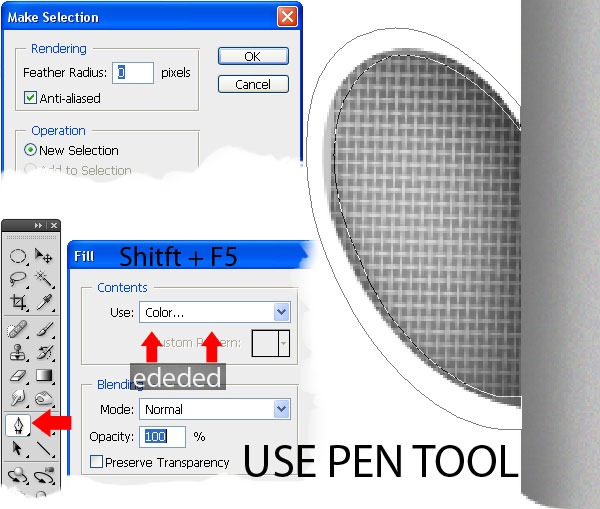
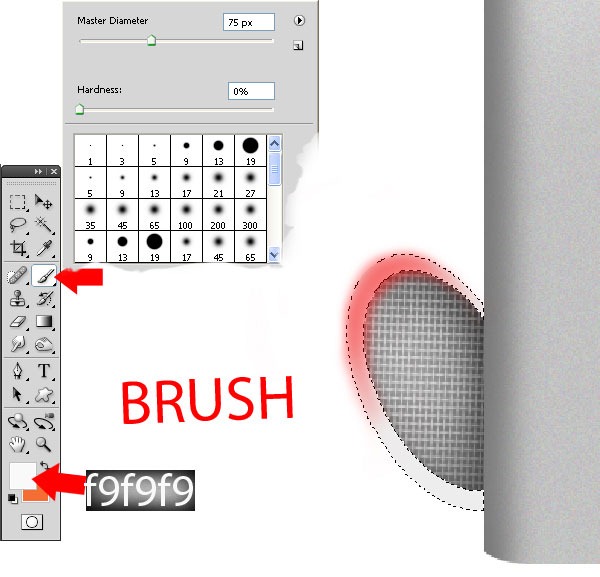
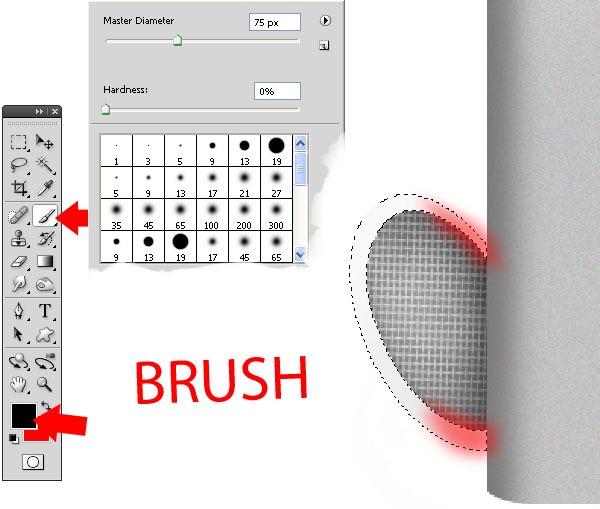
Brush 75px slowly this side with black and set opacity 39% . Make new layer and make new path Pen Tool ( P ) ( like in the picture ) make selection and Fill ( Shift + F5 ) selection with color # deeded . Brush this area with color f9f9f9 . Brush 75px top with color #f9f9f9 and brush the bottom with black .
Step 28
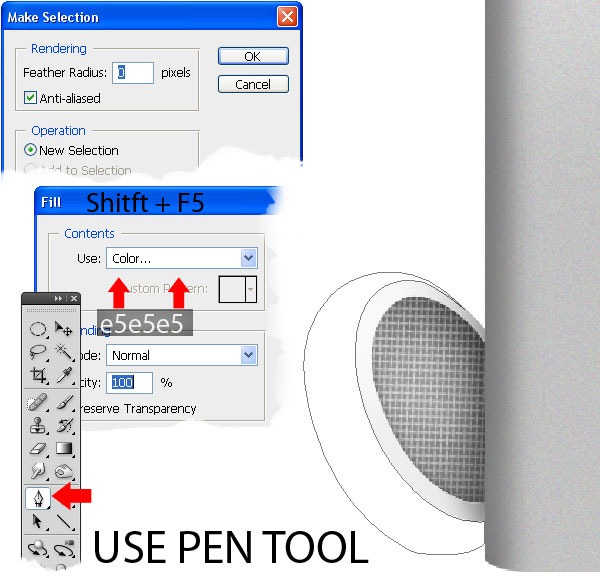
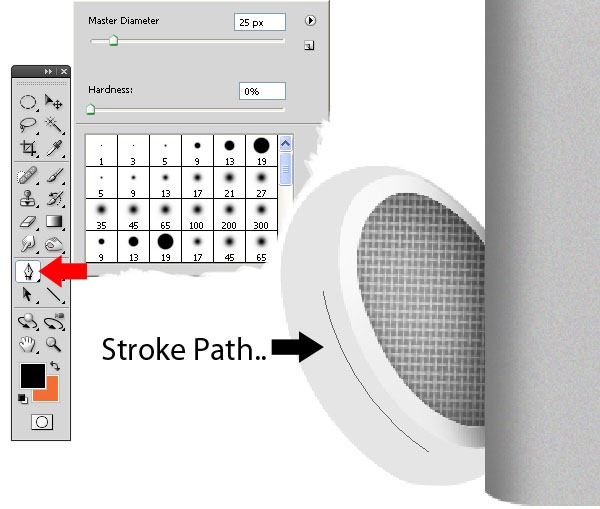
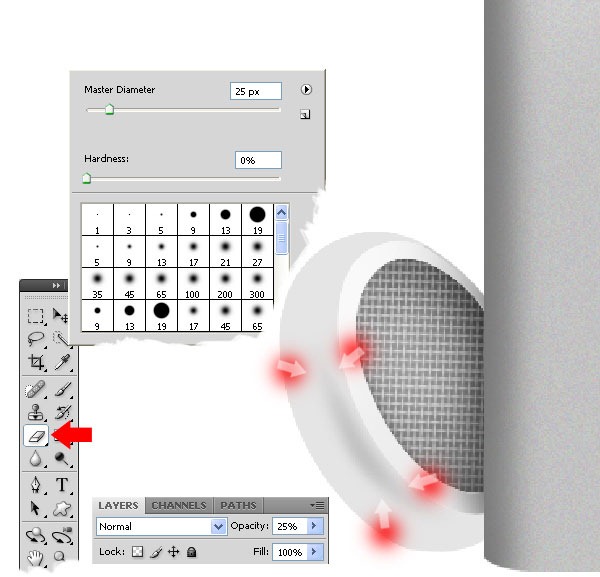
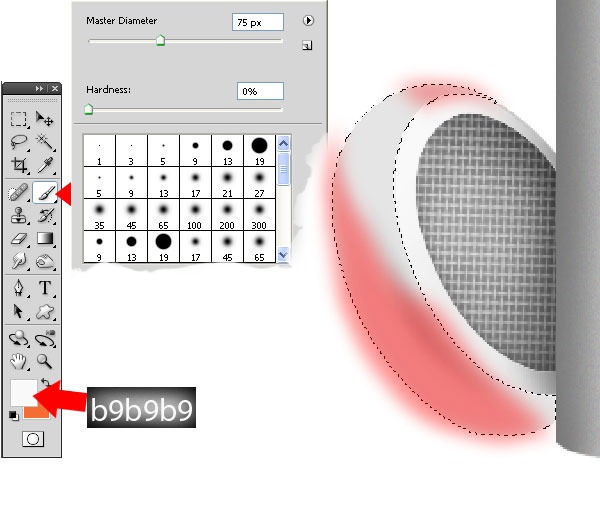
Make new path Pen Tool ( P ) like in the picture and make selection and Fill (Shift+F5) with color #e5e5e5 . Make new path Pen Tool ( P ) and stroke this path with brush ( 25px ) with black and gently wipe the edge . Brush 75px side with color #b9b9b9 .
Step 29
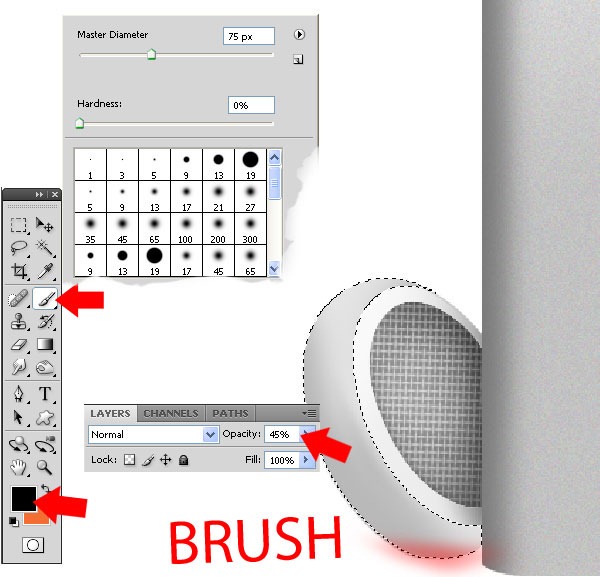
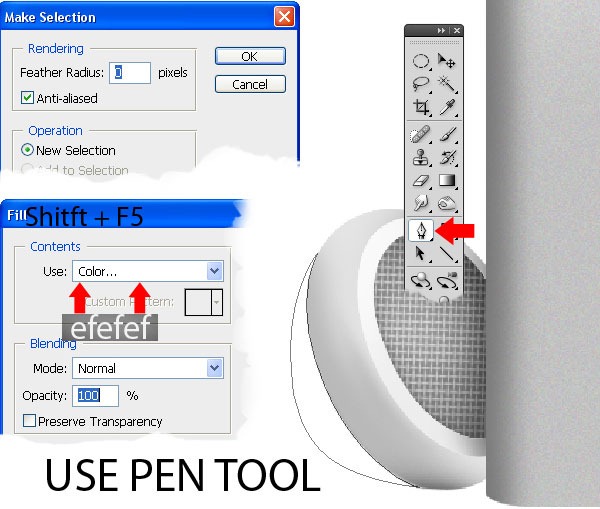
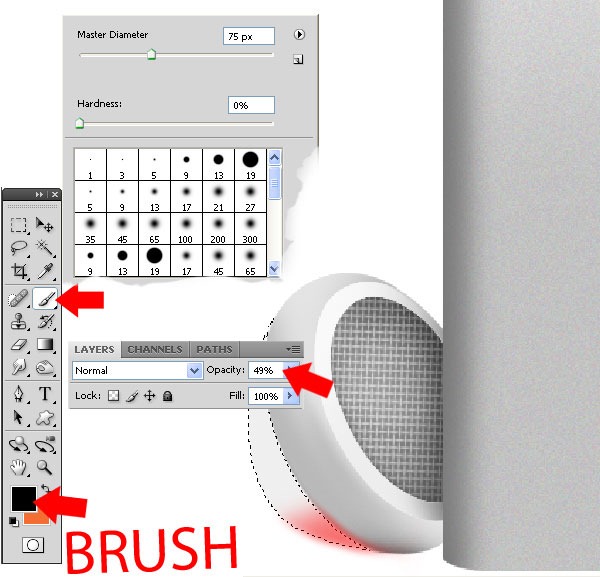
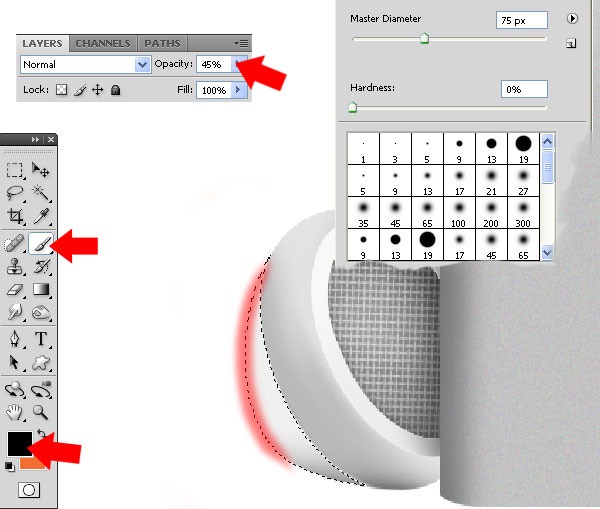
Brush 75px easy this side with black and make opacity 45% . Make new path and make selection with father 0 and Fill ( Shift + F5 ) selection with color #efefef . Brush 75px easy this side with black and make opacity 49% . Brush 75px this side with black and set opacity 45% .
Step 30
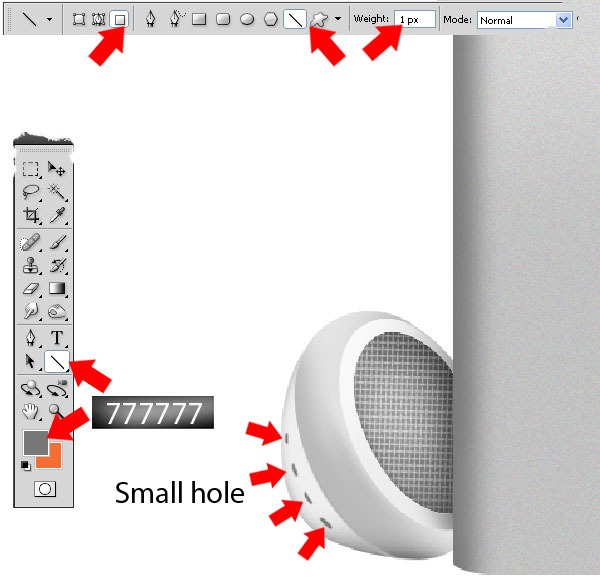
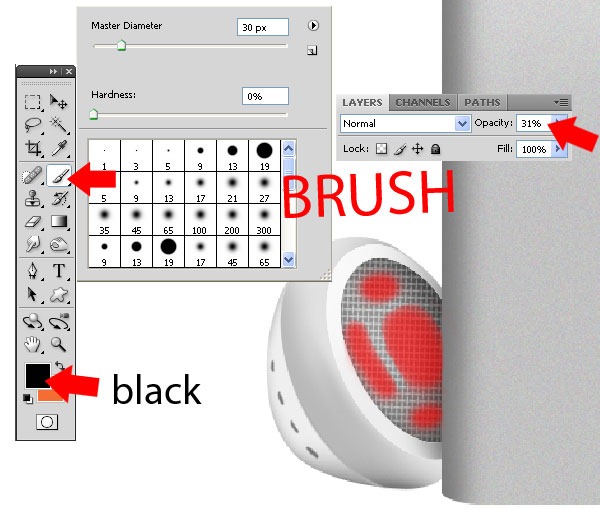
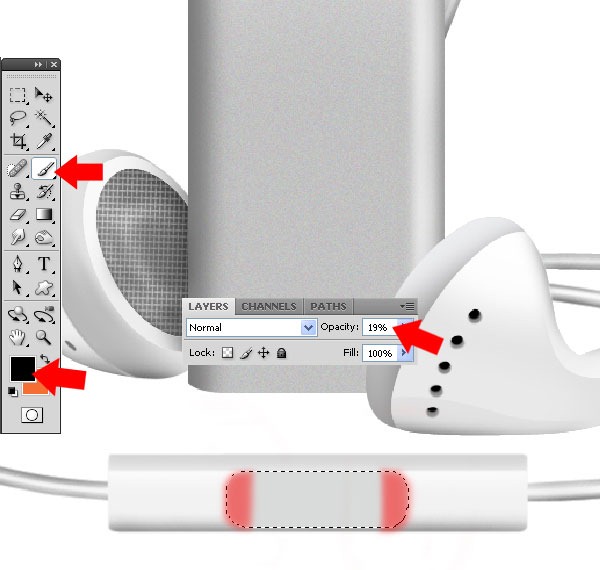
Use Line Tool and use settings like in the photo, use color #777777. Make new hole in the net with black and brush 30px and set opacity 31% .
Step 31
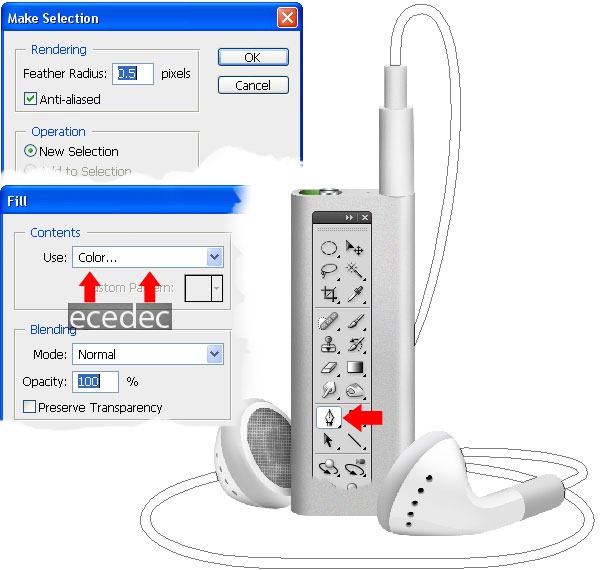
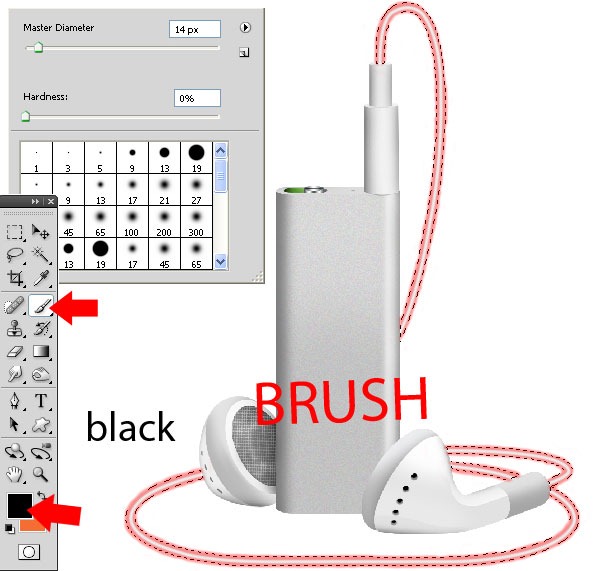
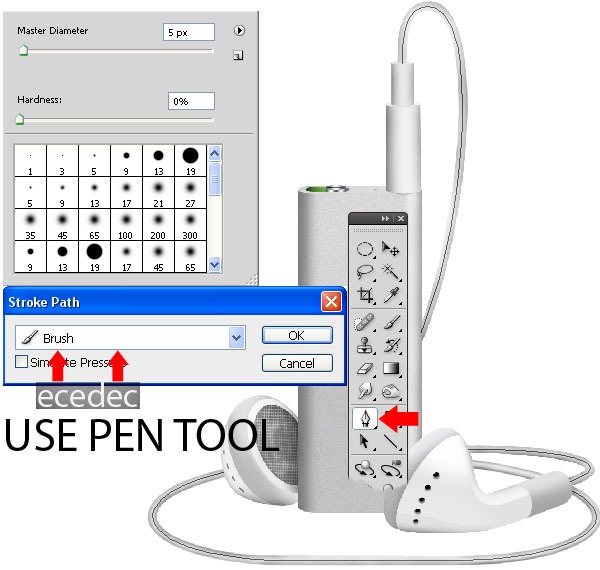
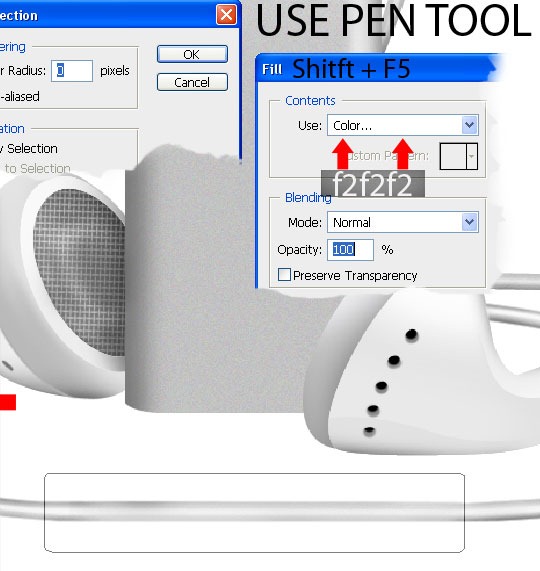
Make new path and make selection with father 0.5 and fill selection (Shift+F5) with color #ecedec . Brush 14px easy on wire side with black. Make a path in the middle of the wire like in the picture , stroke path with color #ecedec and brush 5px . Make path like in the picture and make selection father 0 and Fill selection (Shift + F5) with color #f2f2f2 .
Step 32
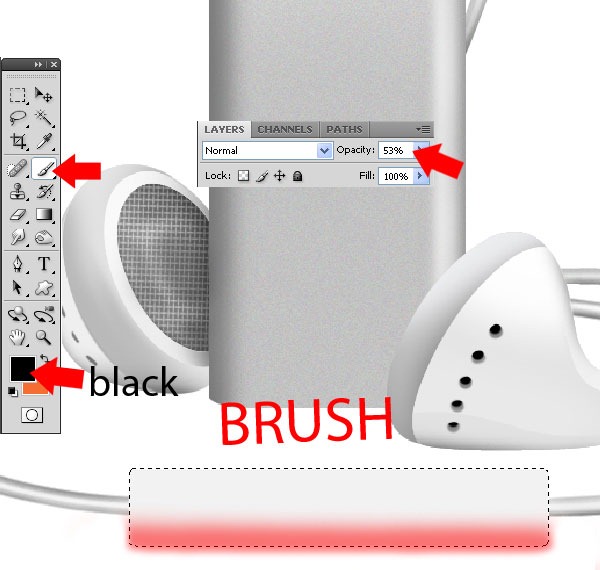
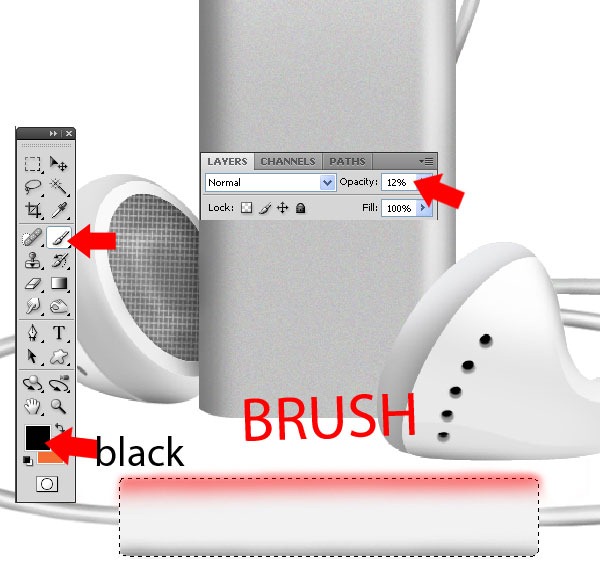
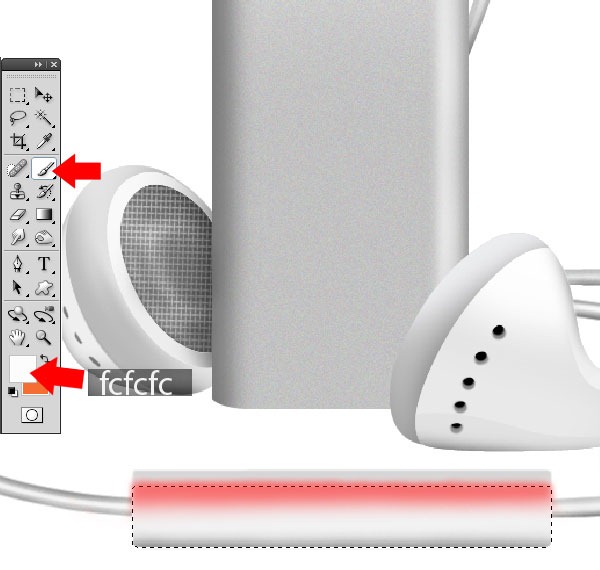
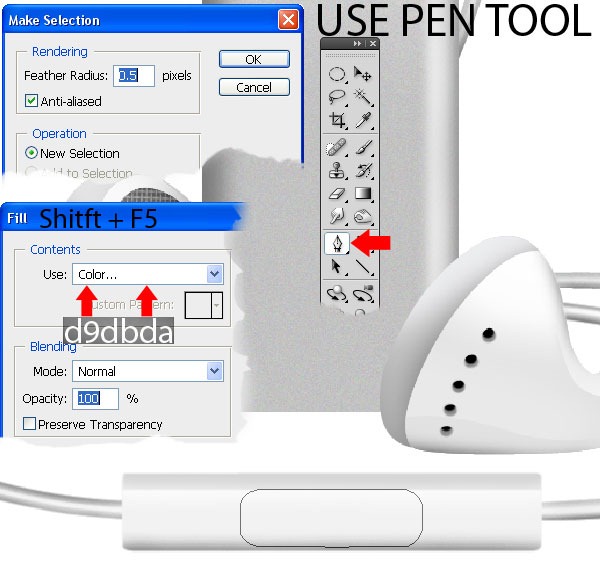
Brush 75px down side with black and set opacity 53%, brush the up side with black and set opacity 12% . Make new selection like in the picture and brush 75px with color #fcfcfc. Make new path and make selection with father 0.5 and Fill (Shift + F5) selection with color #d9dbda .
Step 33
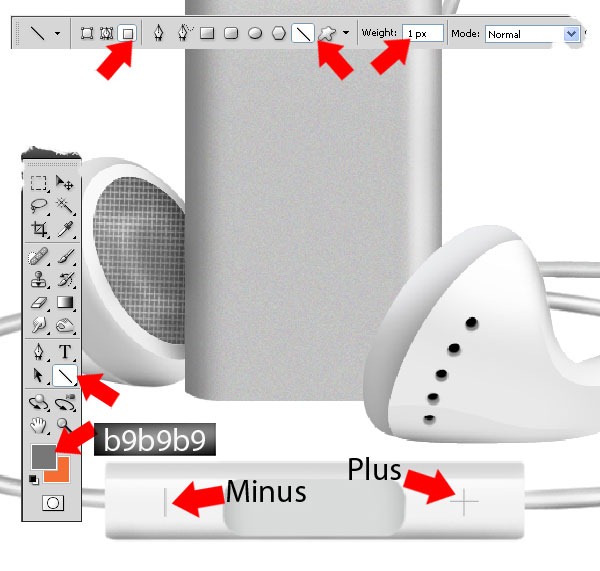
Brush 25px side with black and set opacity 12%. Make with Line Tool and color #b9b9b9 mark – and +.
Step 34
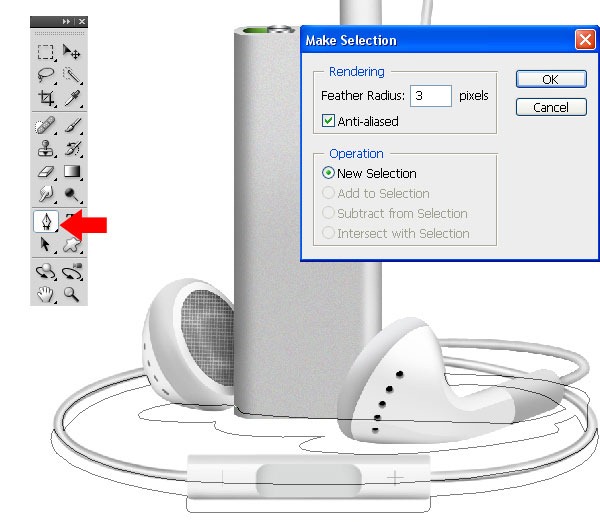
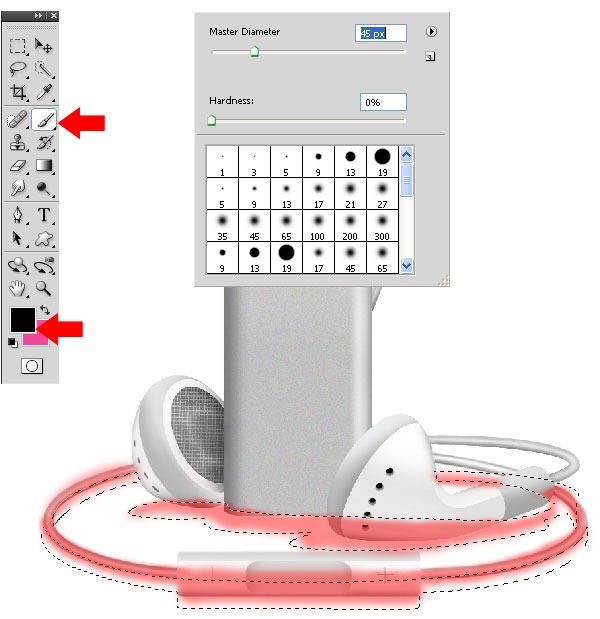
Make new shape like in the picture and make selection with father 3 and brush 45px with black like I did . Make new shape with Pen Tool ( P ) with father 0.5 and brush on edge with white and set opacity 35% . Make a path and stroke this with brush 5px and color white , erase easy on edge .
Final Results

source:photoshoptutorials.ws/