Preview of Final Results

Deathly Photo Manipulation Photoshop Tutorial
Step 1 - Removing Sky From Background
Download the picture of the ground and open it in Photoshop. First of all we need to remove the current sky which is boring and really uninteresting so we can replace it with more dramatic one in next steps. Cutting the sky out with Lasso Tool or Pen Tool would be really time consuming and hard. To avoid that we use Channels.
Click on the Channels palette. If you don´t see it go to Window > Channels and it will appear. On the palette you can see separated red, green and blue channel.

Duplicate the one where is the highest contrast between the sky and the ground. I duplicated Blue Channel. Press Ctrl + L. It activates Levels color adjustment. Set Input Levels similar as it is shown on the picture bellow.

Grab the Brush Tool (B), pick black color and paint over the rest of the ground which is not black but only grey. You should end up with something similar to this one:

Click back on RGB Channel to be able to see the picture in colors again.
On your Layers palette right click on the background layer and choose the option Layer From Background. Name the layer GROUND.
Now go to Select > Load Selection and set the Channel on Blue copy. Press OK. This step activates selection based on the Blue copy Channel which you’ve created a while ago.
Press Ctrl + Shift + I to invert the selection and add Layer Mask. The button Add layer mask can be seen on the bottom part of the Layers palette.
This cause that the sky disappear.

Step 2 - Deflection of Ground
In this step you will deflect the ground so it will have better shape for putting the skeleton. Go to Image > Rotate Canvas > 90° CVV and then to Filter > Distort > Shear and set the curve as you can see bellow.

Choose the option Repeat Edge Pixels instead of Wrap Around and press OK. No go to Image > Rotate Canvas > 90° CV to give it back the right orientation.
Step 3 - Square Format
As you can see the final picture has square format. We will fix it in this step. Grab the Crop Tool (C) and set Width and Height on the value 1.
![]()
Bellow it’s seen how the cropping looks.

Press Enter to crop it.
Step 4 - Adjusting the Ground
In this step you will increase the contrast of the ground and add details with using of texture.
First of all it’s necessary to fix contrast. To do that add Adjustment Layer Levels. Using of adjustment layer is really useful because all adjustments you do this way are non destructive and you always can go back and change them. It’s almost impossible to do that if you adjust your pictures with using of Image > Adjustment > ... Thanks to adjustment layers you can also adjust only parts of the image.
The button Create new fill or adjustment layer is in the bottom part of your Layers palette.
![]()
Set the Input Levels on 0; 0,63; 255 and press OK.

Now download the grunge texture and drag it into the manipulation. Place this layer on the top of your layers and change the Blending Mode on Overlay.

Now add layer mask. Make sure that the layer mask is active (just click on the thumbnail of the layer mask), grab Brush Tool (B), choose some soft round brush, pick black color and paint over the areas of the texture which should be hidden.

Step 5 - Adding the Sky
Download the picture of sky and drag it into your picture. Name the layer SKY and place it on the top of your layers. Press Ctrl + T and resize it on proper size. Set the Blending Mode on Multiply. Add layer mask and with using of black brush erase the parts of the sky which should be invisible.

Step 6 - Desaturation
To unify the look of the sky and ground and also to create stronger atmosphere we desaturate the whole picture a little. Add new adjustment layer Hue/Saturation on the top of your layers and set the value Saturation on -50. Press OK.
After these six steps your picture should be similar to the one bellow.

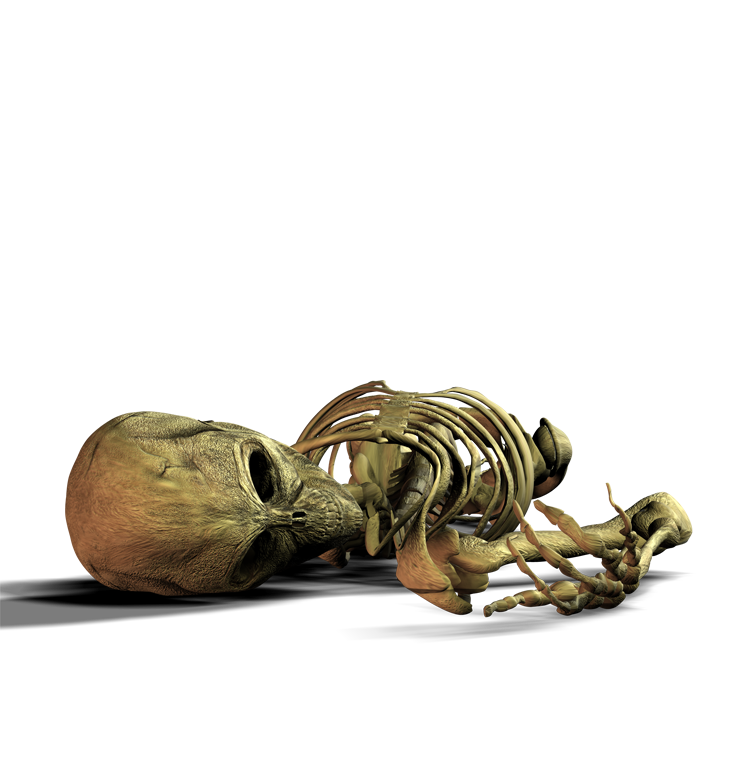
Step 7 - Adding the Skeleton
Open the picture with skeleton and drag it into the manipulation. Place the layer on the top and name it SKELETON. As you can see the skeleton doesn’t fit to the rest of the picture because it´s too saturated and dark. We’ll fix it now. Add new adjustment layer Hue/Saturation and set the value Saturation on -35. Press OK. Right click on this layer and choose the option Create Clipping Mask. This way the adjustment layer affects only the skeleton, the rest of the picture stays untouched.
To make the skeleton lighter and with bit more contrast add adjustment layer Levels and set the Input Levels on 8; 1,29; 205. Press OK and also create clipping mask.

Step 8 - Adding Details to the Skeleton
Since the skeleton is only a very simple render, the texture of bones has very few details which doesn’t look nice. We will add some details now.
Open the grunge texture you used to add details to the ground and drag it into the manipulation again. Place in on the top of the layers and create clipping mask to it affects only the skeleton. Change the Blending Mode on Overlay.
Open another texture from the pack and do the same process with it.

Step 9 - Adding Mist
Mist always creates nice, mysterious atmosphere. To create mist add a new layer on the top of your layers. Name it MIST. Grab Brush Tool (B), select some soft round brush and lower the Opacity on 20%. Pressing Alt click on some bright part of the sky to select its color and then gently paint over the horizon. Change the color frequently to get more realistic result.
Bellow you can see exactly what I painted. The layer with mist has Normal Blending Mode, I just put black layer under so you can see exactly how the mist layer looks.

Bellow it’s show how the manipulation looks so far.

Step 10 - Adding Flowers
Download picture of flower and drag it into the manipulation. There is nothing special on this step. Just duplicate the original picture, resize it, flip it and place it similar as you can see on the final preview.
To add more depth to the picture I made one flower in front little bigger and blur it with Gaussian Blur so it looks out of focus. You can do the same. Just go to Filter > Blur > Gaussian Blur... and set the Diameter on about 1 px.
Step 11 - Adding Shadows
Since we want to the picture looks realistic we need to add shadows to the flowers. I will show you the process on the main flower which grows around the skeleton´s hand. The process will be same with the rest of the flowers.
Duplicate the flower and flip it vertical (Edit > Transform > Flip Vertical). Press Ctrl+T and rotate this new layer so it has the same direction as the light.

Click on the layer with shadow pressing Ctrl. It activates the mask of the layer. Grab Brush Tool (B), pick black color and fill with it the selection. Press Ctrl + D to deselect it. Now go to Filter > Blur > Gaussian Blur... and the Radius on 2,5 px. Press OK. Lower the opacity on 60%.
Do the same with the bigger flowers which are in the forepart of the picture.
After this step your manipulation should be similar ti the one bellow.

Step 12 - Improving the Light
The light scene is quite boring yet. It deserves more contrast. Add a new layer on the top of your layers and name it MORE LIGHTS. Grab Gradient Tool (G) and fill the layer with solid black color.
Now go to Filter > Render > Lens Flare.... Choose one of the Lens Types (I chose 105mm Prime) and set the Flare Center similar as you can see bellow.

Change the Blending Mode of this layer on Screen. It causes that the black color become invisible and flare nicely blends to the rest of the picture.
Place the brightest spot of the flare on the area where the light source is . Press Ctrl + T and rotate the layer to it has same direction as can be seen bellow.
![19[1]](http://photoshoptutorials.ws/images/stories/CreateaDeathlyPhotoManipulation_EFD/191.jpg "19[1]")
The brightest spot of the flare is too bright and it doesn´t look nice. To make it bit darker add new layer mask. Grab Brush Tool (B), select some soft round brush, lower the opacity on 30%, pick black color and gently paint over that spot.
Step 13 - Adding the Birds
This is another really simple step. Download some bird brushes ( e. g. these) and install them into the Photoshop. If you don´t know how you can take a look at this tutorial.
Create a new layer on the top of your layers and name it BIRDS. Grab Brush Tool (B) and select the brushes you´ve just installed. Pick some dark grey color. I don´t recommend you to use the pure black since things in distance are usually lighter and also because black color looks in most cases to harsh and not much realistic. In nature you don´t see many pure black things - they are dark drown, dark green etc.
You can choose some dark color from the sky for example. Now paint the birds.
Bellow you can see how the manipulation looks so far.

Step 14 - Global Changing Of Colors
All the main elements of the pictures are placed. In this and next steps we will change color tones, brightness and contrast to give it the desire mood.
We’ll start with global color adjustment. To do that we use Selective Color. It’s a great tool which allows you to change separately each color tone which gives you much more freedom than using e.g. Color Balance. If you’re not familiar with this adjustment tool I would recommend you to look at this video which explains the basic features of it and on practical examples shows how Selective Color works.
Add new adjustment layer Selective Color on the top of your layers and set the Colors as you can see on the picture.

On the picture bellow it’s shown how the picture looks with and without the Selective Color adjustment.

Step 15 - Redder Flowers
To add more contrast and make the flowers more pronounced they should be redder. Add new adjustment layer Selective Color on the top of your layers again. This time we will change only Reds, other colors stay the same as before.
Set the Selective Color as it is shown and press OK.

As you can see the adjustment affects also the skull which doesn’t look nice. To fix it add layer mask to this layer and paint with black over the skull. The unwanted red tones disappear.
Bellow you can see how the manipulation looks after these steps.

Step 16 - More Global Adjustments
According to me the current picture is too bright. To fix it add new adjustment layer Levels on the top of your layers and set the Input Levels on 0; 0,79; 255. Press OK.

Previous darkening makes the yellow tones too saturated which ruins the cold atmosphere we’ve try to create in previous steps. To fix that add new adjustment layer Hue/Saturation on the top of your layers. In Edit option choose Yellows and set Saturation on -30. Press OK.

Bellow you can see how these adjustments affect the picture.

Step 17 - Applying Texture
Adding textures to your work is great way how to unify the look of the picture, add more details and also add bit of painted look.
Download some nice grunge texture. I used one from the grunge pack which was already used in previous steps but feel free to use any texture you like. Good thing about the grunge textures which were used in this tutorial is that they are bit darker on the edges and lighter in the middle. It adds more plasticity to your picture and also create decent vignette.
Drag the texture you’ve chosen into the manipulation. Name it TEXTURE and place it on the top of the layers. Now experiment with Blending Modes and Opacity till you get the look you like. I set the Blending Mode on Soft Light and lower the Opacity on 45%.
Step 18 - Changing the Light Scene
There is still something wrong with the global lights and shadows. There is the light source on the right side of the horizon but if you look carefully the ground around the horizon is not lighter, but it should be. We will fix it now.
Add new layer on the top of your layers and name it e. g. HORIZONT LIGHT. Grab Brush Tool (B), select some soft round brush and pick some bright color from the sky. Lower the opacity on about 30% and paint carefully over the ground which is close to the light source.
Then pick some dark color of sky and paint over the areas which are farther from the light source.
Bellow you can see what exactly I painted. To make it well visible I add grey layer under.

And there you can see how the whole manipulation looks.

Step 19 - Last Changing of Colors
There is only few things left. We will change the colors little bit, add vignette and correct the levels.
First let´s change the colors. Add new adjustment layer Gradient Map on the top of your layers. Choose the basic Red, Green preset and press OK.

Change the Blending Mode of this layer on Soft Light and lower the Opacity on 30%.
Step 20 - Adding Vignette
Vignette is a great tool if you want to catch viewer’s attention longer in the picture. It directs his look into the center of the picture.
Add new adjustment layer Levels on the top and set the Input Levels on 0; 0,77; 255. Press OK.

Grab the Gradient Tool (G), pick solid black color and fill the layer mask of this layer. It causes that the adjustment disappear. Now grab the Brush Tool (B), select soft round brush and pick white color. Paint over the edges of the picture. The adjustment appears and make nice vignette.

Step 21 - Correcting the Levels
The one last thing you need to do is to correct levels little bit. Grab the Marquee Tool (M) and select the whole picture. Press Ctrl + Shift + C to copy the picture merged. Now press Ctrl + V to paste it. Place this layer on the top of the layers. Now go to Image > Adjustments > Auto Levels or just press Ctrl + Shift + L. It adds bit more contrast to the picture.
Conclusion
Congratulation! You’re finished. Thank you for reading this tutorial and hope that you’ve learnt something new or found inspiration for your new work. I like to see your work based on this tutorial!
Have you all nice day!

source:photoshoptutorials.ws/


