Long Exposure Sunset Photoshop Tutorial
Tutorial Details:
- Program: Adobe Photoshop CS2
- Version: 9
- Difficulty: Medium
- Estimated Completion Time: 1 to 1.5 hours
Resources:
- Sunset S7 Stock Image by LemnosExplorer (Royalty Free License)
- Old Buggie by Michael Vincent Manalo (Royalty Free License)
- Paper Texture 1 by wojtar-stock (Royalty Free License)
Step 1 - Create a new image
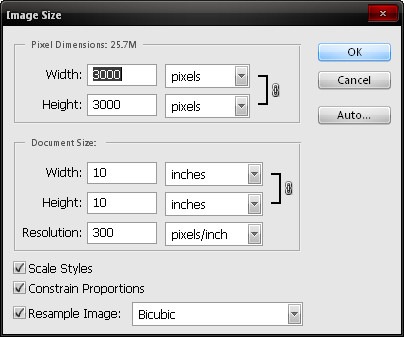
To start off, let’s create a new file, go to the Menu bar and click on File > New and use these settings:
- Width: 3000px
- Height: 3000px
- Resolution: 300 dpi
- Color Mode: RGB Color; 8bit
- Background Contents: Transparent
Step 2 - Create the background
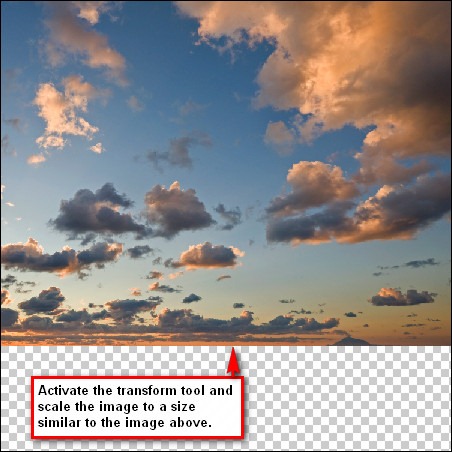
The first step in creating our background is the creation of the sky. Open “Sunset S7 Stock Image “from the folder you’ve saved it into and then drag it to our canvas by using the Move tool (V). With the image on the canvas, click on the layer and then rename it to “sky”. To rename a layer, just double click on the word “layer 1” and you will be able to rename that layer. After that, activate your Transform tool by pressing Ctrl/Cmd + T and transform the image as seen below:
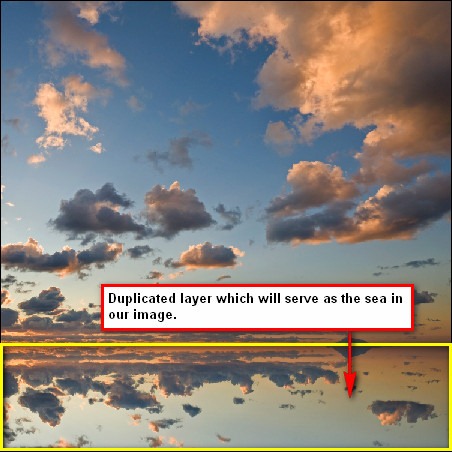
Now let’s create the sea. This time, we won’t be opening any sea stock image, for we would still be using the “Sunset S7 Stock Image “. Duplicate that layer by pressing Ctrl/Cmd + J and then activate your transform tool; right click on the image to bring up the contextual menu of the transform tool. As soon as the menu is shown, click on Flip Vertical which should create an illusion of reflection. This layer would serve as the sea. Rename that layer now to “sea”.
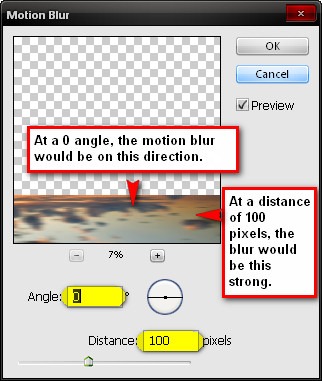
Our aim here is to create a pseudo long exposure shot, so we will be applying blur filter effects to produce the desired effect. First, click on the “sea” layer. With that selected, go to the Menu bar and click on Filter > Blur > Motion Blur and input these settings:
- Angle: 0’
- Distance: 100px
Now click on the “sky” layer and duplicate it; input the same blur filter settings like we used above. Note: When you apply the blur tool on the sky image, the image will be reduced since the Motion Blur technically resizes that image and in turn stretches its overall size. Duplicating the image would fill those missing regions when the Motion Blur effect has been applied.
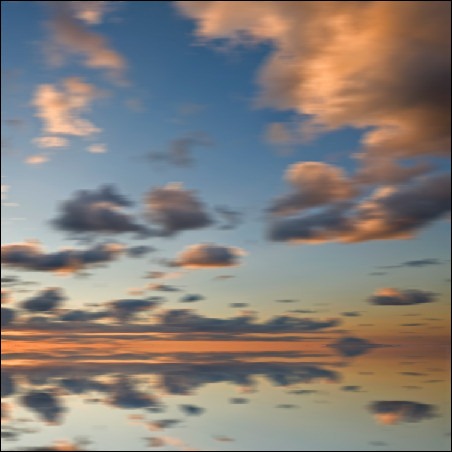
Now we’re finished with the background, so it’s time we group the layers. Click on Layer on the Menu bar and once it opens click on New > Group and change the group’s name to “Background”, you may also click on the Create New Group button from the Layer window.
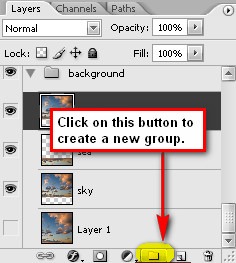
Step 3 - Insert the Buggy
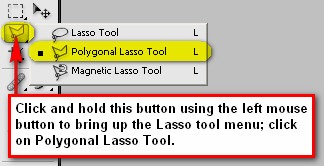
In this step, we will be adding our subject, the Classic Volkswagen Buggy; open the “Old Buggy” stock image from the folder you’ve saved it into and then activate the Polygonal Lasso tool (L) because we would need to remove the Buggy from its background.
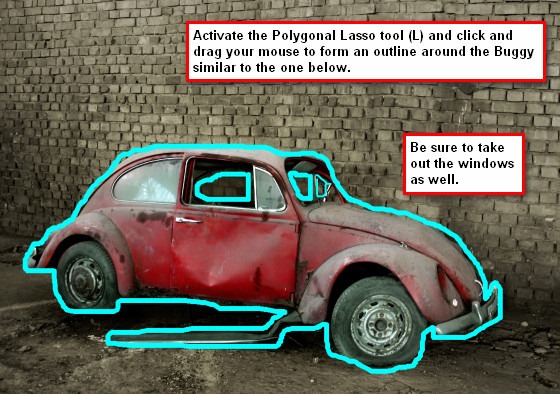
Now after you’ve made the selection, we would need to drag the Buggy from its original image to our canvas. Drag it to our canvas using the Move tool (V) and then rename its layer to “Buggy”. We would need to align it with our background so activate your transform tool (Ctrl/Cmd + T) and pick Rotate from its menu; Rotate the image as seen on the image below:
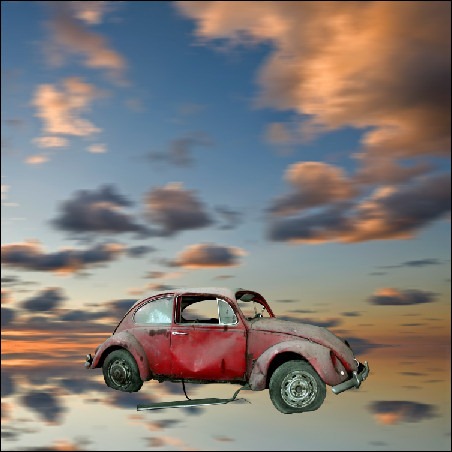
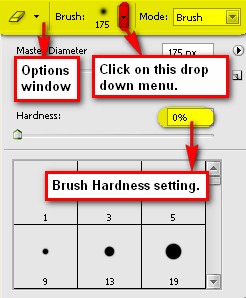
To create the reflection illusion we would need to erase some parts of the “Buggy” layer. Activate your Eraser tool (E) and input these settings:
- Brush size: 175px
- Hardness: 0%
- Opacity: 100%
- Flow: 100%
Note: To activate the hardness option click on the drop-down menu beside the word Brush on the Options window.
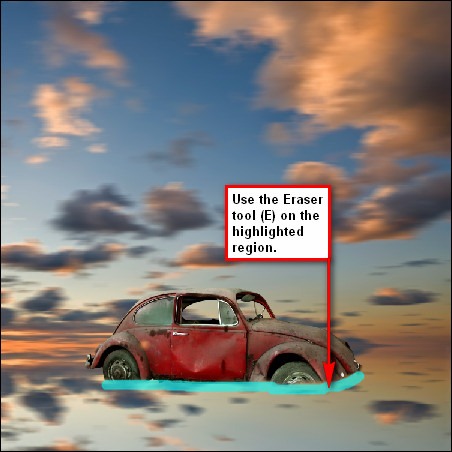
Let’s create the reflection for our Buggy. Click on the “Buggy” layer and press “Ctrl/Cmd + J” to duplicate it. Rename that layer to “buggy reflection”. Now let’s apply the same technique we did on our sky image. Transform the image and click on Flip Vertical from the transform tools’ contextual menu.
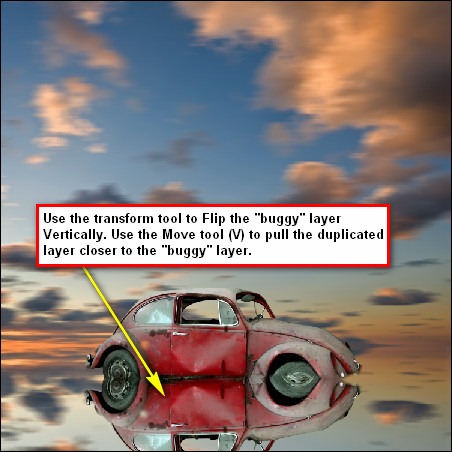
Now let’s make it look more like a real reflection. Left click on the “buggy layer” and go to Filter > Blur > Motion Blur on the Menu bar and input these settings:
- Angle: 90’
- Distance: 75px
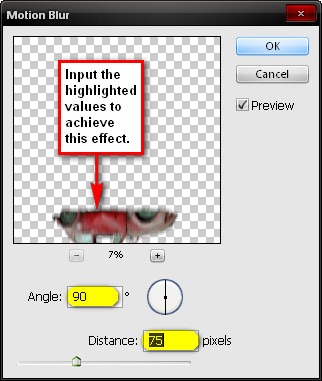
To improve the authenticity of the reflection we would need to erase some areas. Activate your Eraser Tool (E) and then input these values:
- Brush size: 400px
- Hardness: 0%
- Opacity: 100%
- Flow: 100%
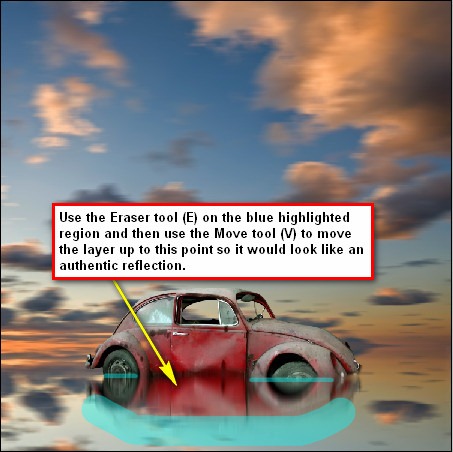
Now let’s group these layers and name that group: “buggy and its shadow”.
Step 4 - Creating the shadows and the light and correcting the colors of the Buggy
In this step we would be using the Burn tool (O) to darken some light parts of the Buggy; we will be using the Brush tool (B) to create light and shadows and use the Clone Stamp tool (S) to retouch some errors in the Buggy and using the Color Balance to adjust the colors of the Buggy.
Note: Include all the layers that you would be creating on this step within the “Buggy and its shadow” group.
First let’s fix the error in the window which has a reflection from the camera’s flash. First, let’s adjust the zoom level on the Navigator window; input a zoom level of 100%.
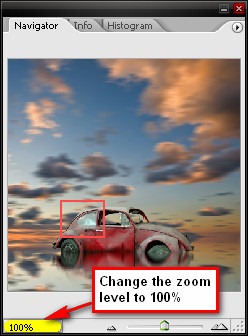
Activate the Clone Stamp tool (S) and then input these settings:
- Brush size: 50px
- Hardness: 0%
- Opacity: 100%
- Flow: 100%
To use the Clone Stamp tool (S) first you’d have to click on area which you want to clone (to do this, press Alt + Left-click) and once you’ve selected an area, left-click on the spot you want replaced.
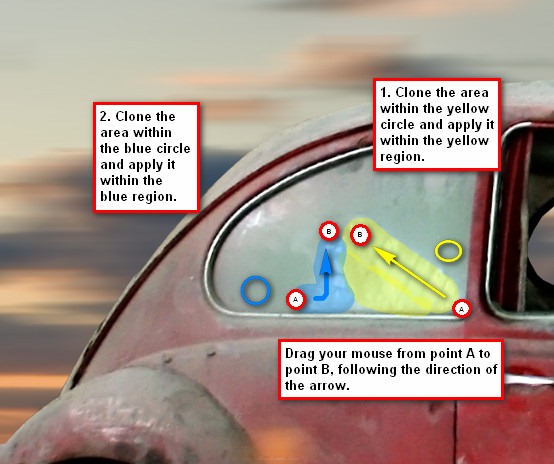
The result should be similar to the image below after cloning:
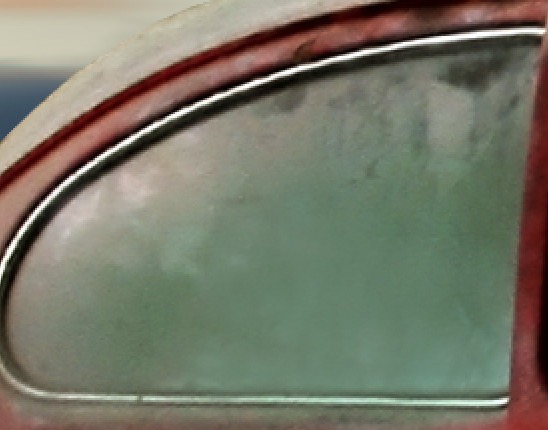
Now let’s adjust the colors of our subject. Click on the “Buggy” layer and then go to the Menu bar and select Image > Adjustments > Color Balance and input these values, respectively:
- Color Levels: +15, 0, -15
- Tone Balance: Midtones
- Preserve Luminosity: Checked
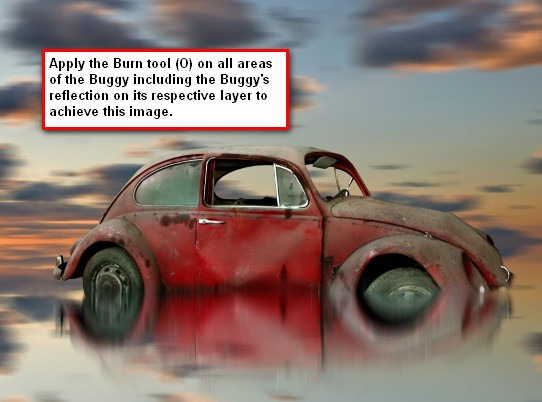
Now let’s use the Burn tool (O) to alter the light on the Buggy.
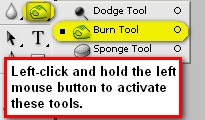
Activate the Burn tool (O) and input the values below:
- Brush size: 300px
- Hardness: 0%
- Opacity: 15%
- Flow: 100%
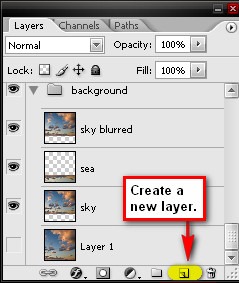
Now let’s create the shadow to where the Buggy is stationed. Create a new layer by pressing Ctrl/Cmd + Shift + N and press OK. You may also do that by going to the menu bar and clicking on Layer > New > Layer or simply by pressing the Create New Layer button on the Layer Window which is represented by a paper-like icon beside the Delete Layer icon (trash-can). Rename the new layer to “shadow”. This layer should be above all the layers that have been created.
Activate the Brush tool (B) and input the following values:
- Brush size: 600px
- Hardness: 0%
- Opacity: 25%
- Flow: 100%
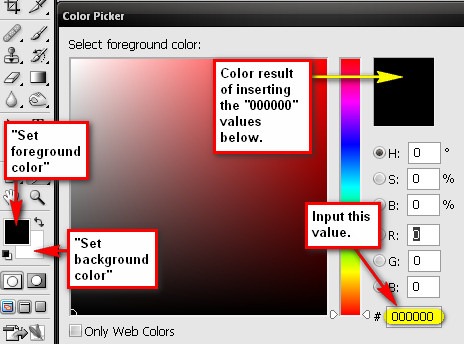
- Brush Color: 000000
Note: The brush’s color can be changed from the Color Picker menu. It can be activated by clicking either on the “Set foreground color” or “Set background color” on the Tools window.
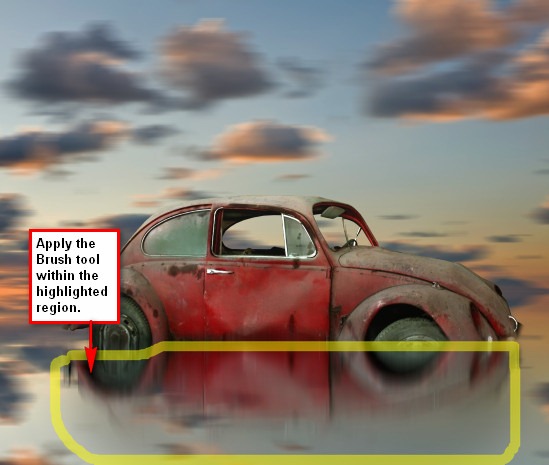
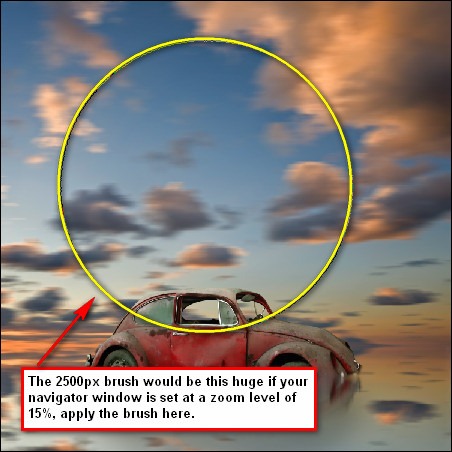
Create a new layer and rename it to “light”. We will be adding light to the center of the image to improve the sky’s contrast. Put this layer on top of the “shadow” layer.
Activate your Brush tool (B) and input the following values:
- Brush size: 2500px
- Hardness: 0%
- Opacity: 8%
- Flow: 100%
- Brush color: ffffff
Step 5 - Create a Vignette
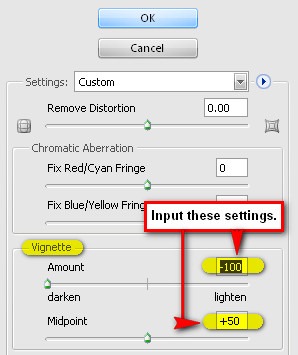
In this step, we would be creating a Vignette to make our subject stand out. To start off, go to the Menu bar and click on File > New and use the same settings we used to create our canvas. (Refer to Step 1). But take note, the background contents should be: WHITE. Once it has been created, go to Filter > Distort > Lens Correction. Find the tab Vignette and use these settings:
- Vignette amount: -100
- Midpoint: +50
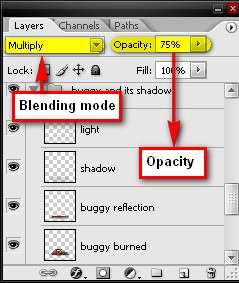
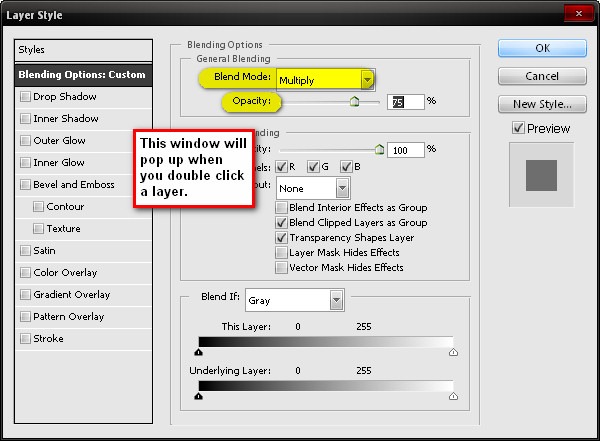
Now that that’s done drag the vignette to our canvas using the Move tool (V) and put it on top of all the layers that we’ve created, and then set its Blending mode to Multiply and its Opacity to 75%.
Note: The Blending mode can be found in the Layer window, the Opacity tab is just beside it. You may also access the Blending mode by double clicking on the layer that you want the Blending mode changed.
Step 6 - Adding the Texture
Now we will be adding our texture to give the image a distinct feel and color. Open “Paper Texture 1” and drag it to our image using the Move tool (V). Once it is on our canvas, activate the Transform tool to resize it to fit our canvas.
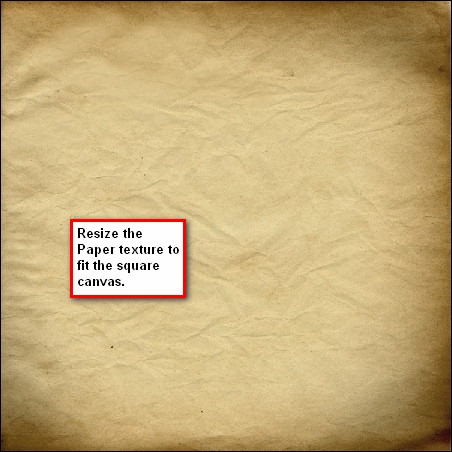
Now let’s change its blending mode; input these settings:
- Blending mode: Soft light
- Opacity: 20%
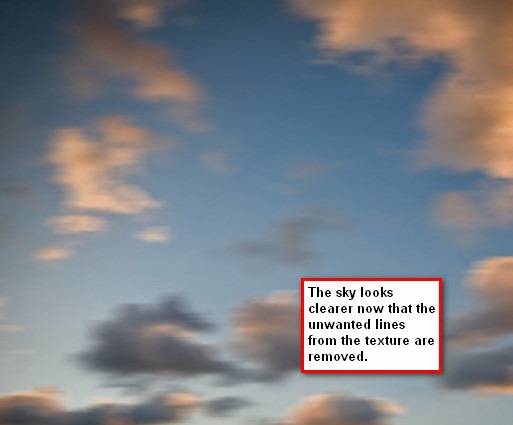
After you’ve done that, you’d notice that there are some unwanted lines on the sky which resulted from the texture that we’ve added. We’ll need to remove that and in order to do so; we’ll need the Clone Stamp tool (S). Activate the tool and input these settings:
- Brush size: 300px
- Hardness: 0%
- Opacity: 100%
- Flow: 100%
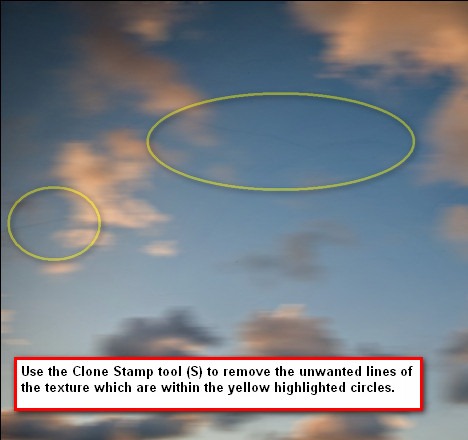
See the image below for the result of using the Clone Stamp tool.
Step 7 - Retouch the image
In this step, we will be giving the image a retouch. We will recolor it, and make it more breathtaking. Click on the “Create new fill layer or adjustment layer”.
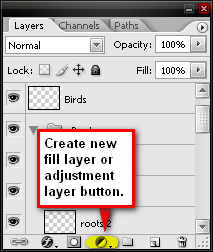
Upon clicking that button pick Solid Color from the menu. Opening the Solid Color from the menu opens the Color Picker box. Upon opening, input these values on the “#” box.
- #: 000326
When the box closes, change the Blending mode to “Exclusion” and set the Opacity to 40%. Create another Solid color adjustment layer and then input this value on the “#” box.
- #: ef851e
Change the Blending mode to “Soft Light” and the Opacity to 20% when the box closes. Now let’s create a Gradient Map adjustment layer. Click on “Create new fill layer or adjustment layer” button and choose Gradient Map from the contextual menu.
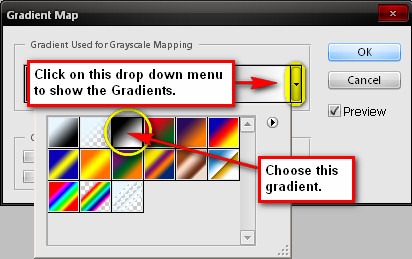
Press OK and once it appears on the Laye r window, change its Blending mode to Luminosity, while leave the Opacity unchanged. Next, let’s create a Color Balance adjustment layer. Once the Color Balance box opens, input these values, respectively:
- Color Levels: +15, 0, -15
- Tone Balance: Midtones
- Preserve Luminosity: Checked
Now, click on the “Create new fill layer or adjustment layer” and let’s make a Levels adjustment layer. When the box opens, input these values:
- Channel: Blue
- Input levels: 15, 1.00, 255
- Output levels: 0, 255
Next, let’s adjust the Brightness/Contrast; create a Brightness/Contrast adjustment layer and input the following values:
- Brightness: 6
- Contrast: 5
Let’s create another Gradient Map adjustment layer once again, use the same Gradient like what we used earlier. After choosing the Gradient, change the Blending mode to “Luminosity” and the Opacity to 70%.
Now to boost the Saturation or the overall strength of our image, we’ll be creating a Hue/Saturation adjustment layer. From the “Create new fill layer or adjustment layer” pick Hue/Saturation and input these values as the box opens:
- Edit: Master
- Hue: 0
- Saturation: 5
- Lightness: 0
Step 8 - Sharpening and saving as PSD
Before merging the layers or flattening the image, you may want to save it as PSD file so you may edit the image again in the future. After that, let’s sharpen the image. Go to Filter > Sharpen > Smart Sharpen and input these values:
- Amount: 125%
- Radius: 1.0
- Remove: Gaussian Blur
- More Accurate: Checked
Now you may also sharpen it more by adjusting its light and its contrast. To do that go to Filter > Sharpen > Unsharp mask and input these values:
- Amount: 20%
- Radius: 50.0 px
- Threshold: 1 level
Step 9 - Saving the file as a TIFF file and as a Jpeg file
After you’ve done the sharpening, you may flatten the image by right clicking on any layer and clicking Flatten Image. You may want to save it as a TIFF file first, which would allow you to do some quick changes to the image, like adjustment layers and fill layers without reducing its quality. You can view cracks in the image through the Histogram. Finally, save it as a .jpeg image.
Note: Over edited .Jpeg files would reduce the image’s quality, especially in print.
Final Results
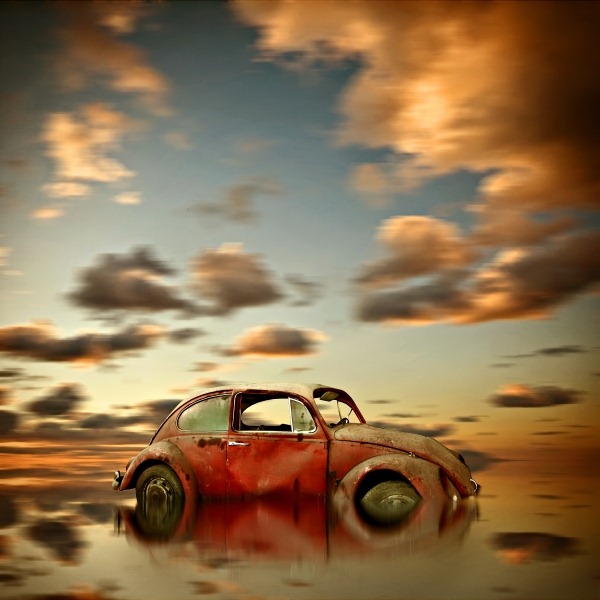
source:photoshoptutorials.ws/
No comments:
Post a Comment