Note: This photo effect is titled Gritty HDR due to the common use of the name and is not intended to be an accurate description of the effect. HDR means high dynamic range but this photo effect does not require the use of HDR (High Dynamic Range) photos. This effect is better described as a grungy tone mapping effect that can be done without the use of HDR images.

Gritty HDR Photoshop Tutorial
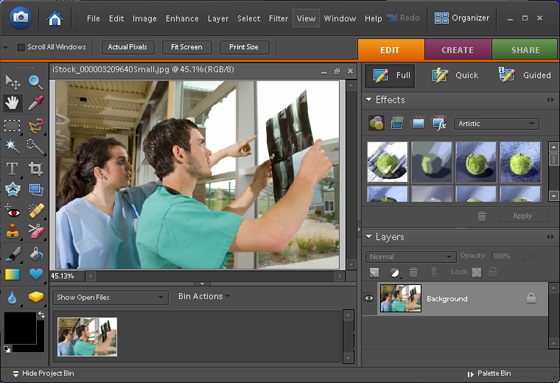
Step 1: Open a photo into Photoshop
Start by opening an image into Photoshop. To do this, run Photoshop and choose File> Open. Browse and select the photo you would like to edit then click OK.
Photoshop CS2 or Older:
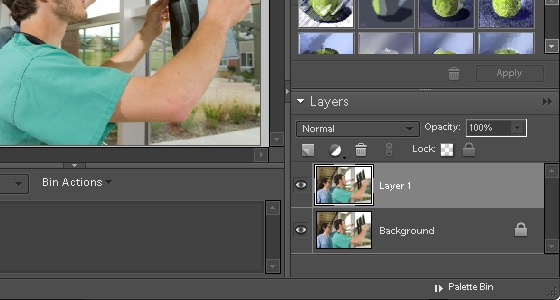
Select the layer and press Ctrl+J or go to Layer> Duplicate Layer to create a duplicate of the layer. Do not do any editing on the Background layer. Instead, work on the Background copy layer. This will ensure you always have a copy of the original unedited image in case you require it for further post processing.
Photoshop CS3
If you are using Adobe Photoshop CS3, right mouse click on the layer an select "Convert to Smart Object". This will allow you to apply Smart Filters which can be edited at anytime and will keep the file size smaller.

Step 2: Make details more visible with the Shadow/Highlights tool
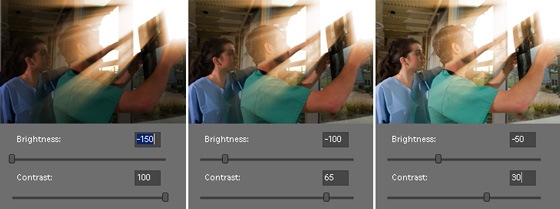
First, we'll mimic the tone mapping effect by using the Shadow/Highlights tool. Choose Image> Adjustments> Shadow/Highlights. In the Shadow/Highlights tool, adjust the settings so that all details are easy to see without making the photo look fake.

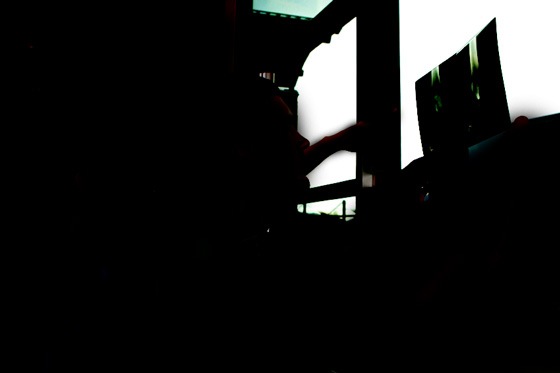
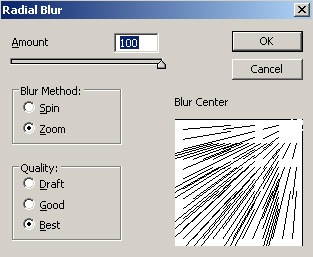
Step 3: Add a halo effect with the Unsharp Mask filter
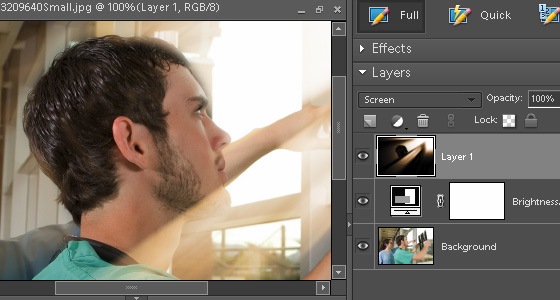
Choose Filter> Sharpen> Unsharp Mask. We will not be using this filter to sharpen the image. Instead, we'll use this filter to add a high-contrast halo effect to the image. In the Unsharp Mask filter, set the Radius to 250 pixels and adjust the amount to get an effect that you desire.

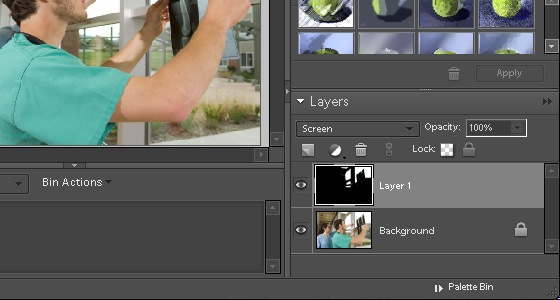
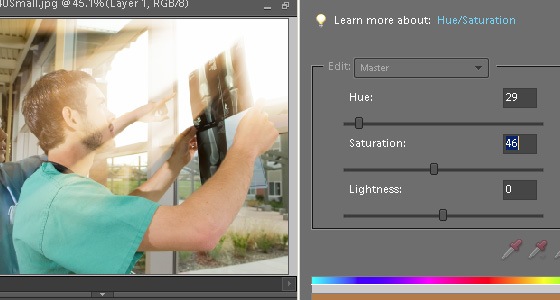
Step 4: Add a Black and White adjustment layer
Photoshop CS2 or Older:
Select Layer> New Adjustment Layer> Hue/Saturation. Set the Saturation to -100 and click OK.
Photoshop CS3
Select Layer> New Adjustment Layer> Black and White. A window with the settings will appear. For now, just click OK without touching any of the settings and change the blending mode of the Black and White adjustment layer to Overlay.

Step 5: Adjust the Black and White adjustment layer settings (For Photoshop CS3 only)
Photoshop CS2 or Older:
Skip this step
Photoshop CS3
In the previous step, we skipped the settings to change the layer blending mode. Now, we'll go back and edit the settings that we previously skipped. The reason for this is so that we can see the live preview effect of the Black and White adjustment layer with Overlay blending mode instead of the Normal blending mode.
Double-click on the Black and White adjustment layer and a Black and White window will appear. In this window, adjust the settings to get the results you desire. Start by scrolling through the Presets and find the one that closely matches your

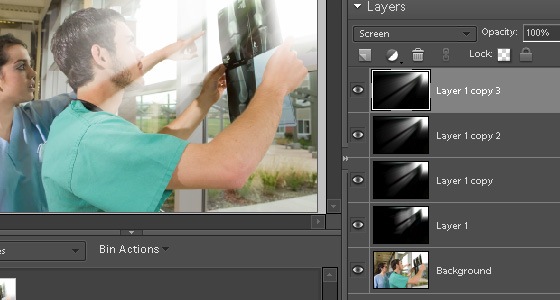
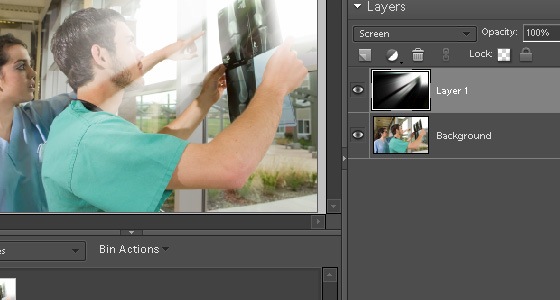
Step 6: Create a new layer named "Grain"
Choose Layer> New Layer or press Ctrl+Shift+N. Type in "Grain" (without the quotations) as the layer name and select Overlay as the blending mode. We will use this layer to add noise to the image.

Step 7: Add a 50% gray fill
Select the Grain layer that we created in the previous step. Then, press Ctrl+Backspace to access the Fill tool. In the Fill tool, select 50% Gray in the Use drop down menu and click OK. This will fill the layer with 50% gray.

The reason we're using 50% gray is because it will not be visible on many layer blending modes including Overlay. This means that the gray will not be visible on our Grain layer because it's using Overlay as the blending mode. So why did we do this if it does nothing?
Some filters including the Add Noise filter we'll be using in the next step won't work on an empty layer. In order to use it, we had to fill the layer with 50% gray and change the blending mode to one of the blending modes that won't show the 50% gray.
Step 8: Add Noise
Choose Filter> Noise> Add Noise. In the Add Noise tool, checkmark Monochromatic and click OK.

Step 9: Blur the noise
Choose Filter> Blur> Gaussian Blur and enter 0.3 in the Radius setting then click OK.

Step 10: Increase the contrast of the layer with Auto Levels
Choose Image> Adjustments> Auto Levels. This will increase the contrast of the layer making the noise extremely visible. Reduce the opacity of the layer until you get the noise level you desire.


Final Results
Original Image

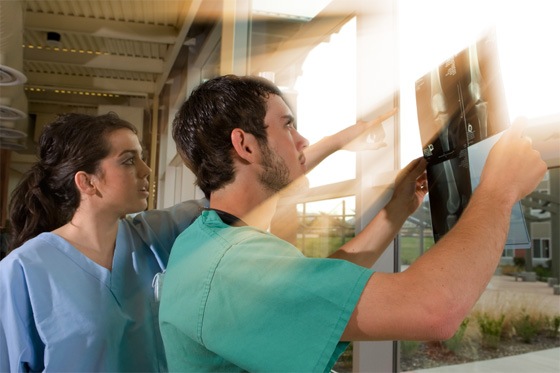
Gritty HDR
source::http://photoshoptutorials.ws/photoshop-tutorials/photo-effects/gritty-hdr/all-pages.html