Stylish Surreal Portrait
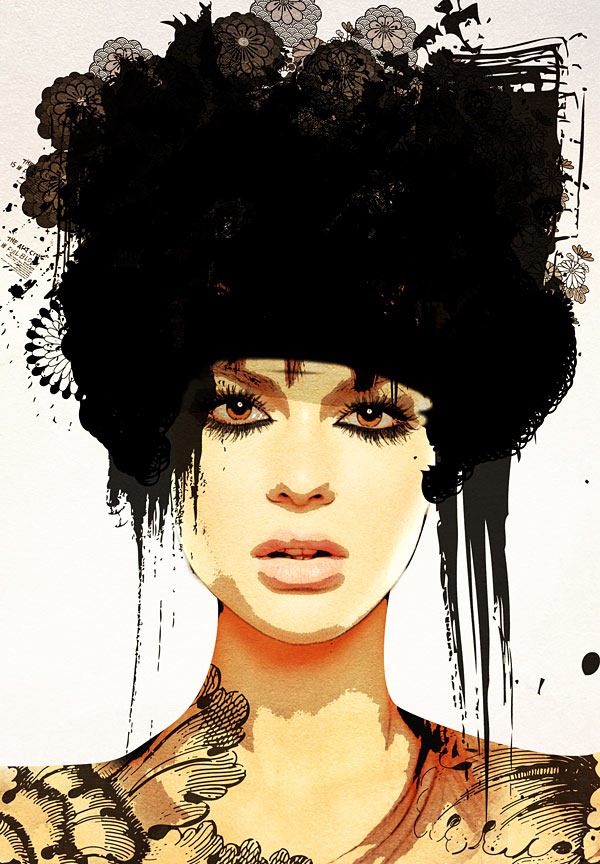
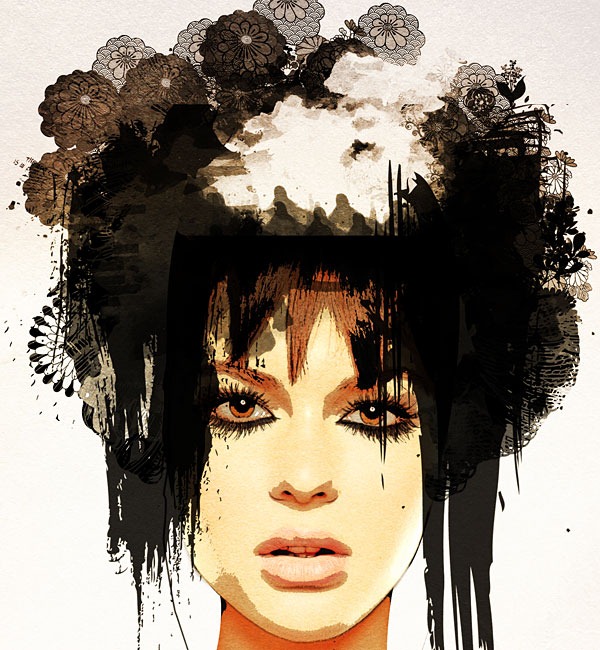
Preview of Final Results
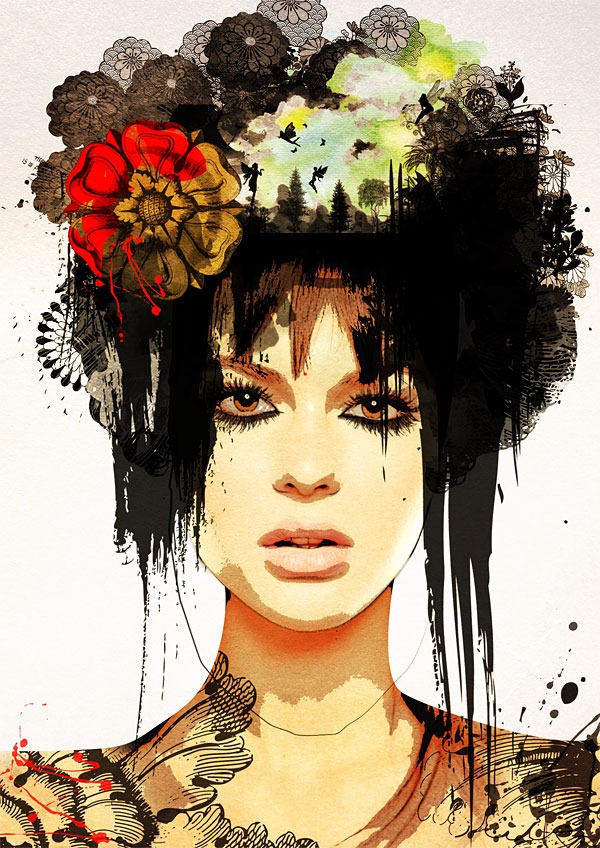
Stylish Surreal Portrait Photoshop तुतोरिअल
Step 1 - Brainstorm
I love the concept behind surrealism. Surrealism is a style of art that uses visual imagery from the subconscious mind to create art without the intention of logical comprehensibility. - Surrealism.com. Let's not limit our creativity to logic and let's design a portrait that will be a fusion of spunk, futuristic and Victorian!
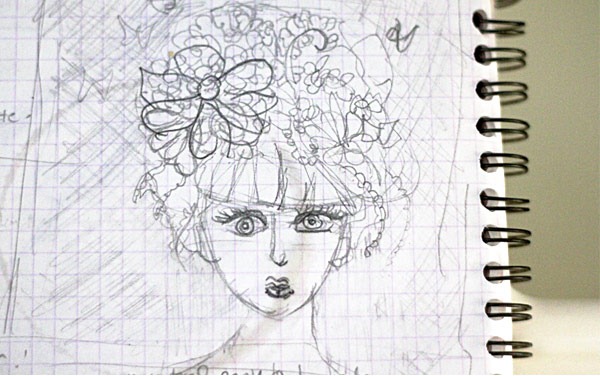
Gather some inspiration to get your creative juices started. For this type of design I find it best to put my idea to paper before going into Photoshop to create the artwork. Right now it's just a rough sketch to help you visualize your concept. It doesn't matter if the end result is far from your original sketch. I drew a head overflowing with flowers and butterflies.
Step 2 - Set up
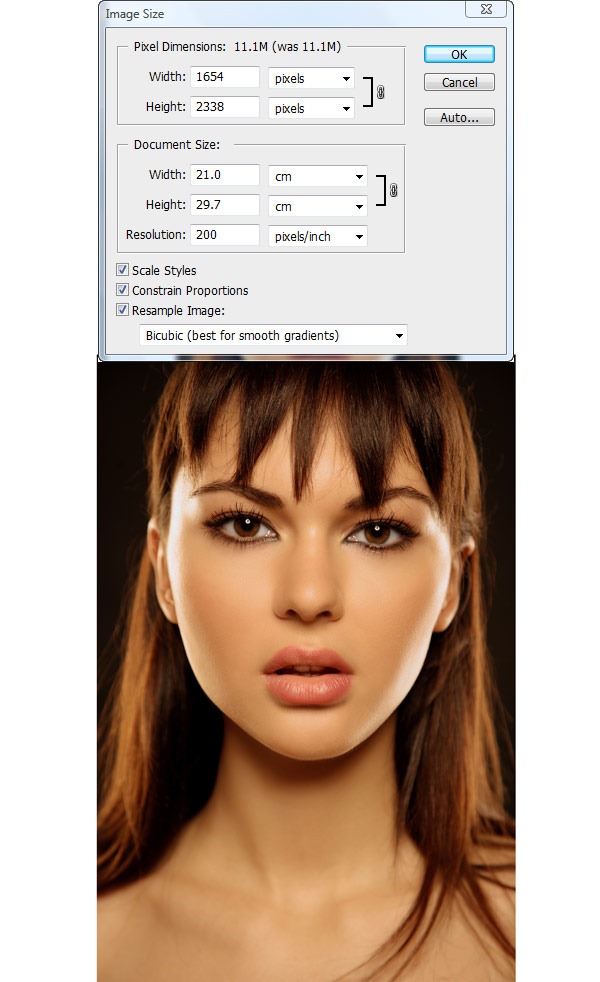
Create an A4 size canvas with a decent print quality of 200dpi (optimal is 300dpi). Let's start off by working on the woman to give her a fashionable look. Open the woman image and place it at the center, bottom of the page.
Step 3
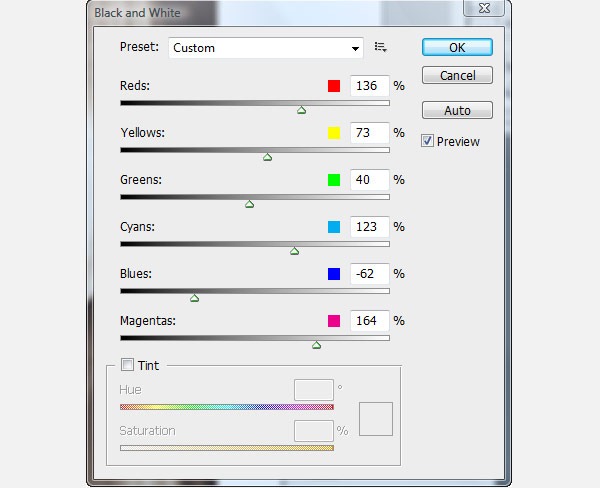
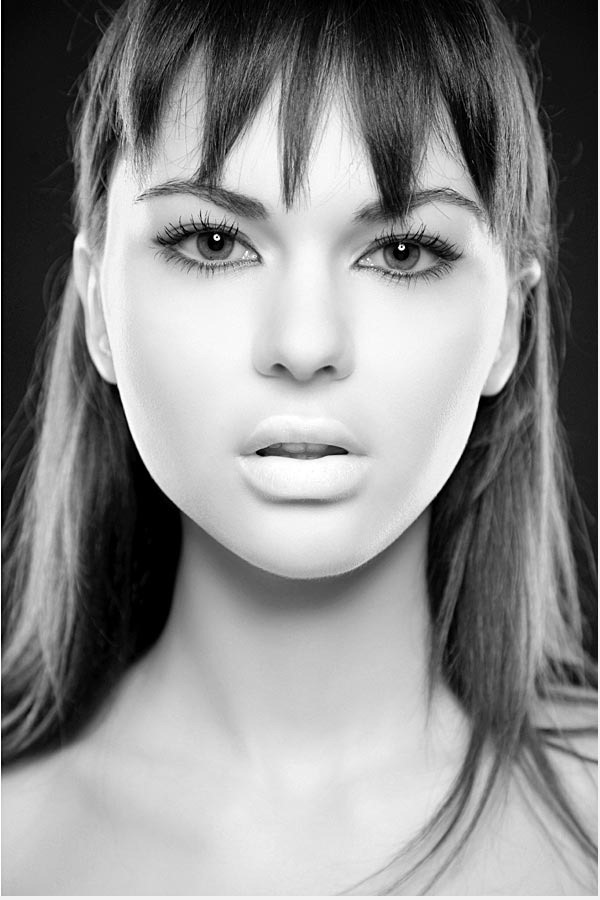
Duplicate the woman image and apply a Black & White adjustment ( Image > Adjustments > Black & White) on it. Adjust the values for the different colors until you get a sharp black & white image with high contrasts. In a fashion portrait, the focus is usually on the woman's eyes and hair. Additionally I want her face contours to be more defined as I'm planning to extract her face from the image later.
Step 4
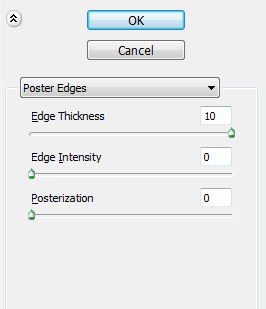
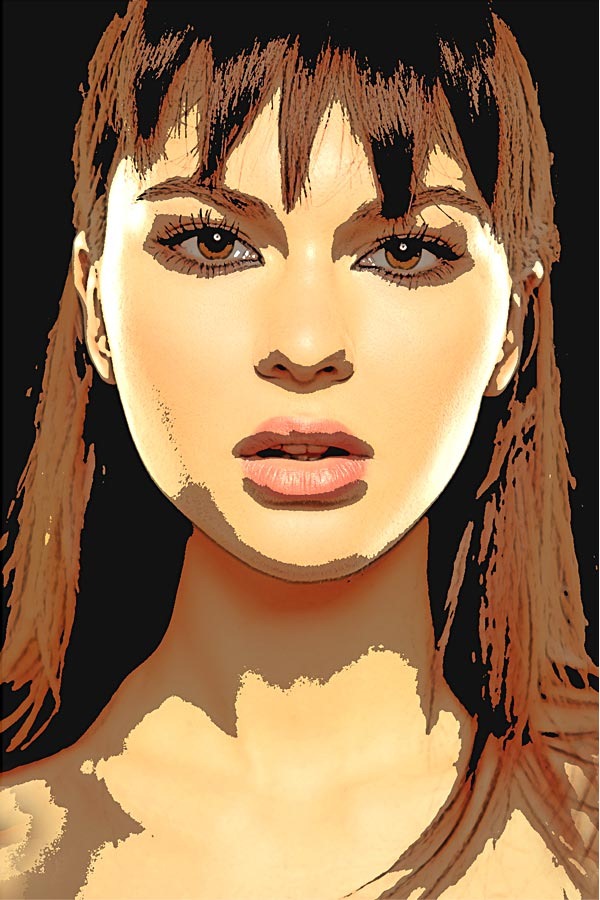
Make a second copy of the woman's image and apply a Poster Edges Filter (Filter > Artistic > Poster Edges) with a maximum edge thickness of 10 and the bring the rest of the settings to 0. This gives us a highly stylized image and a beautiful glowing skin.
Step 5
The “poster edge” layer should be on top of the “black & white” and it's Opacity should be set to 90%.

Step 6
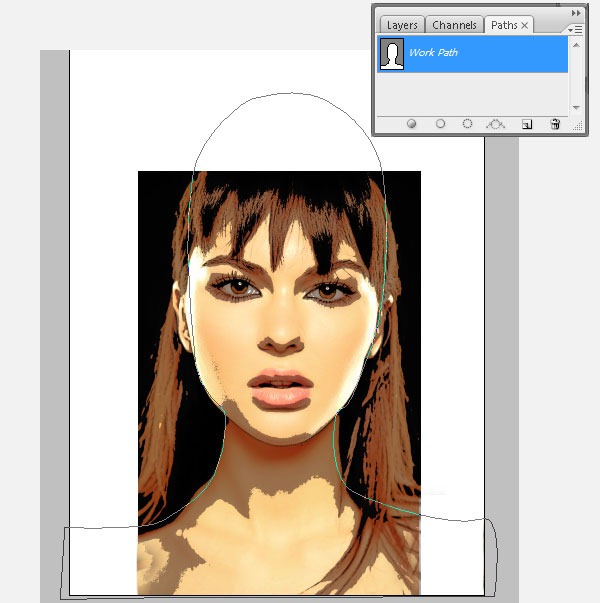
We will use the Pen Tool (P) to extract the background and hair and keep her face and torso. There are a few reasons for using this method. One is for clean edges, two we can modify the shape at any point in time and three we can reuse the path for other purposes. Use the Pen Tool (P) set to Paths.

Step 7
Carefully plot around the face and shoulders contours ignoring the hair. Make a dome shape for her head where it is cropped and continue the shape of her shoulders as well. With the Pen Tool (P) selected, press Cmd/Ctrl key and drag individual points to adjust the shape of your path.
Step 8
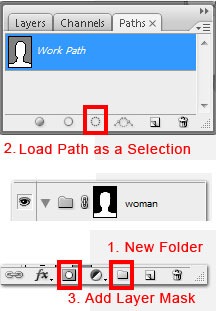
Next we will apply this path to a folder that will contain all our layers for textures, colors, effects pertaining to the woman's face and body. Create a New Folder(1). Load the woman's path as a Selection (2). Add a Layer Mask to the New Folder (3).
Step 9
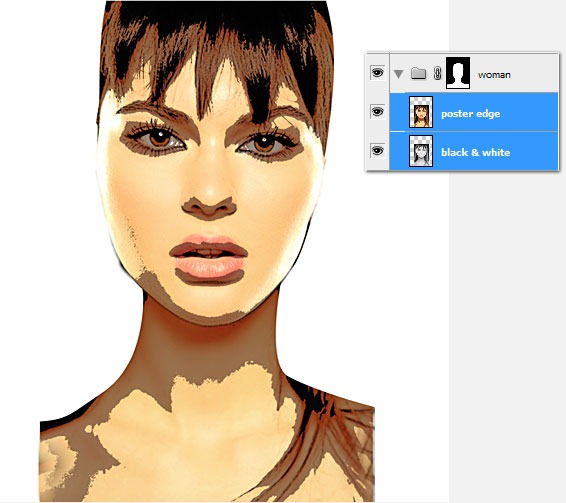
Move both the “poster edge” and the “black & white” layers into the folder to view the result. You may need to refine the mask to include the nice black outline of her face. To do so use a small soft round brush and paint over the folder's mask. All New Layers that we'll be creating in the next few steps should be created inside this folder.
Step 10
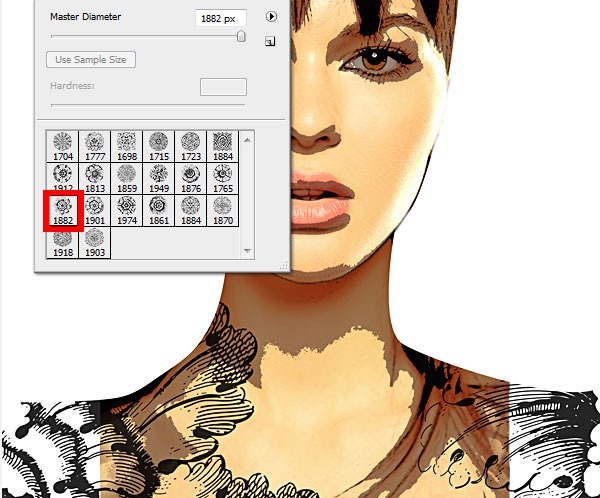
Let's add some funky clothes on her. Load the Victorian Brushes and use the brush (1) at it's actual size. In black, using the Brush Tool (B) paint one flower on her left shoulder and another on her right shoulder.
Step 11
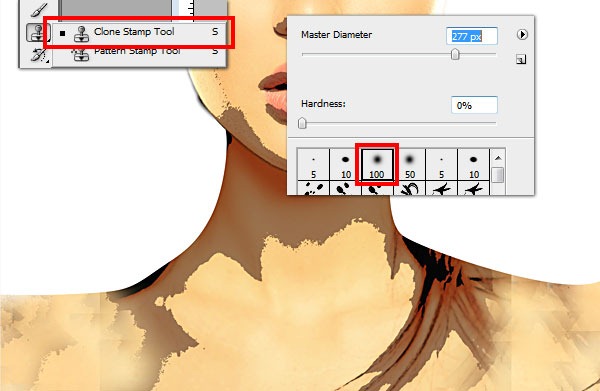
A quick way to color in her missing shoulders is through the Clone Stamp Tool (S). Use a soft round brush of about 180 – 280 px. Alt pick an area of her body (layer “poster edge”) and apply it to her shoulders. Continue to pick and patch her shoulders very roughly. It doesn't have to be smooth and perfect since they are hidden beneath her clothes. Moreover the rough patches will look stylish and blend with the overall look in the end.
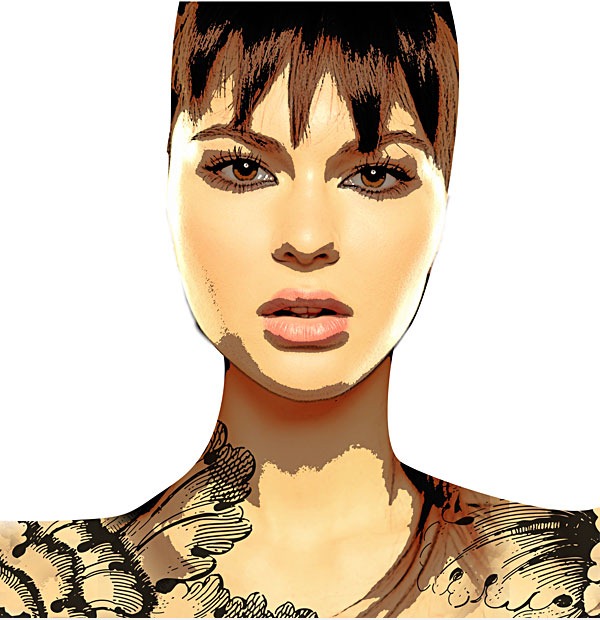
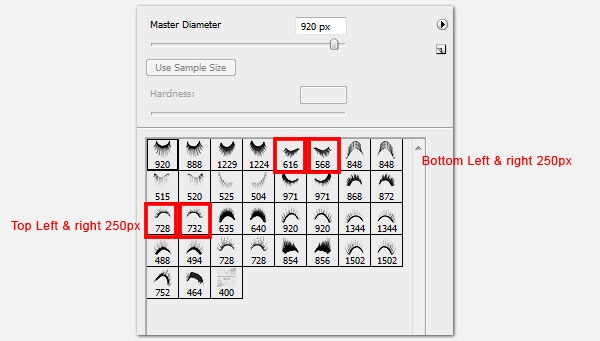
Step 12
Next we'll highlight her eyes by adding some eyelashes. Load eyelashes brushes. Create a New Layer and using the Brush Tool (B) paint in black along the top & bottom eyelashes of both eyes.
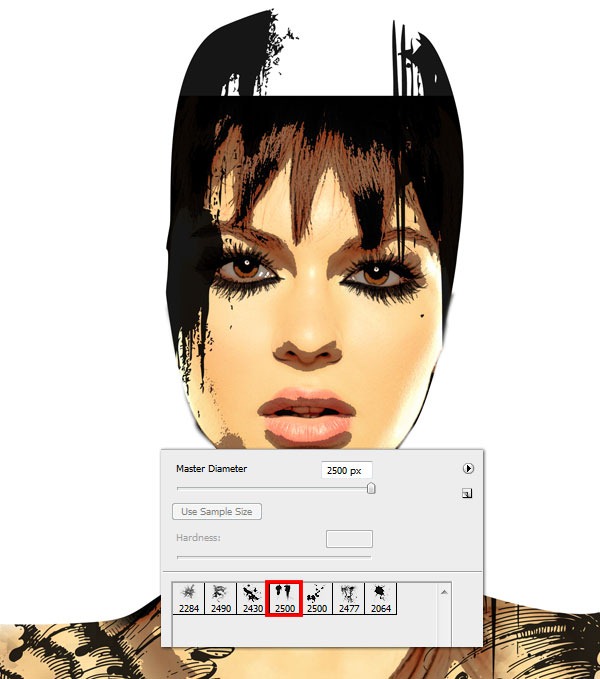
Step 13
Now it's time to give her a hairstyle masterpiece! Start off by making her hair base using these splatter brushes. Create a New Layer, use the Brush Tool (B) and paint in Black with the brush shown below at its original size.
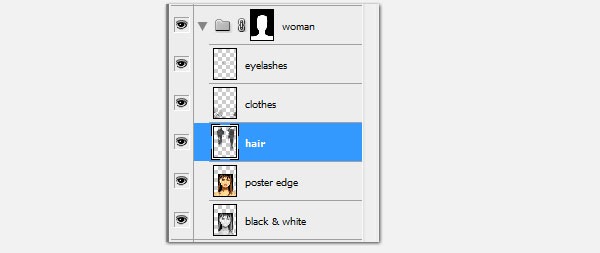
Step 14
So far our layers are organized as below. Check to make sure you're on the right track. Then create a New Folder above the stack and call it “Hair”.
Step 15
Duplicate the “hair” layer and place it in the “hair” folder above.
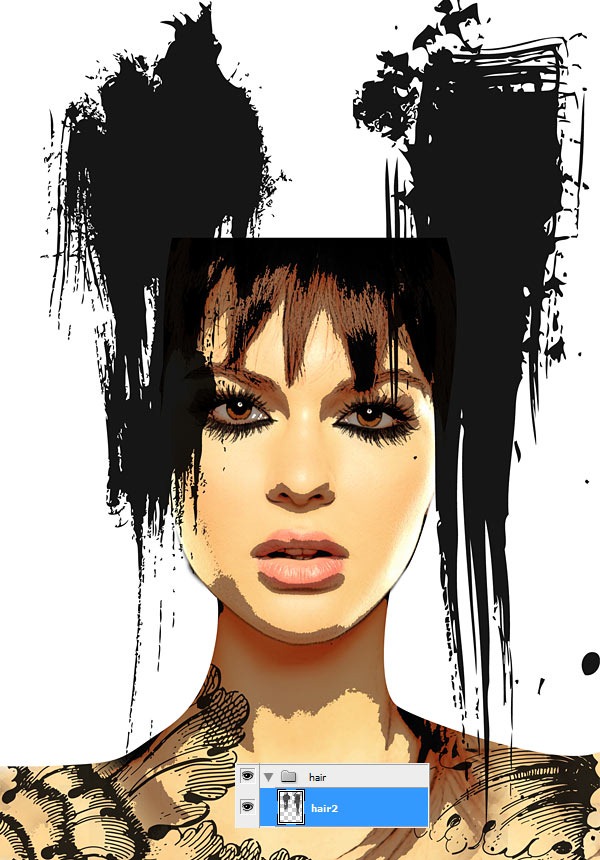
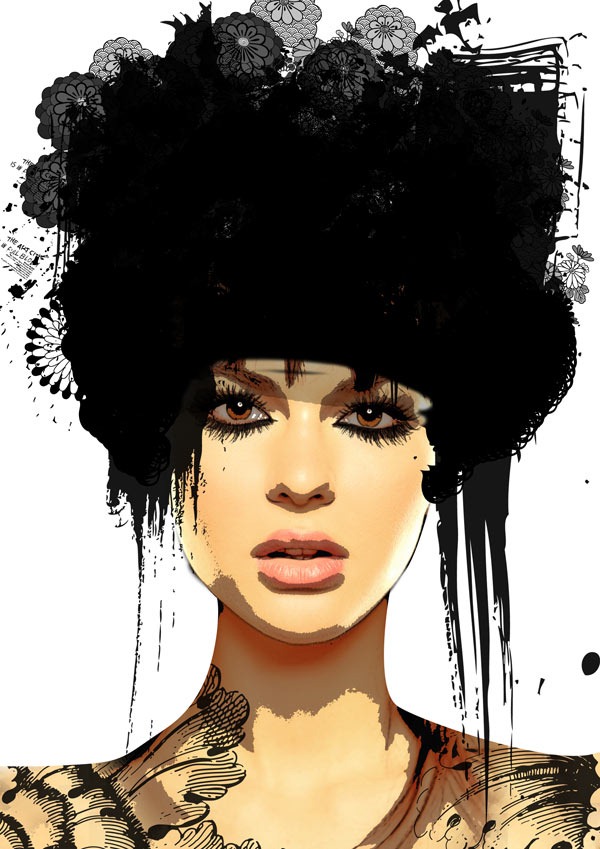
Step 16
Next load the Japanese flowers brushes and Beautiful flowers brushes. Use a combination of both to create a canvas of flowers. Be wild and bold!
Step 17
At this point, take a step back to view the overall artwork. I decided to unify the harsh contrast of smooth glowing skin gainst rough edged shadows on her jaws, neck and eyes area. Instead of getting rid of the edges, I decided to enhance them by going for a watercolor look. I chose this beautiful paper to work with.
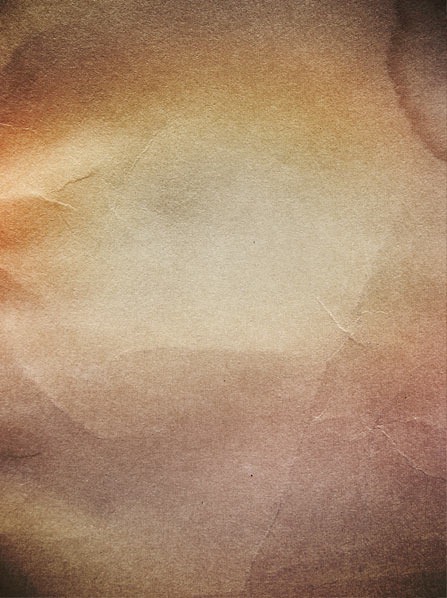
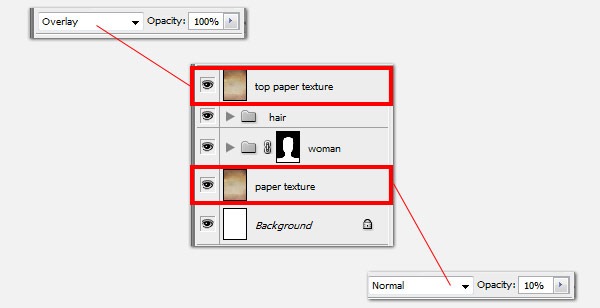
Step 18
Open the paper texture and make a copy of it. Place one of it at the top of all layers and the other one at the bottom. Change the top paper texture's blending mode to Overlay. Change the bottom paper texture's Opacity to 10%. Here we have a harmonious skin tone and texture.
Step 18
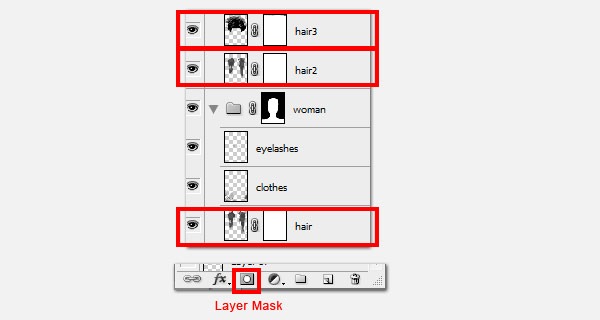
The next thing to do is create a little surreal world inside her head. An enchanted world of fairies. Begin by adding a Layer Mask to all 3 hair layers.
Step 20
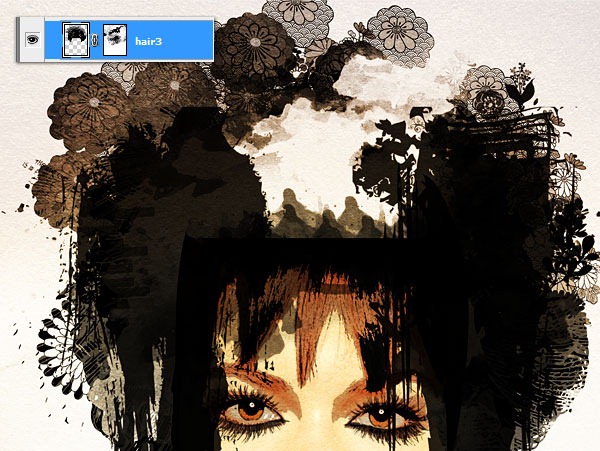
Use these Watercolor Splatters and paint over the layer masks to erase off part of the black hair while retaining soft cloudy edges for a dreamy watercolor effect. Begin with layer “hair3”, use the Brush Tool and experiment with different brush shapes and sizes.
Step 21
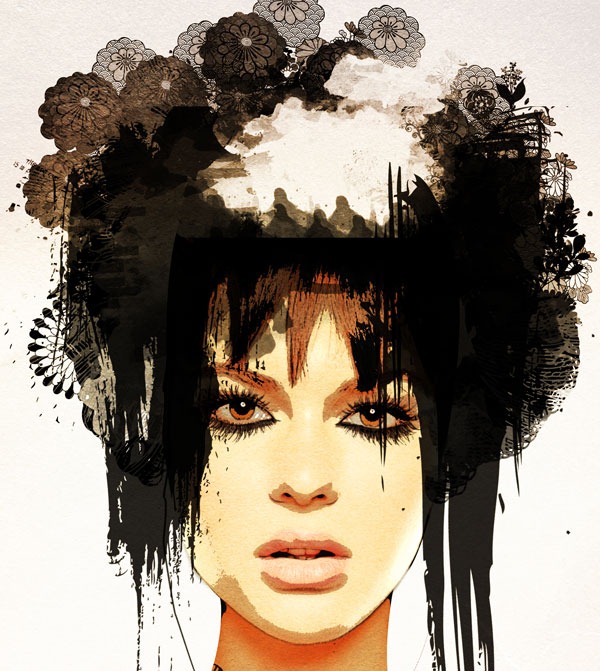
Then continue painting on “hair2” and “hair3” layer masks.
Step 22
Add little clouds in the sky by using the Eraser Tool (E). With the same watercolor brushes but much smaller brush size, work on “hair3” Layer mask.
Step 23
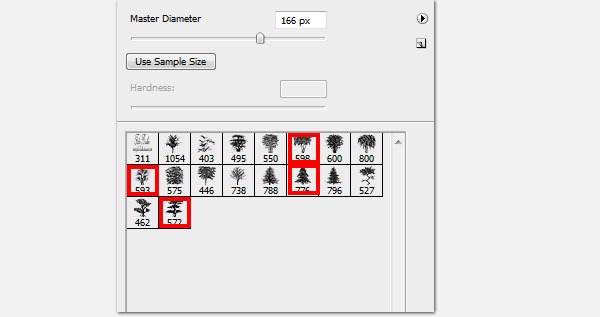
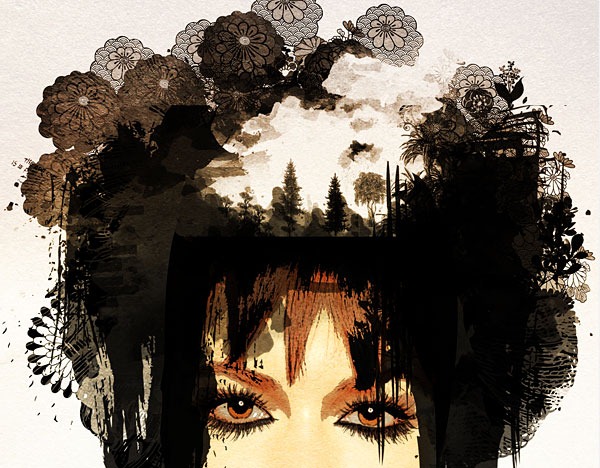
Add some trees to our landscape. Create a New Layer and use the brushes below. Again play with various sizes and opacity to achieve depth.
Step 24
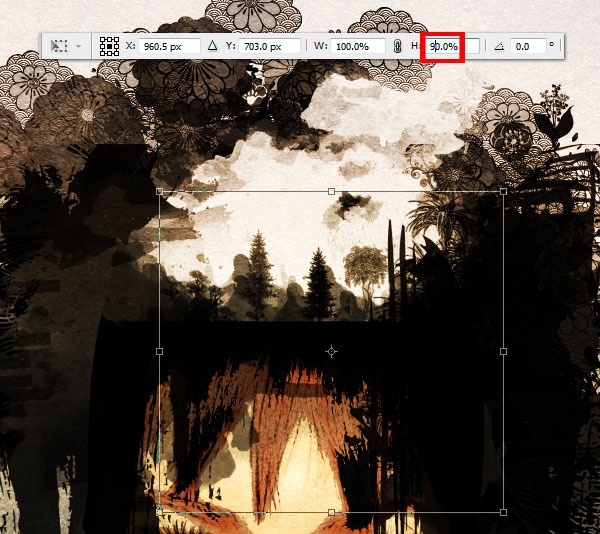
Shorten the trees with the Transform Tool (Cmd/Ctrl + T) to be 90% of its original height. We need to make some space for the fairies.
Step 25
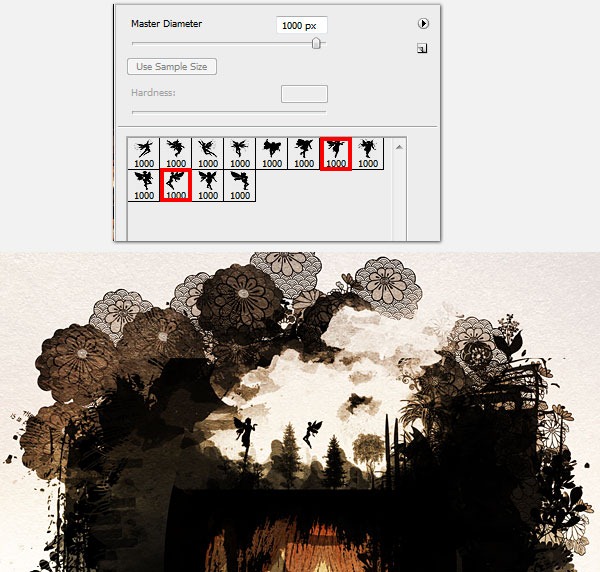
We'll be using these fairies brushes . Create a New Layer for each fairy so that you can position and scale them individually. Below are the brushes I've used.
Step 26
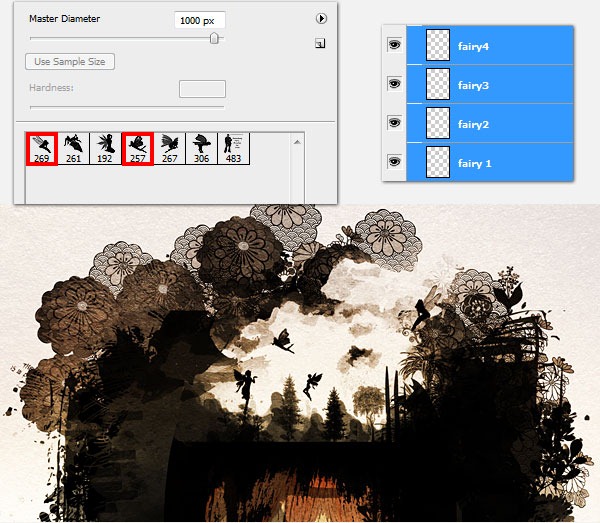
Add two more fairies from a second set of fairies brushes. Again create a New Layer for each fairy, position and scale them to fit your scene.
Step 27
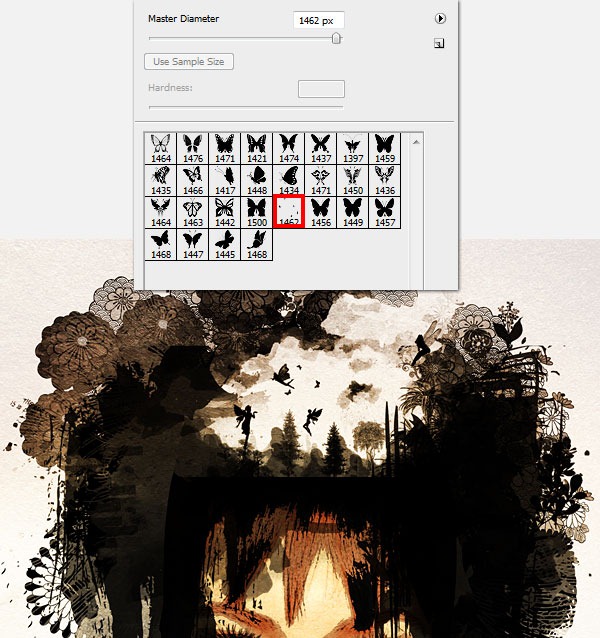
The last props we'll be adding to the scene are some tiny butterflies. Download the butterflies brushes, create a New Layer and paint your butterflies.
Step 28
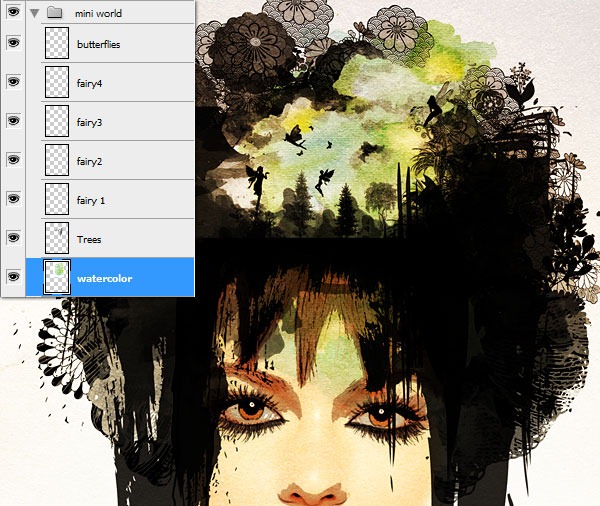
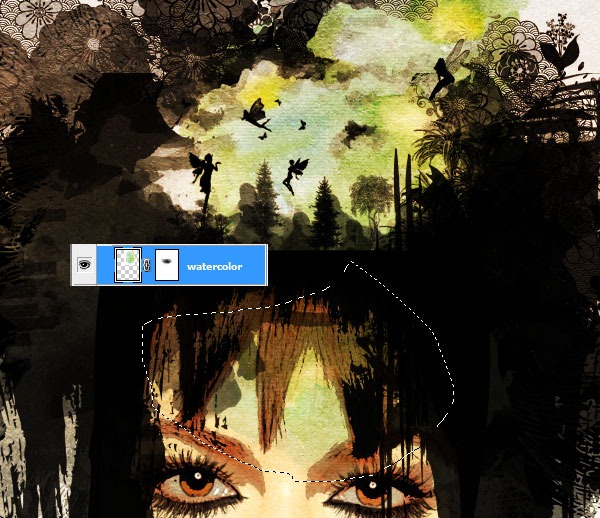
Time to add some some colors to our little world. Open this watercolor texture and move the layer below the trees and fairies. Set the layer's Blending Mode to Darken.
Step 29
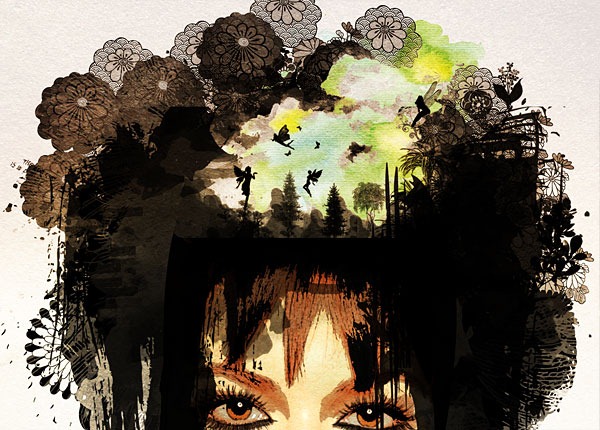
Add a Layer Mask to the “watercolor” layer and use the watercolor brushes to remove part of the overflowing green watercolor.
Step 30
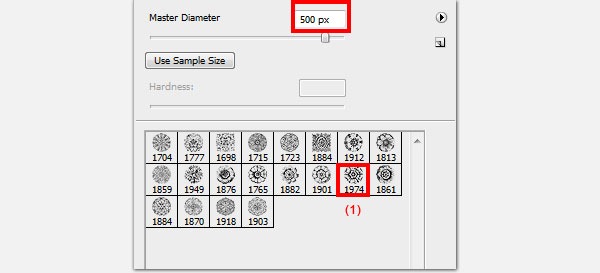
Let's add a flower piece to her head. Load the victorian flower brushes that you've used to make her clothes and select this(1), size 500px.
Step 31
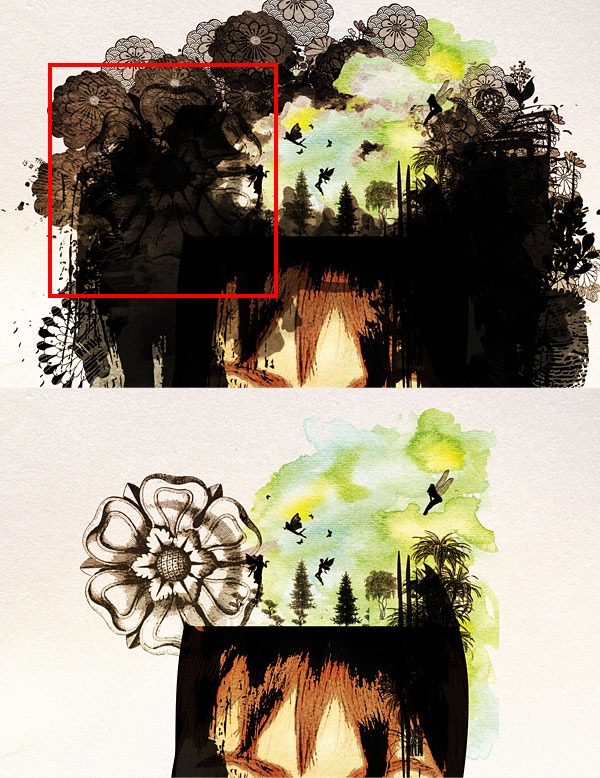
Create a New Layer and paint using the Brush Tool (B) the selected flower in black. Disable visibility of the hair folder in order to see the flower.
Step 32
To color the flower, create a New Folder “flower color” in which we will place the color layers. Next use the Magic Wand Tool (W), with the flower layer selected, click on the canvas outside the flower.
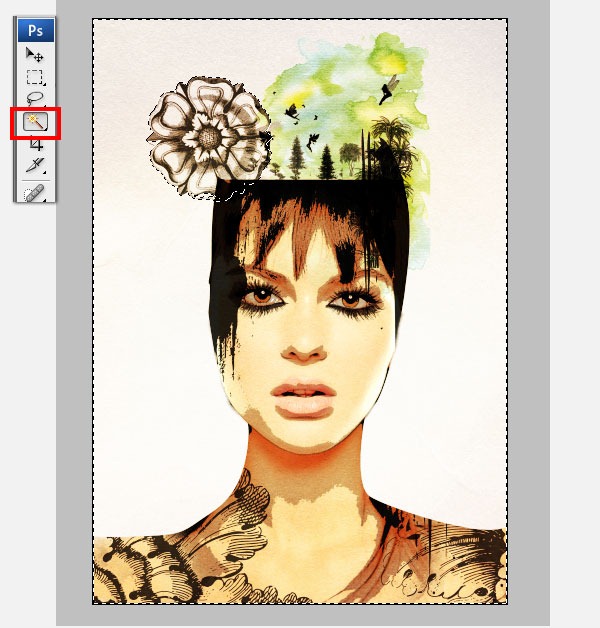
Step 33
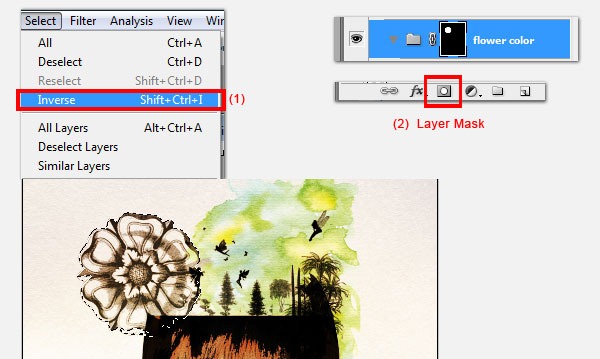
Go to Select > Inverse (1). With the “flower color” folder selected, click on Add Layer Mask(2).
Step 34
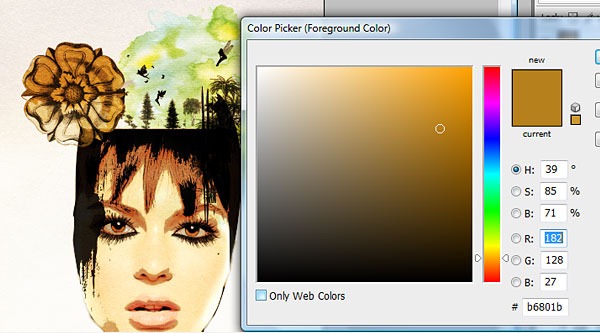
We will first add a watercolor wash to the flower. Load your watercolor brushes and create a New Layer inside the “flower color” folder. Apply an ocre color, see example below. Use the Brush Tool (B) apply the color, some overlapping and some with lighter opacity to get a watercolor textured wash.
Step 35
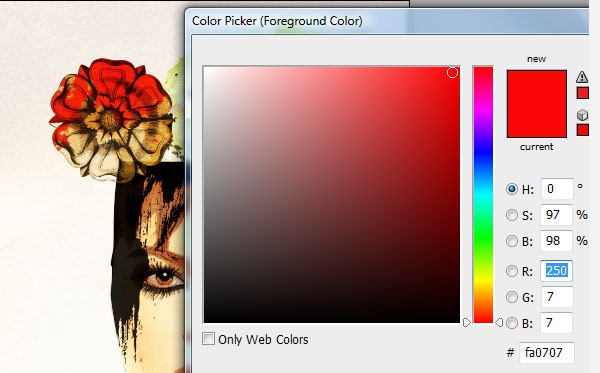
Now create another Layer on top of the “ocre” and paint over a deep red, 100% opacity.
Step 36
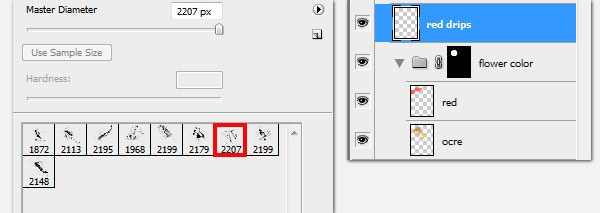
To make the flower more interesting, let's add a few drips of red paint. Create a New Layer on top of the “flower color” folder. Download and load these splatter brushes. Select the brush below.
Step 37
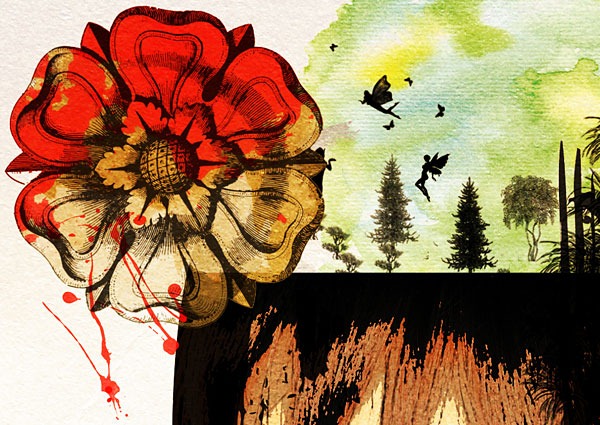
Apply the drip as below.
Step 38
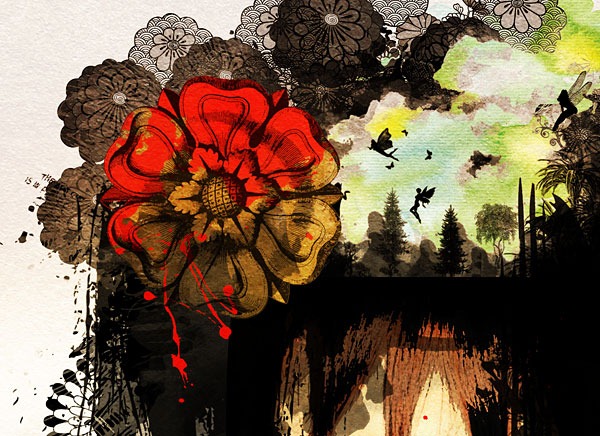
You can now make the hair layers visible again. Using a round brush erase off (Eraser Tool (E)) the left diagonal line as it looks unatural.
Step 39
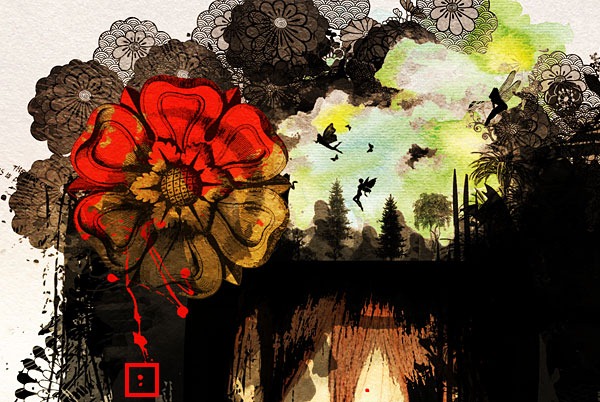
Create a New Layer and add 2 little drops at the bottom as below using one of the splatter brushes, then erase off the unwanted splatters. Resize and rotate (Transform Tool) them to fit the design.
Step 40
Take a step back and add the finishing touches. To balance off the red drips on top, I've added some splatters on her left shoulder. Create a New Layer, use the same brush in Step 36. Position and rotate (Transform Tool) the drips.
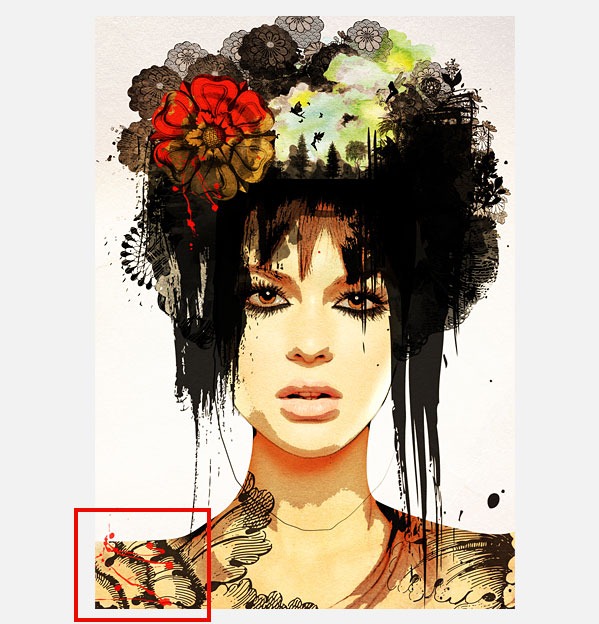
Step 41
Add some black splatters to her right shoulder.
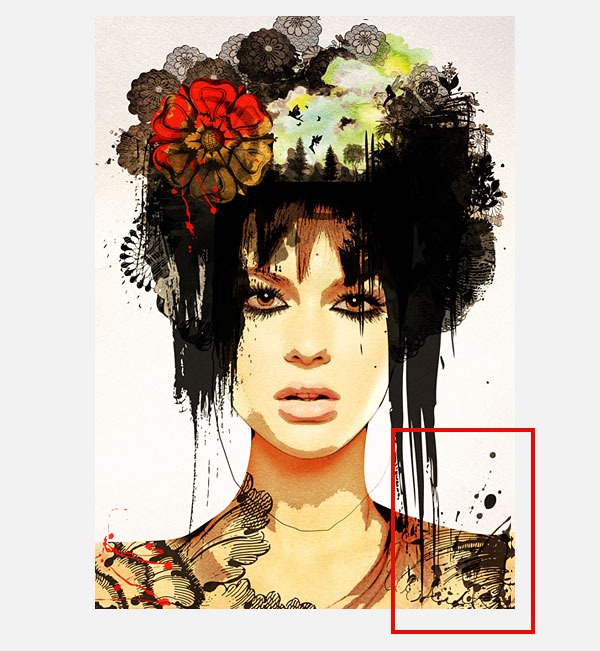
Step 42
Lastly move the flower piece and drips slightly to the left and bottom as it is hiding one of our fairies. We are done!
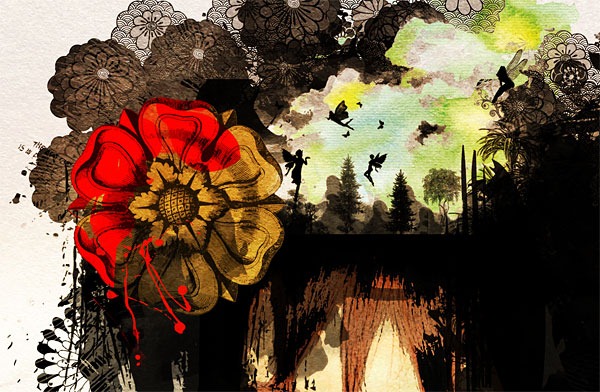
Final Version
![stylish-portrait[1] stylish-portrait[1]](http://photoshoptutorials.ws/images/stories/StylishSurrealPortrait_FC52/stylishportrait1.jpg)
No comments:
Post a Comment