Custom Hi-Tech Grid
Version: Photoshop CS3 and earlier
Level: Easy
Objectives: Photoshop tutorial for creating custom pattern
Tools & Techniques: pattern, grid, special effects
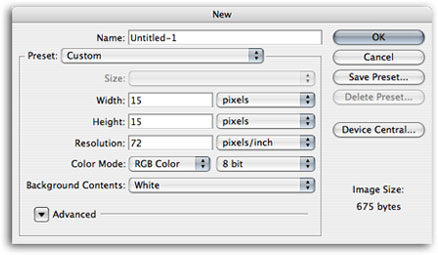
Step 1: Getting Started
- Open a new document and make it around 15x15
- You'll want to experiment with this size to create various size grids
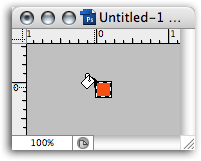
Step 2: Filling with Color
The color you choose will be the grid line
- Select the Paint Bucket Tool
- Select a Foreground Color
- Click once on the canvas to fill with the selected Foreground color
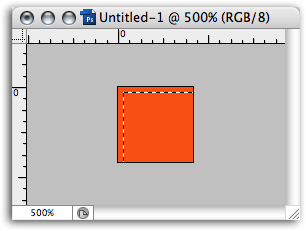
- Select All
|
|  |
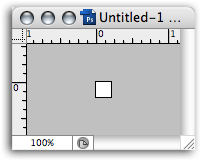
Step 4: Positioning the Selection
- Move the selection down and to the right.
- Using the Arrow keys on your keyboard, nudge the selection over one pixel to the right and one pixel down
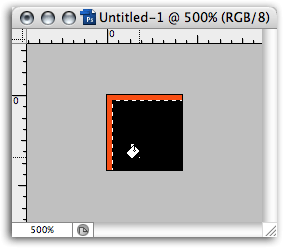
Step 5: Filling the Selection
Once you've nudged it over and down, fill it with Black or any other color you want to use as the background for the grid.
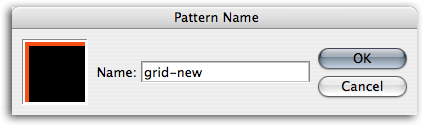
Step 6: Defining as Pattern
- Select All by clicking Cmd-A/Ctrl-A
- Go up to Edit>Define Pattern...
- Give the new grid a name: grid--new
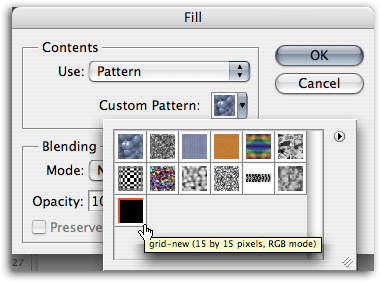
Step 7: Applying the Custom Pattern
- Create a new canvas 400x400
- Edit>Fill... and choose Pattern from the dialog box
- Select the Pattern you just defined: grid--new
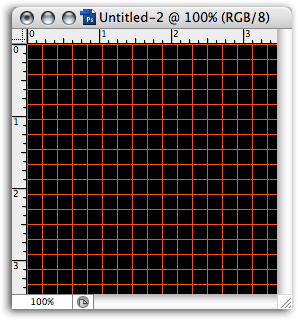
And that's it! You now have a pretty cool background to play with.
SOURCE::http://www.cbtcafe.com/photoshop/newgrid/newgrid.html
No comments:
Post a Comment