Step 1: Begin with an image you'd like to slice
 |
Step 2: Show the Rulers
View>Show Rulers or Control-R/Command-R
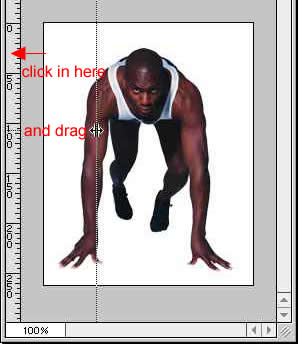
Step 3: Drag out some guides
- Move your cursor into the rulers. You can now click and drag out a guide from the rulers.
- You can also drag guides out vertically. Just start from the top ruler and drag down. I'll drag one more guide out from the top.
 |
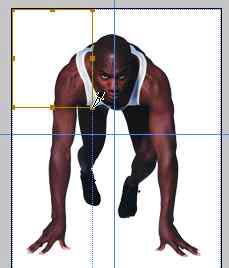
Step 4: Draw out the slices
- Select the Slice Tool
- From the top left corner, drag out a selection to the center of the image. The slice should snap to the guides.
- Go ahead and repeat for the remaining sections of your image.
 |
Step 5: Edit the slice
Select the Slice Select Tool and right click in an area containing a slice.
Step 6: Editing the Slice Options
In here, you can change the name of the slice to something more identifiable as well as give the sliced image a URL, target, text and alt tag.
In this example I only added a name for the slice
 |
Step 7: Saving for Web
Now, you only need to go to File>Save for Web. This exports the images and the HTML code.
The Save For Web Dialog window comes up
 |
Step 8: Finishing Up
- Click OK and save to a new folder
- In the folder you'll see that Photoshop created an html file and a folder called images
 |
Step 9: Testing the Page
Double click the slicing.html file and you'll see the image placed in it's own table.
You can also view the code by right-clicking in the web page (not on an image) and selecting View Source from the menu to see the code generated by Photoshop.
You can see the names of the image slices we renamed: topleft.jpg, topright.jpg, bottom.jpg, and bottomright.jpg. Photoshop wrote the html and put these into a table for us:)
SOURCE::http://www.cbtcafe.com/photoshop/slicingimages/part2.html
No comments:
Post a Comment